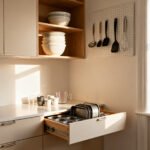
How To Make Builder-grade Finishes Look Better On A Budget
Posted in :

Builder-grade finishes get the job done… and that’s about it. They’re the beige of home design: safe, bland, and everywhere. The good news?
You don’t need a gut reno or a designer budget to level them up. With a weekend, a cart of affordable supplies, and a little nerve, you can make your place look custom without burning your savings.
Start With Paint: The 80/20 Upgrade
Paint fixes almost everything. Walls, trim, doors, cabinets—if it holds still, you can probably paint it.
And yes, the right color makes builder-beige look like it belongs in an office park.
- Pick a modern neutral for most rooms: soft greige, warm white, or pale taupe. They hide flaws and pair with almost any furniture.
- Do contrast trim: try a soft white on walls and a satin black or smoky gray on doors and trim for instant custom vibes.
- Upgrade your sheen strategically: matte or eggshell for walls, satin for trim and doors, semi-gloss for high-traffic areas.
Cabinet Paint: The Big Visual Win
You can drag dated cabinets into 2026 with a weekend of painting.
- Degrease with TSP substitute, scuff sand, vacuum, and tack cloth. Don’t skip steps—paint punishes shortcuts.
- Use a bonding primer, then two thin coats of enamel cabinet paint.
- Go bold on the island and neutral on the perimeter.
It reads high-end, IMO.
Swap the Jewelry: Hardware That Works Hard
You can replace knobs and pulls in an afternoon, and it changes the whole mood. Think of hardware as earrings for your cabinets and doors—small, shiny, and doing the most.
- Match finishes across rooms for cohesion: black, brushed brass, or satin nickel.
- Use longer pulls on drawers for a modern look (5–8 inch pulls feel luxe).
- Update hinges if they show. Hidden hinges?
Bless. Visible shiny brass from 1998? Replace or spray paint them.
- Door levers over knobs look newer and feel better.
Small change, big impact.
Pro tip: Template time
Use a hardware template or make one from cardboard so your holes line up. Crooked handles will haunt you.
Lighting: Kill the “Boob Light” Energy
Swapping cheap flush mounts and builder pendants changes everything. Good lighting makes even basic surfaces look intentional.
- Layer your light: overhead + task + accent.
Floor lamps and plug-in sconces count.
- Choose warm bulbs (2700K–3000K) for cozy vibes. FYI: bright white bulbs make beige look sickly.
- Replace one main fixture per room with something sculptural. Think rattan, globe, or simple black metal.
- Use dimmers where you can.
Mood matters.
Rental-friendly lighting hacks
- Use plug-in pendants with a ceiling hook to fake hardwired style.
- Swap shades on existing lamps for linen or pleated versions. Cheap, chic, done.
Make Surfaces Look Custom (Without Replacing Them)
You can’t always rip out the laminate, but you can trick the eye.
- Countertop covers: try peel-and-stick vinyl or a poured epoxy kit. It’s not marble, but your wallet won’t cry.
- Peel-and-stick backsplash: modern options look shockingly legit.
Subway, zellige-look, or patterned—pick one.
- Bathroom vanity glow-up: paint it, swap the faucet, add new pulls. Boom: spa vibes.
- Removable grout paint: refresh dingy grout with a grout pen for a cleaner look.
Trim and Molding Magic
Cheap finishes look expensive with better lines.
- Add simple picture-frame molding or board-and-batten with MDF strips and caulk. Then paint it all one color.
- Frame out bathroom mirrors or replace them with two smaller framed mirrors—way more custom.
- Install a basic ledge shelf as a “mantel” over a blank wall.
Instant architecture.
Textiles Do Heavy Lifting
Fabric softens hard surfaces and distracts from basic finishes. Yes, we’re sneakily misdirecting attention. It works.
- Curtains hung high and wide make windows feel grand.
Use curtain clips for polished drape.
- Layer rugs if your flooring bores you. Jute base + patterned rug on top = texture and personality.
- Swap shower curtains for a heavier fabric one. Add a curved rod for hotel energy.
- Throw pillows with texture (bouclé, linen, velvet) make a basic sofa look curated.
Color and pattern strategy
Stick to 2–3 colors and vary the textures.
Too many patterns read chaotic and cheap; strategic layers read intentional.
Declutter and Style Like You Mean It
Clutter screams “builder-grade,” while styled surfaces whisper “I planned this.” You can do this without buying a truck of decor.
- Clear counters except for one tray with 3–5 items: a plant, a candle, a pretty utensil crock. Done.
- Use trays and baskets to corral stuff. It’s containment theater, and it absolutely works.
- Art beats blank walls: thrift frames, print high-res art online, and hang at eye level.
Large art looks pricier than a gallery wall of tiny frames.
- Plants everywhere. Real if you can, high-quality faux if you can’t. Greenery distracts from blah finishes like a pro.
Doors, Switches, and the “Tiny but Mighty” Tweaks
The small things add up to a big vibe shift.
Super budget-friendly too.
- Paint interior doors a contrasting color (charcoal, navy, or greige). It’s ridiculously chic for the cost.
- Swap switch plates and outlet covers for screwless versions. Instant polish.
- Upgrade faucets and showerheads to a modern shape.
Black, brass, or brushed nickel—just keep it consistent.
- Add stick-on LED puck lights under cabinets for a soft glow at night. Cheap, effective, a little bit fancy.
Entryway glow-up
- Add a slim console or wall shelf, a mirror, a bowl for keys, and a plant. That’s it.
- Place a runner rug to distract from basic flooring and add warmth.
Budget Game Plan (So You Don’t Overspend)
Let’s keep it real: you can blow a budget on three brass pulls and a dream.
Prioritize rooms you use most and the eye-level surfaces you see daily.
- Week 1: Paint and declutter – walls, trim, one or two doors. Style surfaces.
- Week 2: Hardware and lighting – cabinet pulls, one key fixture per main room.
- Week 3: Textiles – curtains, shower curtain, a couple of rugs.
- Week 4: Surface upgrades – backsplash, mirror frame, faucet swap, puck lights.
Where to save vs. where to splurge
- Save: paint, curtains, pillow covers, trays, plants, switch plates.
- Spend a bit: lighting you’ll look at daily, cabinet hardware you’ll touch 500 times a week.
FAQ
Can I make builder-grade floors look better without replacing them?
Yes. Add area rugs with texture, use felt pads under furniture to avoid more scratches, and consider a floor polish (for hardwood or laminate) to revive the finish.
In bathrooms, a runner and a bath mat combo adds warmth and hides sins, FYI.
Is painting cabinets worth it if I plan to replace them later?
If you’ll replace them within a year, maybe not. If you’ll live with them for 2–5 years, absolutely yes. A few hundred dollars in paint and hardware buys years of daily happiness, IMO.
What if my landlord won’t let me paint?
Lean hard on textiles, lighting, art, and peel-and-stick.
Removable wallpaper, renter-friendly backsplash, plug-in sconces, and oversized art do most of the heavy lifting. You can also paint furniture for color without touching walls.
How do I choose a hardware finish that won’t date quickly?
Stick to classics: black, satin nickel, or unlacquered/brushed brass. Keep finishes consistent across a space and choose simple shapes.
The combo of timeless finish + clean lines rarely goes out of style.
My budget is tiny. What are the top three upgrades?
Paint the walls and at least one door, swap cabinet hardware, and change one main light fixture. Those three moves deliver the biggest vibe shift per dollar and make everything else feel intentional.
Do I need to sand before painting everything?
Not everything, but scuff sanding glossy surfaces (like trim and cabinets) helps paint stick.
Pair it with a bonding primer for best results. On walls, a good clean and patch usually suffice.
Wrap-Up: Custom Vibes, Budget Edition
You don’t need a renovation to ditch the builder-basic energy. Paint smart, upgrade the “touch points” (hardware, lighting, faucets), layer textiles, and style like you care.
Focus on consistency and contrast, and your space will read polished—even if you DIY’d it on a Saturday with coffee and a coupon code. That’s the whole game: small changes, big feel.