Let’s be real: a chaotic pantry is a vibe killer. You open the door, and it’s just rogue pasta, mystery spices, and eight half-empty cereal boxes staring back at you. The good news? You don’t need custom cabinetry or a label maker that costs more than your weekly groceries. These pantry organization ideas on a budget are simple, stylish, and totally doable this weekend.
1. Shop Your House First (You Own More Storage Than You Think)
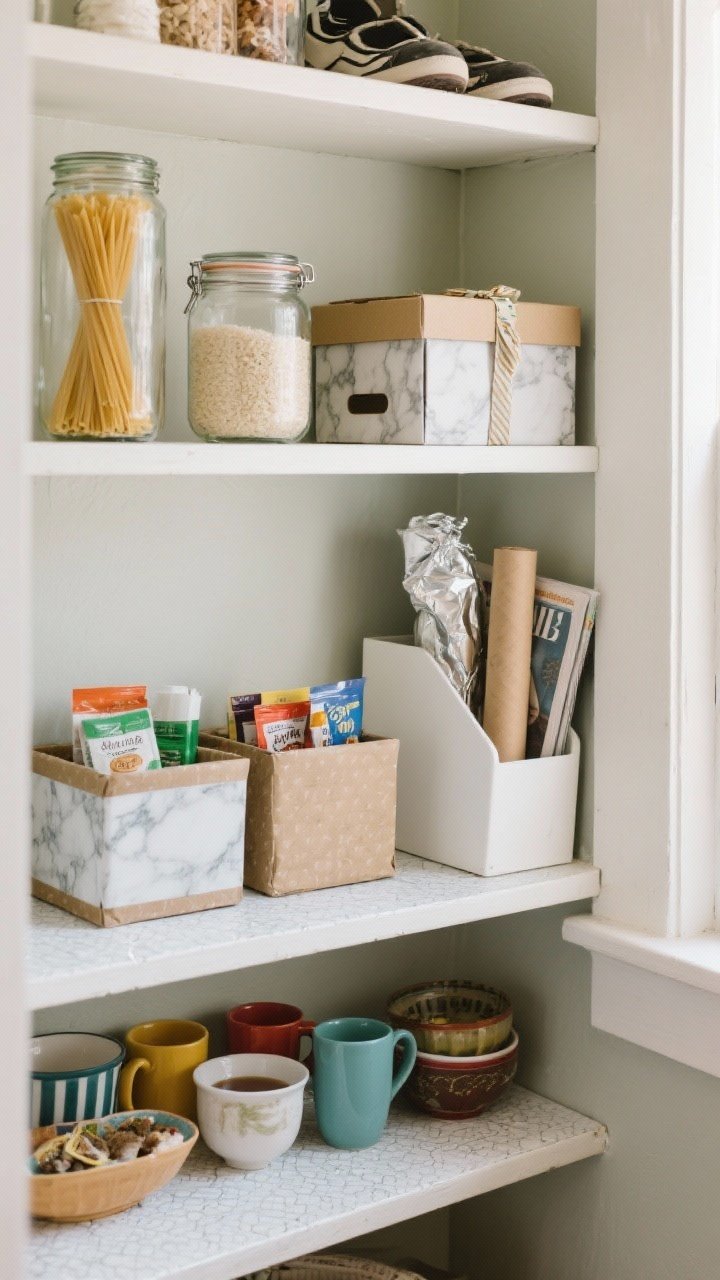
Before you buy a single bin, take a lap around your home. You likely have forgotten containers, baskets, jars, and even shoe boxes that can moonlight as pantry heroes. Repurposing is not just thrifty—it’s cute when done right.
What To Hunt For
- Jars and vases: Perfect for pasta, rice, or snack packs. Mismatched? Embrace it.
- Shoe boxes and gift boxes: Wrap in contact paper for instant “designer” bins.
- Mugs and small bowls: Corral packets, seasoning mixes, tea bags, and bouillon cubes.
- Magazine files: Turn on their side to store foil, wraps, or cutting boards upright.
Quick tip: Line shelves with a wipeable shelf liner (dollar store FTW). It makes everything feel fresher and protects wood from leaks.
2. Decant The Essentials (But Only The Essentials)
We’re not decanting every single thing you own—that’s a job for people with 14 free hours. Focus on high-traffic staples and those messy, floppy bags that never reseal properly.
What’s Worth Decanting
- Dry goods: Rice, flour, sugar, oats, pasta.
- Snack zone: Crackers, pretzels, cookies—things that go stale fast.
- Baking basics: Brown sugar, chocolate chips, cocoa powder.
Use cheap glass jars, thrifted containers, or even cleaned pasta sauce jars. Add simple DIY labels using masking tape and a Sharpie. FYI: Clear containers help you see when you’re low, saving money on duplicates.
3. Create Zones Like A Grocery Store (So Everyone Stops Asking Where Stuff Is)
Think of your pantry as mini aisles. When everything has a zone, you don’t buy six bottles of soy sauce. Your future self will thank you.
Smart Zones To Start With
- Breakfast: Cereal, oats, honey, nut butter, syrup.
- Snacks: Chips, bars, fruit cups—add a low basket for kids’ reach.
- Cooking: Pasta, rice, beans, canned tomatoes, broth.
- Baking: Flour, sugar, baking powder, sprinkles (critical, obviously).
- Condiments & sauces: Oils, vinegars, soy, hot sauce.
- Backstock: Extras of anything—keep on the highest shelf.
Use cheap bins from discount stores or reuse cardboard boxes as dividers. Add a quick label to the shelf edge so things migrate back to their zone instead of to chaos land.
4. Use Vertical Space Like A Tetris Master
Most pantries waste the space above jars and below shelves. That’s prime real estate for budget upgrades that actually feel custom.
Vertical Wins
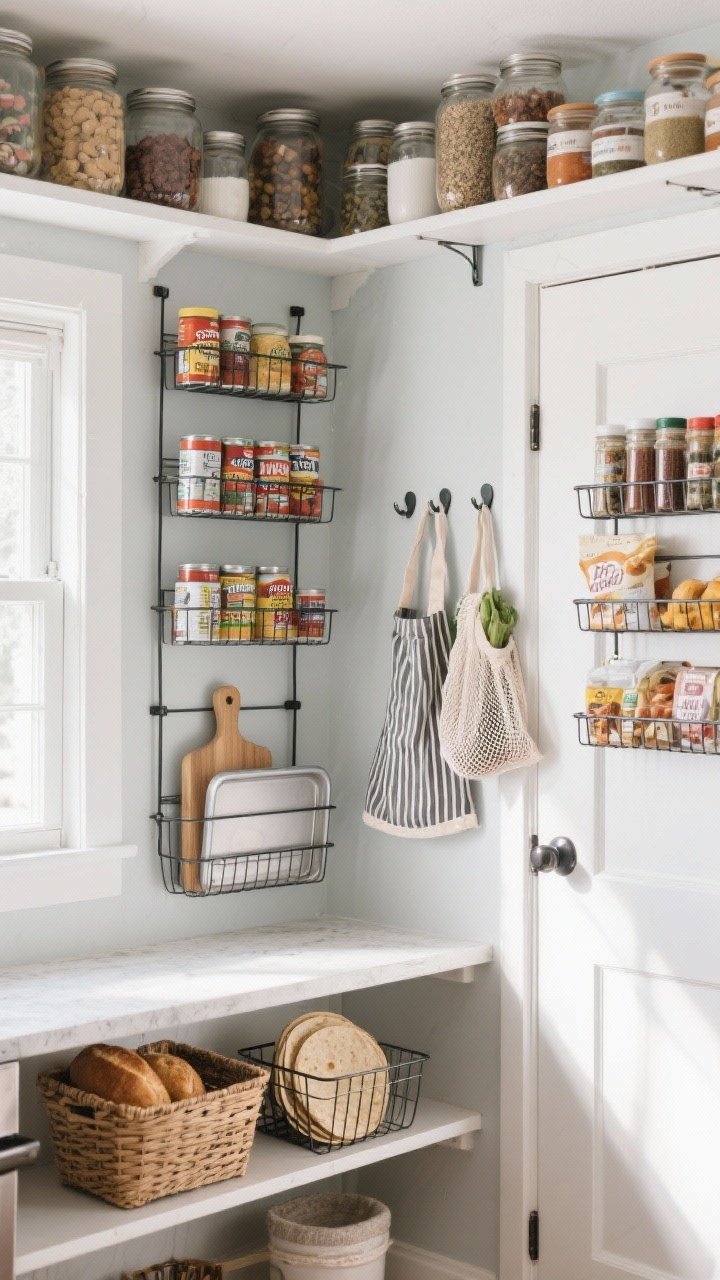
- Risers: Use stackable shelves or wire risers for canned goods so you can see everything.
- Hooks: 3M hooks on doors or walls for aprons, totes, and mesh produce bags.
- Under-shelf baskets: Slide these under existing shelves for bread, tortillas, or napkins.
- Tension rods: Place vertically to create divided sections for cutting boards and trays.
- Door organizers: Over-the-door racks for spices, wraps, and snacks—instant extra shelves.
IMO, the door rack is a game-changer. It’s like finding a secret bonus level in your pantry.
5. Corral The Tiny Stuff (Packets, Pouches, And That Random Ranch Mix)
Small items create big messes. The fix is all about containment and visibility. No more avalanche of taco seasoning every time you reach for cinnamon.
Cheap Containment Ideas
- Clear shoebox bins: Sort by category—sauces, seasoning packets, drink mixes.
- Drawer organizers: Great for granola bars, fruit leather, and single-serve oatmeal.
- Clip it: Use binder clips to hang open chip bags on a tension rod or command hooks.
- Spice management: Use a small turntable for oils/spices near the stove zone or a tiered spice rack.
Bonus: Keep a small container labeled “Use First” for almost-empty snacks or soon-to-expire stuff. It reduces waste and makes snack time weirdly exciting.
6. Label Light And Fast (No Cricut, No Problem)
Labels keep systems alive, especially when multiple people use the pantry. But we’re not doing calligraphy. We’re doing quick, clear, and wipeable.
Easy Label Options
- Masking tape + Sharpie: Classic, cheap, and you can change it in seconds.
- Chalkboard labels: Reusable and cute on jars—just don’t overdo it.
- Printed paper strips: Tape inside clear bins for a minimal look.
- Color coding: One color for snacks, another for baking, etc. FYI, it helps kids put stuff back.
Label both the bin and the shelf edge for maximum clarity. When a container is out for washing, you still know what belongs there.
7. Set Up A Maintenance Routine (So It Stays Pretty, Not Just For Instagram)
Organization isn’t a one-time event. The secret is low-effort maintenance that fits your real life, not a fantasy kitchen with staff. Keep it simple and scheduled.
Small Habits, Big Payoff
- Weekly 5-minute reset: Toss empty boxes, consolidate duplicates, wipe crumbs.
- Inventory check before shopping: Snap a quick photo of the pantry zones to avoid buying thirds.
- First-in, first-out: New groceries go behind old ones. You’ll actually use what you buy.
- Quarterly purge: Donate unopened extras and toss expired spices. Yes, spices expire.
Make it easy for the whole household: keep kid snacks low, daily-use items at eye level, and backup supplies up high. When everything has a home, it’s less “Where’s the peanut butter?” and more “Wow, we are thriving.”
Budget-Friendly Shopping List (Optional But Helpful)
- Clear shoebox bins (4–6)
- Wire shelf risers (2–3)
- Under-shelf basket (1–2)
- Over-the-door organizer (1)
- Masking tape + Sharpie
- Dollar store glass jars or thrifted containers
- Shelf liner roll
- 3M hooks and one tension rod
You don’t need everything at once. Start with the worst problem area—usually snacks or cans—and build from there.
Pro Tricks To Make It Look Designer (On A Deli-Meat Budget)
- Repeat your container style where you can. Even cheap matching bins look polished.
- Face labels forward and align jar heights for instant visual calm.
- Leave breathing room on each shelf if possible—crowded shelves feel messy fast.
- Pop a small tray under oils or sticky condiments to catch drips.
You’ve got this. With a few bins, some labels, and a little strategy, your pantry can go from “ugh” to “who am I, Martha?” on a shoestring. Pick one section, set a timer, and start. Your future self—and your cereal—will thank you.