You don’t need a macramé degree or a trust fund to get dreamy boho walls. With a few simple supplies and a little creativity, you can layer texture, color, and personality like a pro. Ready to make your walls the main character? Let’s go.
1. Fringe-Tastic Yarn Wall Hanging
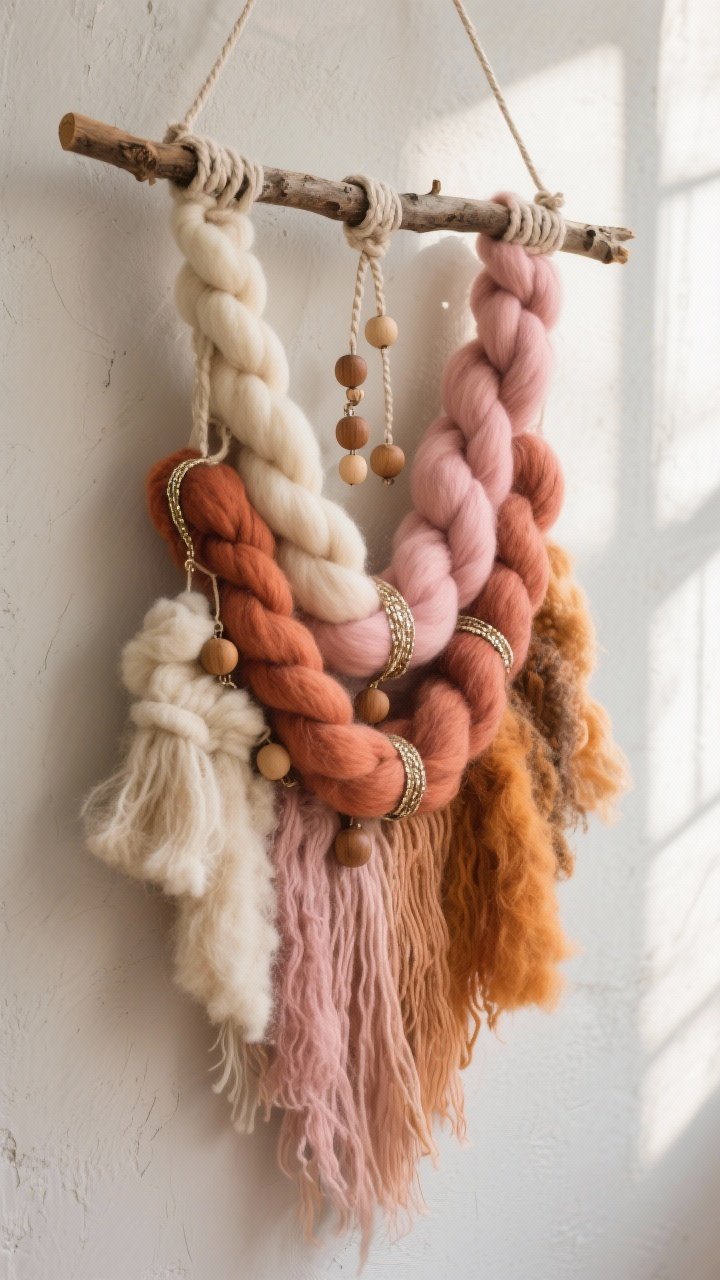
Big, textural, and totally boho—yarn wall hangings are an instant statement. They look fancy but are basically just knots and scissors. If you can tie your shoes, you can make this.
How to Make It
- Supplies: Wooden dowel (or a stick from your last walk), chunky yarn in 2–4 colors, scissors, optional comb.
- Cut yarn strands twice the length you want. Fold in half and loop onto the dowel using a lark’s head knot.
- Stack colors for an ombré effect, then trim the bottom into a V or slanted shape.
- Bonus: Comb the ends for a soft, fringed look.
Pro Tips
- Mix yarn types—wool, cotton, roving—to add texture fast.
- For extra boho points, add a row of wooden beads or wrap sections with metallic thread.
- Use a branch instead of a dowel for that “I foraged this” vibe (because you did).
2. Layered Basket Gallery Wall
Woven baskets = instant warmth and pattern. A basket wall reads like art but feels effortless and earthy. Plus, it’s renter-friendly and insanely customizable.
How to Build the Layout
- Collect flat baskets, trays, and woven trivets in different sizes and patterns.
- Lay them on the floor first to test arrangements—start with a large piece off-center and build around it.
- Attach with removable hooks or tiny nails. Overlap edges slightly for that layered, curated look.
Style Notes
- Mix natural tones with a few dyed pieces (indigo or terracotta = chef’s kiss).
- Slip in a shallow rattan tray or a woven fan for dimension.
- FYI: Thrift stores and Etsy are gold mines. Grab singles, not matching sets.
3. Fabric + Fringe Tapestry (No Sewing Machine Required)
Think of this as wall art’s cozy cousin. A simple fabric panel instantly softens a space and brings color without paint. It’s also a great way to use that pretty textile you couldn’t resist.
Quick DIY
- Supplies: Fabric (mud cloth, kantha, linen), fusible hem tape or fabric glue, dowel, twine, optional fringe trim.
- Fold the top edge over a dowel and secure with hem tape. Add fringe or tassels along the bottom with fabric glue.
- Hang with twine, or go minimal with invisible hooks under the dowel ends.
Design Ideas
- Layer two fabrics—pattern in front, neutral behind—for extra depth.
- Use block-printed or hand-stamped fabric for that artisanal feel.
- Short wall? Hang two side by side like soft, boho “panels.”
4. DIY Clay Wall Charms and Tassel Garland
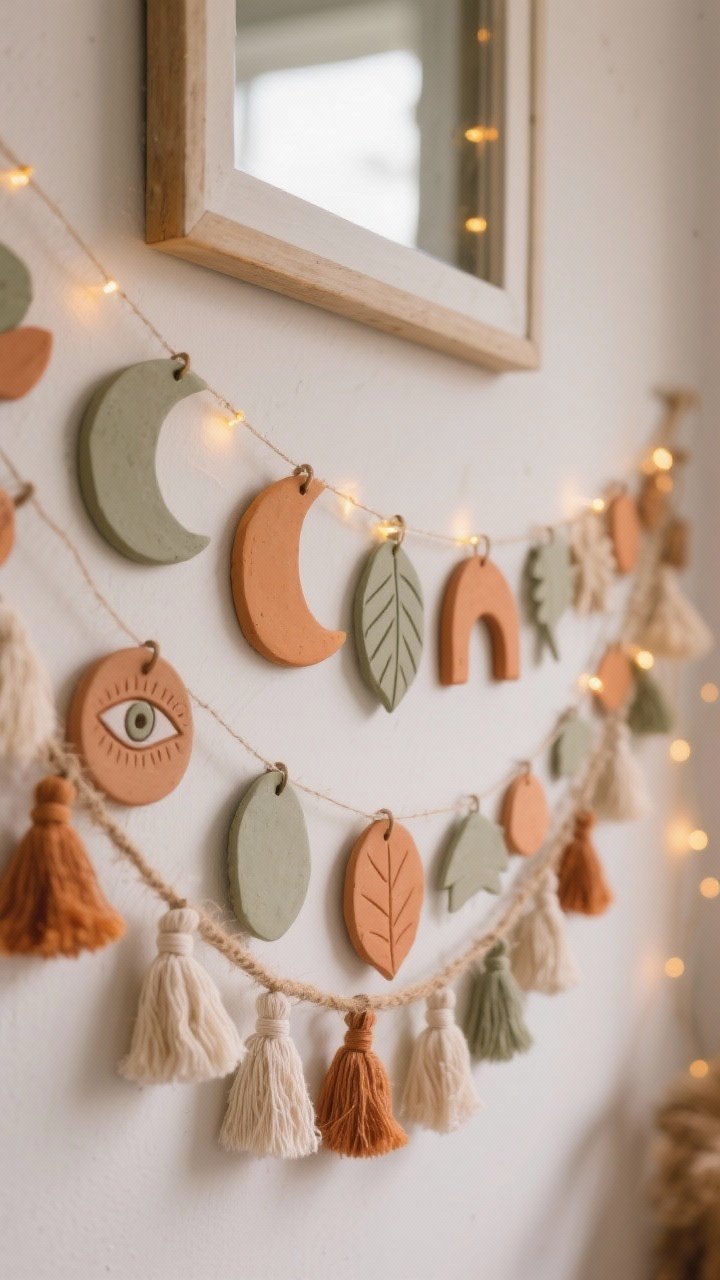
Charm your walls—literally. Air-dry clay shapes and chunky tassels bring movement and whimsy. It’s playful without being twee, IMO.
Make the Charms
- Roll out air-dry clay and cut shapes (moons, arches, eyes, leaves). Poke holes for hanging.
- Let dry fully, then paint with muted, earthy tones or leave raw for a natural look.
- Seal with matte varnish if you want longevity and easy dusting.
Assemble the Garland
- Create tassels with cotton string or raffia. Tie onto a piece of jute.
- Thread clay charms in between tassels, staggering heights for movement.
- Hang over a headboard, mirror, or entryway. Add fairy lights if you’re extra.
5. Pressed Botanicals in Mismatched Frames
Plants forever, but on your walls. Pressed leaves and blooms are delicate, nostalgic, and super boho. They also cost almost nothing—love that for us.
Press and Frame
- Press leaves and flowers between parchment and heavy books for 1–2 weeks (or use a microwave flower press if impatient).
- Mount on neutral paper—off-white, craft, or deckled-edge—to spotlight the shapes.
- Use mismatched vintage frames or floating glass frames to let the botanicals breathe.
Layout Tips
- Create a grid if your space skews modern; go organic clustering for pure boho.
- Mix specimen sizes—fern fronds, eucalyptus sprigs, little wildflowers.
- Label with tiny handwritten tags for a museum-chic moment.
6. Painted Arch + Shelf Vignette
Want a high-impact moment without covering a whole wall? Paint a soft arch and turn it into a mini altar for your treasures. It’s the ultimate renter-friendly “built-in” look—you can repaint later.
Step-by-Step
- Pick a warm, earthy shade—terracotta, clay pink, ochre, or sage.
- Mark the arch with a thumbtack and string “compass,” or trace a large round object for the curve.
- Fill in with a small roller; use a brush for clean edges. Two coats usually do it.
- Mount a simple floating shelf within the arch to style objects: candles, small planters, a tiny woven basket.
Styling Formula
- 1 sculptural piece + 1 plant + 1 textural item (wood, rattan, or ceramic) = balanced mix.
- Keep the palette tight so the arch stays the star. FYI, metal accents pop against matte paint.
7. Upcycled Mirror With Wrapped Rattan or Rope
Mirrors bounce light and make rooms feel bigger. Wrap the frame with rattan peel or cotton rope and you’ve got a coastal-boho masterpiece that looks way more expensive than it is.
DIY Wrap
- Supplies: Simple mirror (thrift it), rattan peel or cotton rope, hot glue or contact adhesive, scissors, optional stain.
- Start at the back, glue and wrap tightly around the frame. Keep rows snug and even.
- For a sunburst look, glue cut rattan reeds radiating out, then add a second ring overlapping the seams.
Finish and Style
- Stain rattan for warmer tones, or leave rope natural for a soft, sandy vibe.
- Hang opposite a window to maximize light. Layer with a plant or woven sconce nearby for peak boho.
Boho Wall Décor Cheat Sheet
- Texture is everything: Mix fibers, woods, clay, and soft fabrics.
- Keep it earthy: Use warm neutrals with pops of rust, ochre, indigo, and sage.
- Embrace asymmetry: Boho feels collected, not measured with a laser level.
- Sustainable wins: Thrift, upcycle, and shop small when you can—your walls and wallet will thank you.
See? Zero intimidation, maximum vibe. Pick one idea, cue your favorite playlist, and give your walls that easy DIY boho magic. And if you end up making all seven, honestly, same.