You know that moment when you walk into a room and it just feels bigger, brighter, and kind of luxurious? Nine times out of ten, there’s a mirror working overtime. Mirrors aren’t just for checking your eyeliner—they’re secret design weapons. And the best part: you don’t need a designer budget to nail the look.
Ready to turn a simple sheet of glass into a full-blown style moment? Let’s get into seven DIY mirror hacks that make your space look custom, clever, and yes—expensive.
1. Frame a Basic Mirror With Unexpected Materials
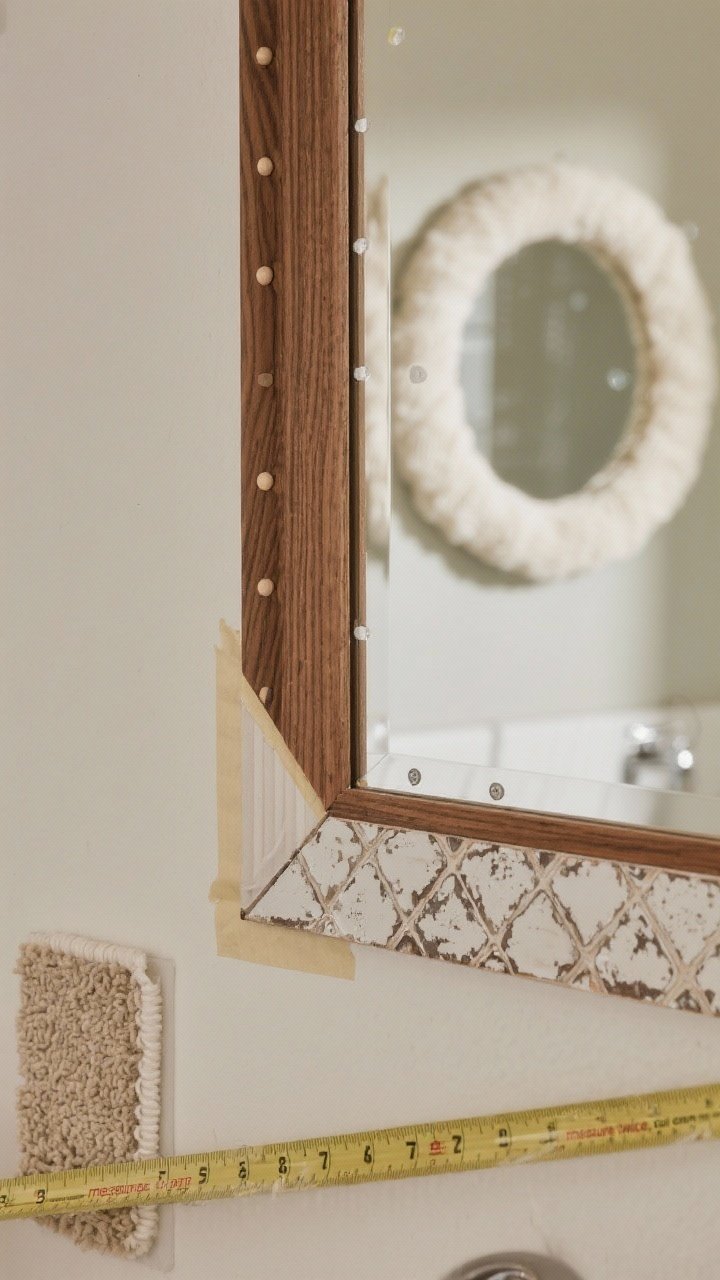
Plain builder-grade mirrors are basically the “before” photo of your bathroom. The fix? Frame it. A frame gives instant polish and makes a cheap mirror look boutique.
Smart Frame Ideas
- Wood trim + mitered corners: Paint or stain for a traditional look. Use construction adhesive to attach directly to the mirror.
- Pool noodles (yep): Wrap in boucle or velvet, then glue around a round mirror for a puffy, sculptural vibe.
- Half-round dowels: Line them vertically for a ribbed, Scandinavian finish.
- Antique ceiling tiles: Create a dramatic, vintage frame—just seal sharp edges.
Quick Tips
- Measure twice, cut once: Especially around wall-mounted sinks and outlets.
- Use mirror-safe adhesive: Regular glue can damage the backing.
- Float the frame: Add a thin spacer so it looks intentional, not slapped on.
2. Create a Faux Window With Mirror Grids
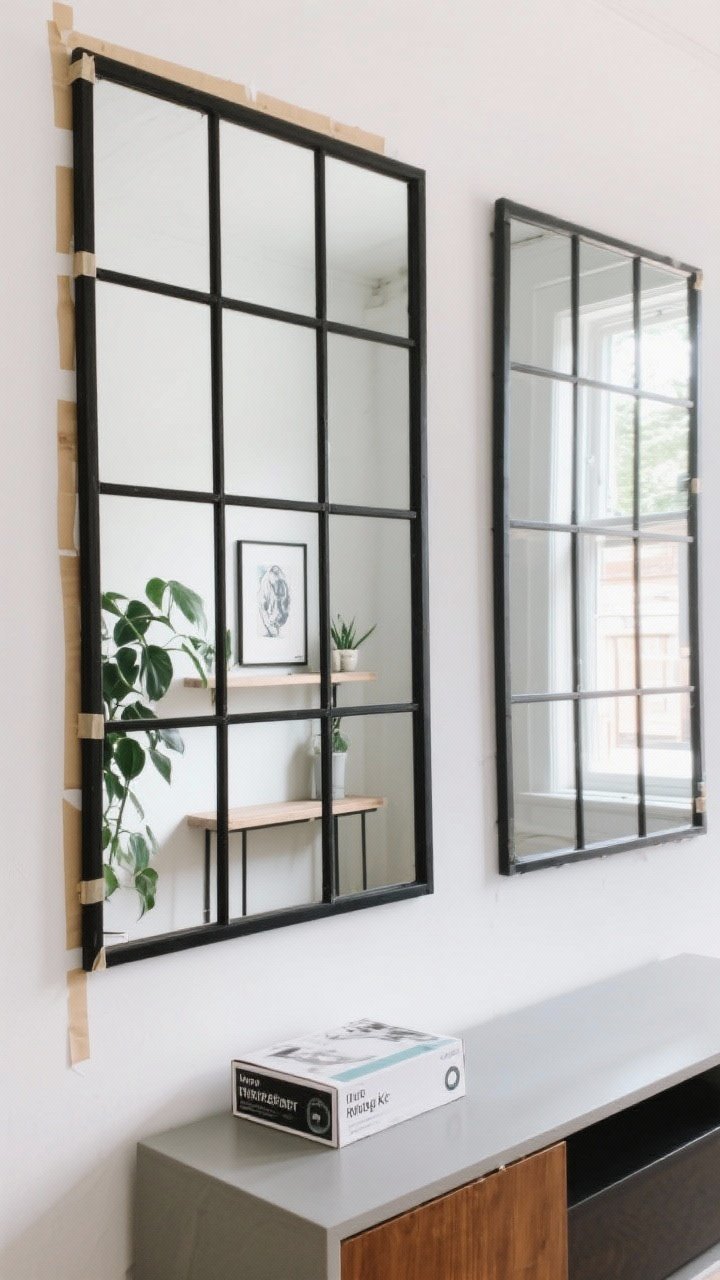
Want that airy loft look without installing actual windows? Use grid overlays on a large mirror to mimic panes. It tricks the eye and bounces light like crazy.
How to Pull It Off
- Choose the vibe: Black for industrial, brass for glam, white for cottage.
- Materials: Thin wood trim, PVC strips, or metal tape. Even peel-and-stick “mullion” kits exist—FYI, they’re renter-friendly.
- Layout first: Mark your lines with painter’s tape before committing.
- Perfect the reflection: Avoid reflecting clutter—point it at a window, art, or a plant shelf.
Bonus: Hang two side by side for a French door moment. Your entryway will look twice the size. Magic? No. Just good design.
3. Go Vintage With a DIY “Antiqued” Mirror
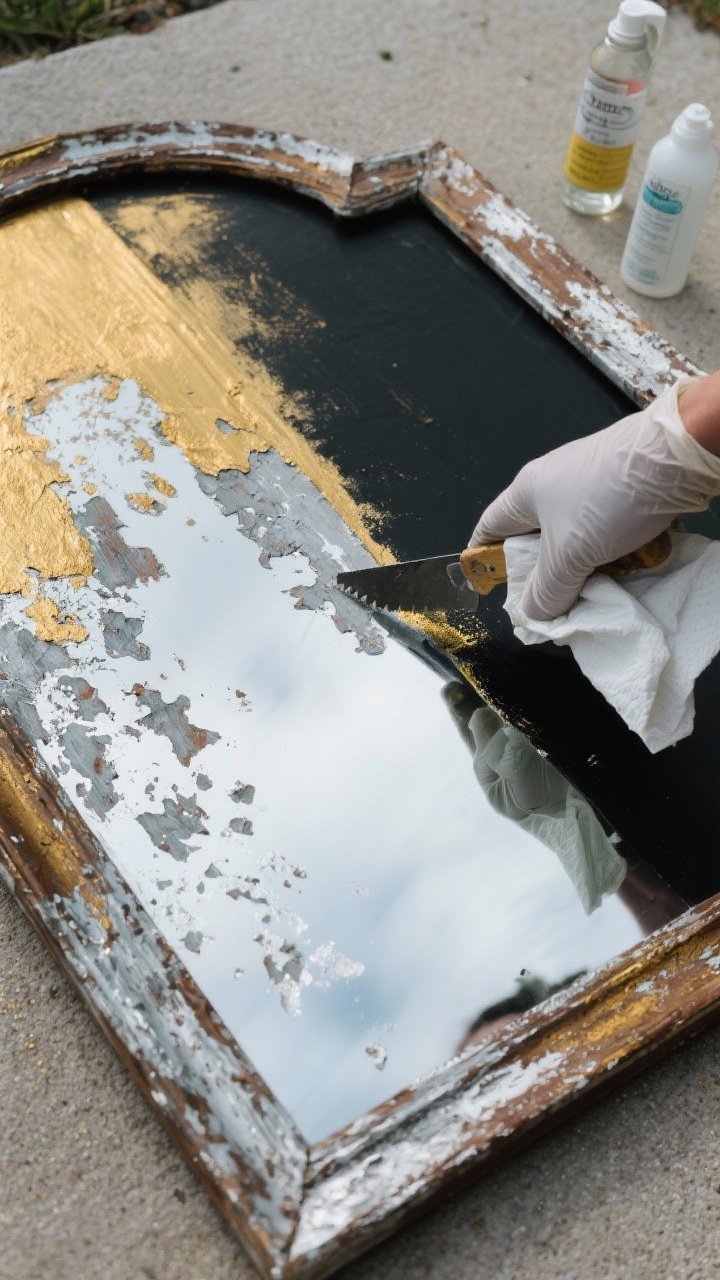
Love the moody, mottled patina of antique mirrors? You can fake it. The look is all about texture and depth—like the mirror has lived a glamorous life.
Simple Antiquing Method
- Find a removable-back mirror: Thrift stores are gold mines.
- Spray the back with paint stripper: Carefully remove portions of the backing. Wear gloves and work outside.
- Spritz vinegar and water: Dab with paper towels to create irregular “aged” spots.
- Back with black or gold spray paint: Black for drama, gold for warmth.
Not into chemicals? Use antiqued window film—peel, stick, and you’re done. It’s convincing and renter-safe, IMO.
4. Build a Mirror Gallery Wall (Without the Chaos)
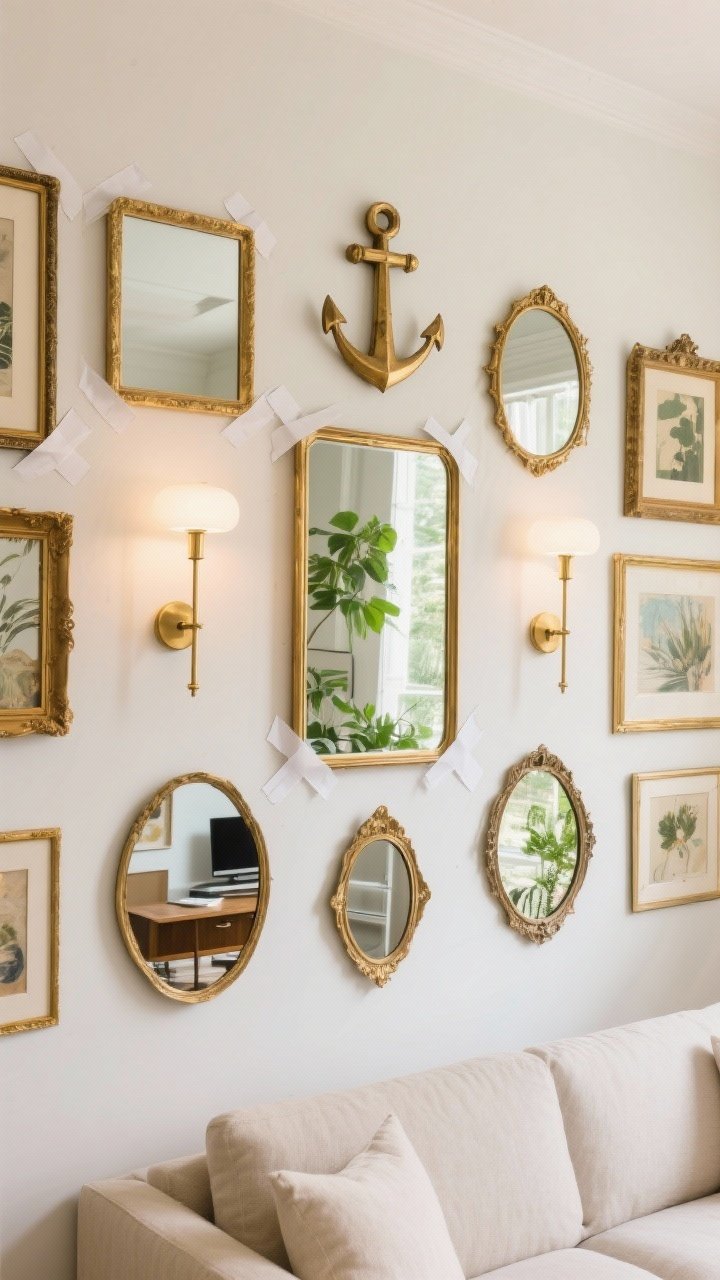
Gallery walls aren’t just for art. A collection of mirrors—vintage, modern, weird shapes—makes a space look curated and bright. The trick is balance, not randomness.
Design Rules That Keep It Chic
- Pick a theme: All gold frames, all black frames, or all curvy shapes.
- Anchor with one large piece: Then layer smaller mirrors around it.
- Use paper templates: Tape them up to test spacing before you hammer anything.
- Mind the reflection: You don’t want to reflect a TV or a messy desk (learned the hard way).
Pro tip: Mix in a sconce or two between mirrors for extra glow. It feels intentional and high-end.
5. Turn Closet Doors Into Statement Mirrors
Sliding closet doors are bland, but they’re prime real estate. Add full-length mirrors and boom—instant boutique dressing room energy.
Two Approaches
- Adhesive mirror panels: Affordable and easy. Use multiple panels to cover each door and frame them with trim for a finished look.
- Acrylic mirror sheets: Lightweight, safer in kids’ rooms. They’re flexible—attach with double-sided mounting tape.
Safety and Style Tips
- Use proper mirror mastic: Weight matters—skip weak adhesives.
- Add edge trim: Lattice, half-round, or metal channel hides seams.
- Mind the track: Don’t add so much weight that the doors struggle to slide.
If you’ve got bifold doors, try mirror tiles in a herringbone pattern. It’s detail-rich and looks custom.
6. Layer Mirrors With Art and Sconces
If you want your walls to look editorial, think layers. Mirrors behind art or lighting is a designer move that adds depth, reflection, and drama (the good kind).
High-Impact Combos
- Mirror + framed art: Hang a small artwork centered on a larger mirror using a stand-off mount or Command strips. It feels elevated, literally.
- Mirror + sconces: Place a pair of sconces flanking a mirror to double the glow. Use dimmable bulbs for mood.
- Shelf + mirror: Lean a mirror on a picture ledge and layer objects in front—think vase, candles, a trailing plant.
Key Details
- Scale matters: The mirror should be bigger than whatever you layer over it.
- Watch glare: Angle sconces slightly or choose matte bulbs to avoid harsh reflections.
- Keep cords tidy: Use cord covers painted to match the wall for a clean look.
FYI: This trick is especially good over buffets, consoles, and mantels.
7. Use Mirrors to Fake Architecture
No arched doorway? No problem. Mirrors can pretend to be built-in architecture—and they’re convincing. This is where DIY meets optical illusion.
Architectural Illusions to Try
- Arched mirror “niche”: Cut an arch-shaped MDF frame, paint it to match the wall, and place a simple mirror inside. It reads like a custom alcove.
- Tall panel mirrors: Space skinny mirrors with painted molding between them to mimic floor-to-ceiling wall panels.
- Over-the-sofa “window” wall: Three identical mirrors in a row look like a set of French windows. Instant symmetry.
Placement Tips
- Go vertical in small rooms: Tall mirrors pull the eye up and make ceilings feel higher.
- Center on existing lines: Align to door trims, ceiling beams, or furniture edges so it feels built-in.
- Choose warm finishes: Black can be bold; wood or brass adds warmth and keeps it from feeling too stark.
Even a narrow hallway can feel grand with a full-height mirror at the end. It’s like a portal to more space (Narnia not included).
Final Tips for Mirror Mastery
- Lighting loves mirrors: Place them where they bounce natural light across the room.
- Clean the right way: Spray cleaner on the cloth, not directly on the mirror, to protect edges and backing.
- Think about what’s reflected: Mirrors are like cameras—they crop and frame a scene. Make sure it’s a good one.
- Mix shapes: Round mirrors soften boxy rooms; arches add character; rectangles are classic and versatile.
There you go—seven mirror moves that make your place look brighter, bigger, and more stylish without a full remodel. Pick one, grab some trim or tape, and create a reflection you’ll actually brag about. Your future selfies will thank you.