You know those airy, minimalist shelves that make every room feel cooler? You can totally make them without blowing your budget. Think sleek lines, hidden brackets, and a spot for your prettiest coffee mugs or that plant you swore you’d keep alive.
Grab your tape measure. We’re building the kind of DIY floating shelves on a budget that’ll make your walls work harder—without the “wait, how much?!” price tag.
1. Plan Like A Pro (Aka: Measure Twice, Drill Once)
Before you buy a single plank, let’s plan. Floating shelves look simple, but a clean, sturdy setup starts with laser-precise measuring. Where are they going? What will they hold? Books weigh a lot more than candles, FYI.
Smart Measuring Tips
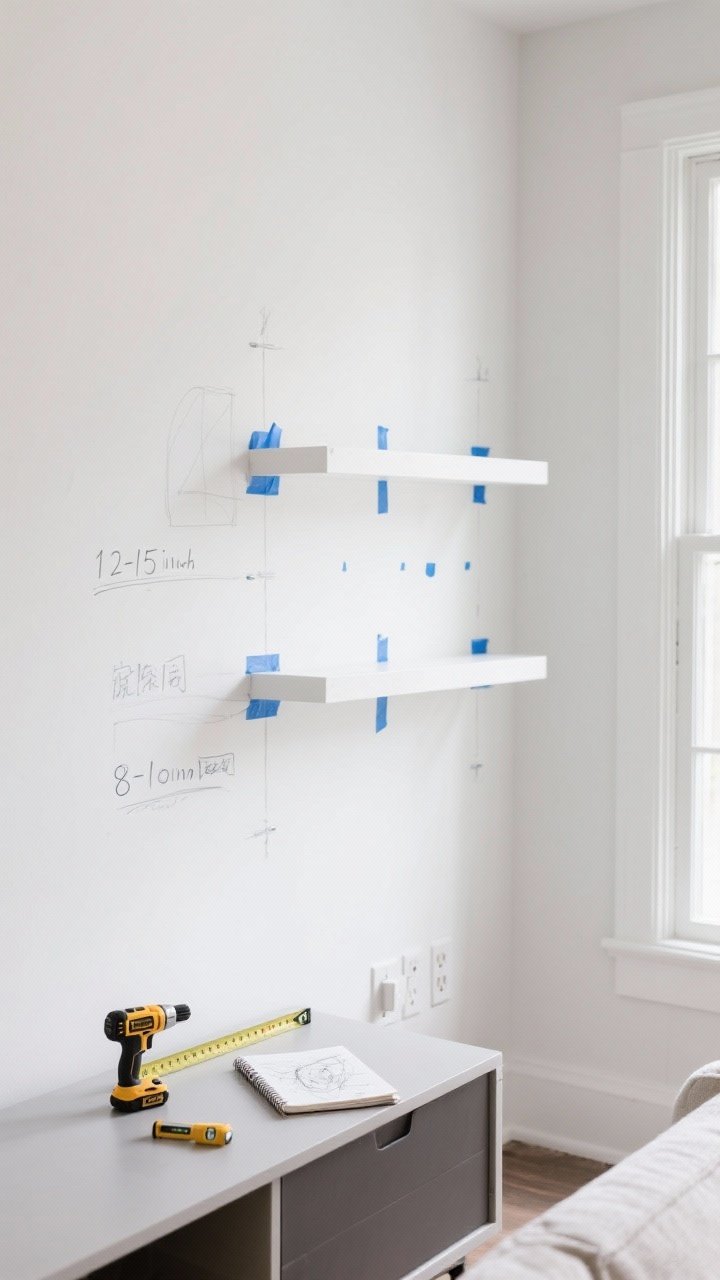
- Height and spacing: For kitchens, aim for 16–18 inches between shelves. For living rooms, 12–15 inches looks balanced for frames and plants.
- Depth: 8–10 inches works for most decor. Go 10–12 inches if you want to stack books or dishes.
- Stud mapping: Use a stud finder and mark them clearly. Shelves anchored to studs = peace of mind.
Sketch your wall with rough sizes and mark outlets, switches, and window trim. It’ll save you a return trip to the hardware store and at least two forehead slaps.
2. Pick Your Materials (Cheap, Chic, And Solid)
You don’t need fancy hardwoods to get the look. You need straight boards, a clever mounting system, and a finish that elevates the whole thing. We’re aiming for style without splurging.
Budget-Friendly Options
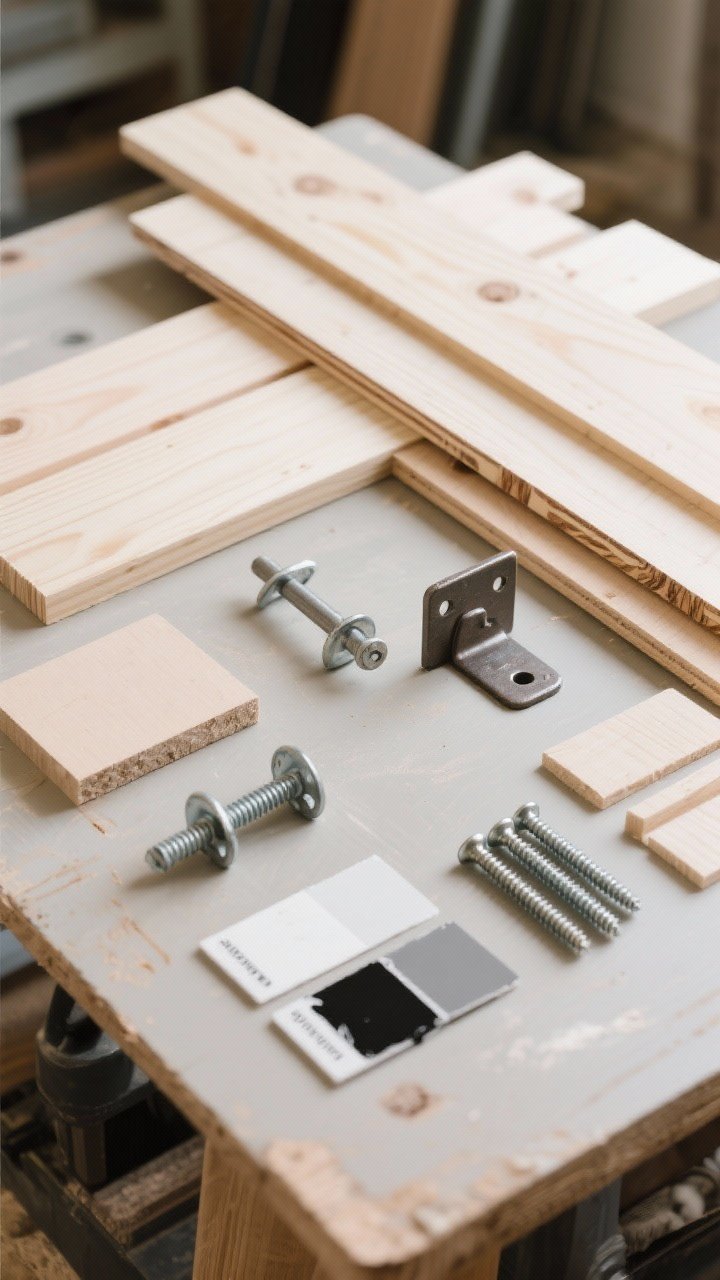
- Wood: Pine and poplar are affordable and easy to work with. For higher-end vibes, try birch or oak veneer plywood and edge-band the front.
- Hidden brackets: Get heavy-duty floating shelf brackets (rod-style or flange-style). If you’re tight on budget, make a simple French cleat from scrap plywood.
- Hardware: Lag screws for studs, heavy-duty anchors if you must go into drywall (but studs are best—always).
- Finish: Water-based stain and poly for a natural look, or a satin paint for modern minimalism.
Pro tip: Look for “common board” or “select pine.” It’s cheaper than hardwood but stains beautifully when you sand it well.
3. Build The Shelves (Simple, Strong, And Sneaky)
There are two easy ways to get that true floating look: a solid board with hidden brackets, or a hollow box that slides over a cleat. Both are budget-friendly and look designer.
Method A: Solid Board + Hidden Brackets
- Cut boards to length. Sand edges smooth (120 > 180 > 220 grit).
- Use rod-style brackets and drill straight holes to slide the rods in. Keep your drill level—no tipsy shelves allowed.
- Stain/paint before installation for a clean finish.
Method B: Hollow Box Over A Cleat
- Build a U-shaped box from 1x wood or 3/4″ plywood. Use glue and brad nails.
- Make a wall-mounted cleat: a 2×2 frame or ripped plywood strip that screws into studs.
- Slide the shelf box over the cleat and secure from underneath with a few discreet screws.
The box method is super forgiving, IMO. It hides brackets and minor mistakes, and it’s surprisingly sturdy when anchored to studs.
4. Finishes That Fool Everyone (Yes, Even Your Design-Savvy Friend)
Good finishes turn budget wood into “wait, where’d you get that?” Show them you don’t need walnut to get warmth. The secret is prep and restraint.
Finishing Moves
- Sand like you mean it: Smooth wood takes stain evenly. Round the front edges slightly for a custom look.
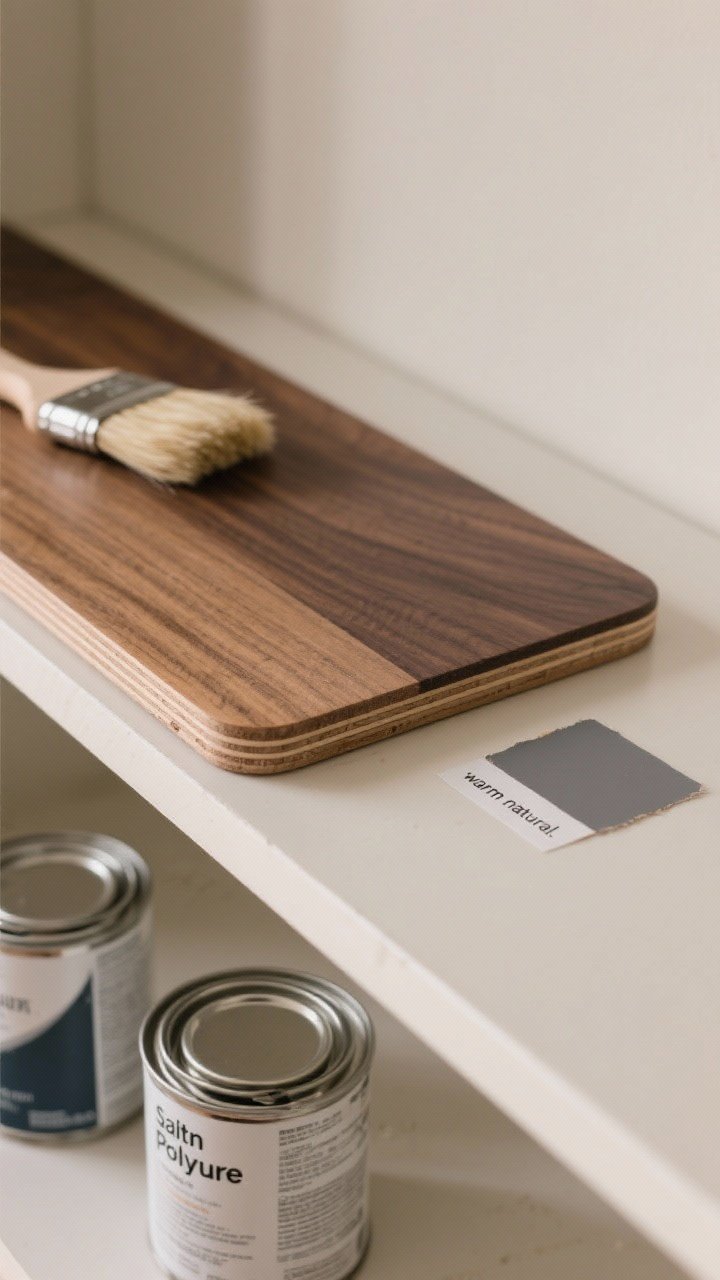
- Stain smart: Try a mid-tone like Special Walnut, Classic Gray, or a warm natural finish. Test on scraps first.
- Seal it: Two coats of satin polyurethane or a water-based polycrylic keeps things durable and easy to wipe down.
- Paint perks: White or black shelves look ultra-modern and hide wood grain. Use primer if knots are visible.
Want high-end? Edge-band plywood fronts and stain. It’s a tiny detail that screams custom.
5. Mounting Without Mayhem (Straight, Level, And Rock-Solid)
This is the moment. Level shelves are the difference between “Pinterest-worthy” and “are your walls melting?” Take your time.
Installation Steps
- Mark your studs: Transfer your layout lines onto painter’s tape. Easier to see and adjust.
- Level first: Draw a level line where the top of the bracket or cleat will sit.
- Anchors and screws: Pre-drill, then use lag screws into studs. If a stud misses your layout, shift the shelf slightly or use more brackets.
- Test fit: Slide the shelf on, check level, adjust, then secure.
Pro tip: If walls aren’t square (they never are), scribe the back edge with a pencil and sand to fit. The tight fit makes it look built-in.
6. Style It Like A Stylist (Because Half The Magic Is In The Curate)
Congrats, your shelves are up. Now let’s style them so they don’t look like a random pile of stuff. Think balance, height, and a little negative space.
Styling Formula That Works
- Anchor pieces: One heavier item per shelf: a stack of books, a big bowl, or a framed art piece.
- Vary heights: Mix tall vases with low bowls and mid-height candles.
- Odd numbers: Group items in threes—classic decorator trick.
- Texture party: Mix matte ceramics, glass, wood, and greenery for depth.
- Leave space: Negative space keeps it looking high-end, not cluttered.
For kitchens, try a pretty row of mugs, a small plant, and stacked plates. For living rooms, blend art, books, and a plant or two. Easy, cohesive, chic.
7. Real-World Budgets, Hacks, And Mistakes To Avoid
Let’s talk numbers and gotchas. You can absolutely build two solid shelves for the cost of one store-bought.
Sample Budget (Per Two Shelves)
- Wood boards or plywood: $20–$40
- Hidden brackets or cleat materials: $15–$35
- Screws, anchors, glue, nails: $10–$15
- Stain/paint and poly: $10–$20
Total: Around $55–$110, depending on size and finishes. Way cheaper than retail, and custom to your space.
Hacks
- Edge-band for the win: Hide plywood edges with iron-on veneer for an instant upgrade.
- Use scrap wood for cleats: Invisible and free—best combo ever.
- Pre-finish: Stain and seal before install to avoid drips on walls.
- Template time: Make a paper or cardboard drilling template so brackets line up perfectly on the shelf and wall.
Mistakes To Dodge
- Skipping studs: Don’t do it unless you love chaos. Heavy items need stud support.
- Overloading: Check bracket ratings. If you want cookbooks and ceramics, choose hardware that can handle it.
- No level: Eyeballing is brave—but risky. Use a level and shims if needed.
- Rushing the finish: Let stain dry fully between coats for a pro look.
Final thought: You don’t need a workshop or a trust fund to build killer shelves. With a few smart choices and a calm afternoon, you’ll have DIY floating shelves on a budget that look straight out of a magazine.
Now go grab your drill. Your walls are ready for their glow-up.