Ready to hunt down that ugly-duckling dresser and turn it into a swan? Same. DIY thrift store furniture makeovers are the fastest way to upgrade your home without crying over your bank account. We’re talking big impact, small budget, and major bragging rights.
Grab a cart, some sandpaper, and your boldest paint color. Let’s rescue some sad furniture and give it a glow-up.
1. Hunt Smart: Spot Diamonds In The Rough
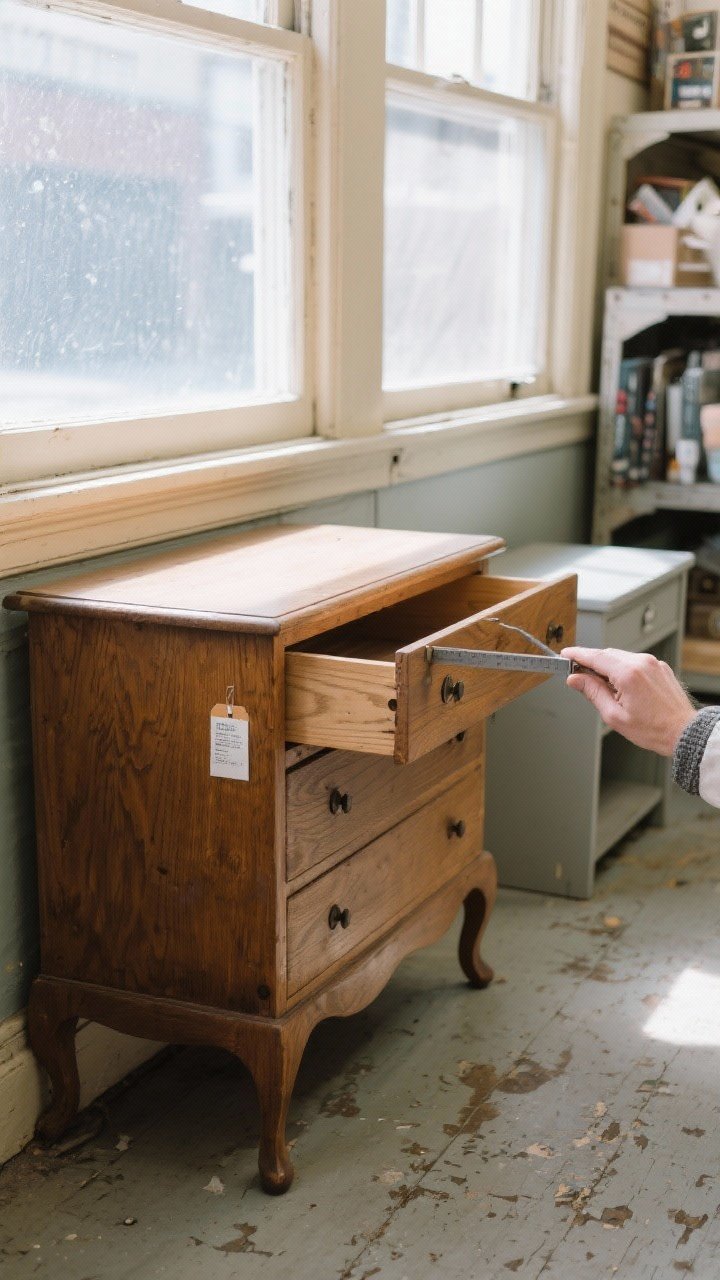
Not all thrift finds are created equal. Look past the flaky finish and focus on the bones. Solid wood? Sturdy joints? Drawers that actually slide? That’s your winner.
What To Look For
- Solid wood or wood veneer: Tap it. If it sounds hollow, it probably is.
- Quality joinery: Dovetail drawers and tight joints scream “keep me.”
- Shape over shade: Curvy legs, clean lines, or a cool silhouette beats a bad stain every time.
- Hardware holes line up: If you’re swapping pulls, matching hole spacing saves time (and filler).
Quick Thrift Tactics
- Go early and often: Best pieces drop mid-week, early morning. Yes, it’s worth it.
- Check the back and underside: Look for labels, water damage, or weird smells (FYI: mildew is fixable; moldy MDF is not).
- Negotiate: Ask politely for 10–20% off if there’s damage. Most places say yes.
2. Prep Like A Pro: Cleaning, Sanding, And Safety
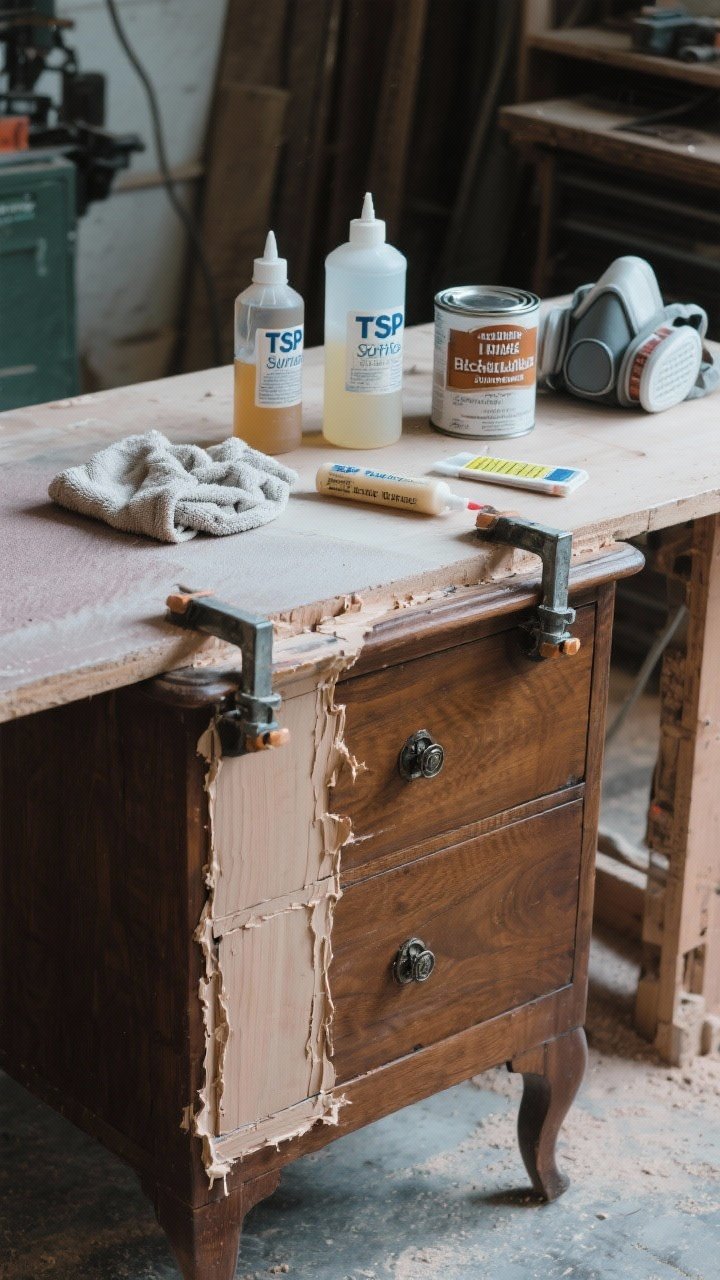
Prep is the makeover. Skipping it is how you get peeling paint and regret. Start with a deep clean to remove wax, grease, and mystery grime (we don’t ask).
Prep Steps That Matter
- Degrease: Use TSP substitute or a vinegar-and-water mix. Rinse and dry fully.
- De-gloss: Scuff sand with 120–150 grit for adhesion. For laminate, use 220 grit and a bonding primer.
- Repair: Wood filler for dings, clamps and glue for loose joints. Let it cure.
- Prime smart: Stain-blocking primer for red woods (mahogany, cherry) to prevent bleed-through. Shellac-based is a hero.
Safety check: If the piece is pre-1978, test for lead paint. If positive, skip sanding or use wet-sanding and proper respirators. Your lungs aren’t decor.
3. Paint, Stain, Or Both? Choose Your Finish Moment
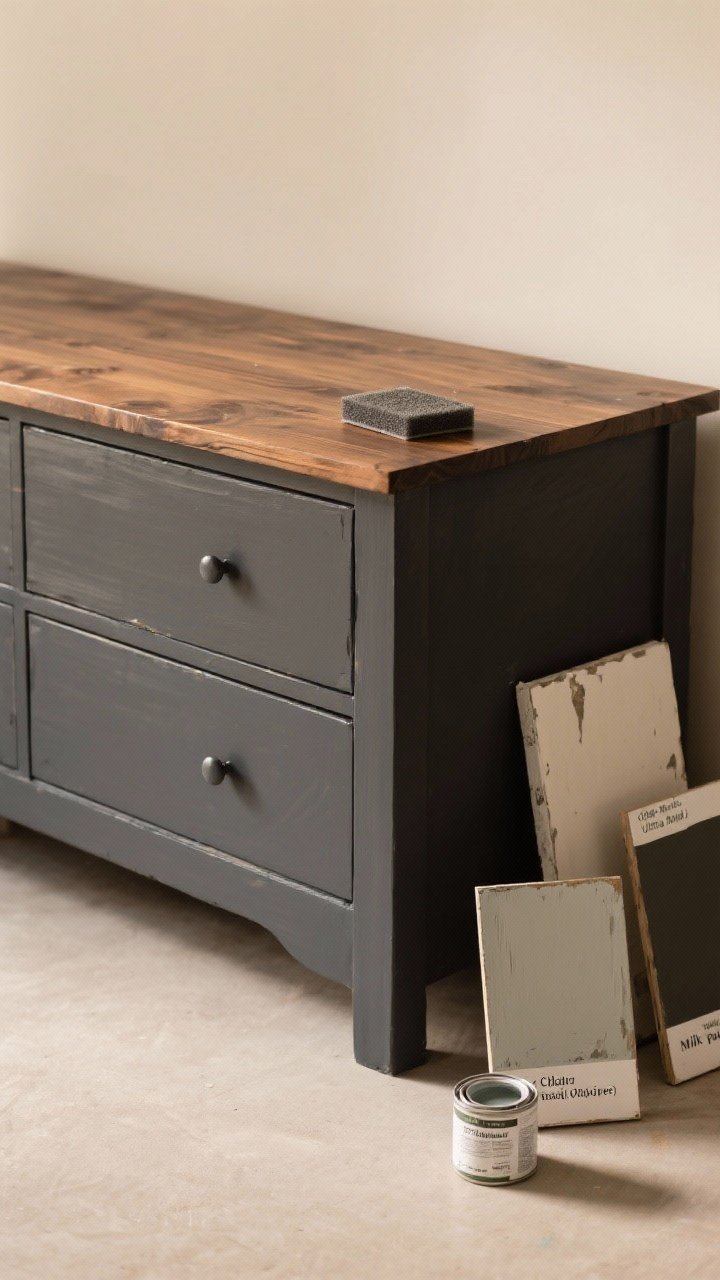
There’s no single “right” finish. It’s about the vibe. Want modern? Go matte paint. Want warmth? Try a refined stain. Want both? Two-tone is chef’s kiss.
Finish Cheat Sheet
- Chalk paint: Ultra matte, easy to distress, minimal prep. Seal with wax or a clear coat.
- Enamel/alkyd: Durable, furniture-grade finish, self-leveling. Perfect for dressers and tables.
- Milk paint: Chippy, vintage charm. Use a bonding agent if you don’t want it too chippy.
- Gel stain: Great over existing finishes and veneers. Less blotchy. Bless.
Pro Painting Tips
- Thin coats: Two to three thin layers > one gloopy one.
- Sand between coats: Light 320–400 grit buff for a smooth-as-butter finish.
- Topcoat wisely: Polyurethane for stain, water-based polycrylic for light colors to avoid yellowing.
IMO, two-tone pieces (stained top, painted base) look high-end with minimal effort. Think: farmhouse meets boutique hotel.
4. Hardware Glow-Up: Small Changes, Big Wow
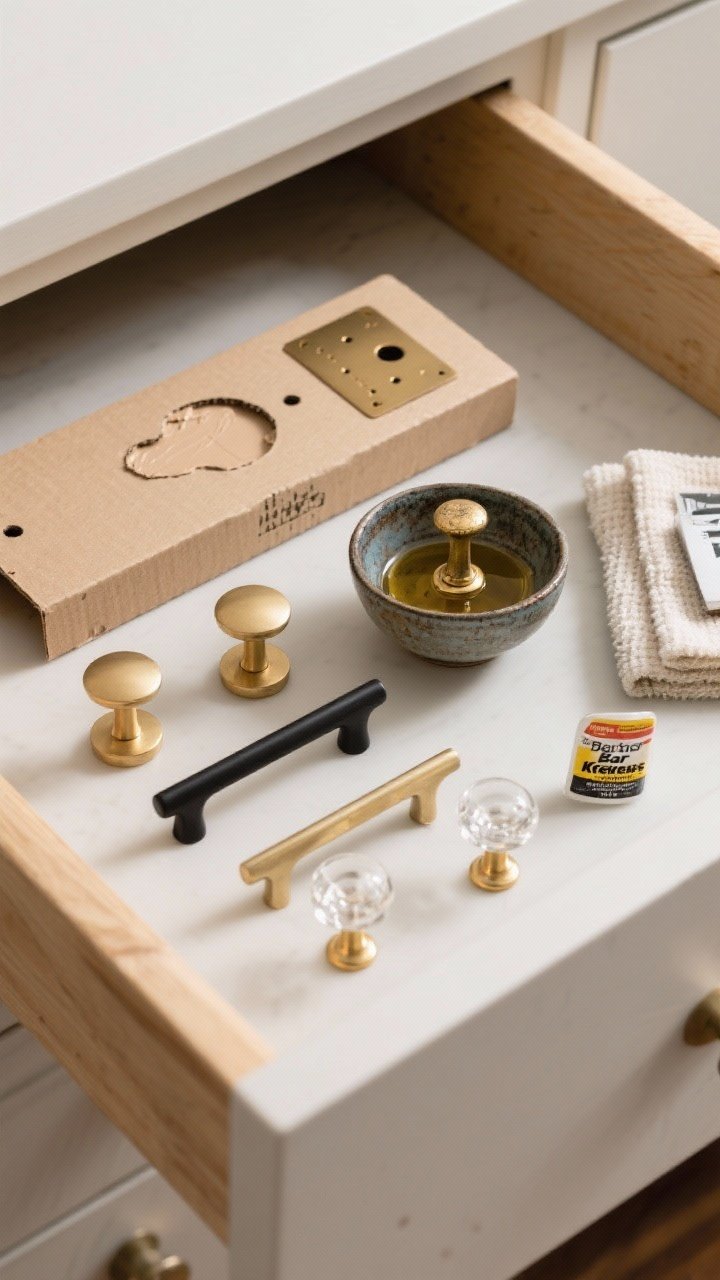
Never underestimate the power of hardware. It’s basically jewelry for your furniture—tiny, shiny, and transformational.
Upgrade Options
- Swap it: Brass cup pulls for vintage, matte black bars for modern, acrylic knobs for glam.
- Polish it: Bar Keepers Friend or a vinegar soak can resurrect tarnished brass.
- Mix and match: Keep it consistent per drawer, but play with shapes across a piece.
Tricks You’ll Actually Use
- Use a template: Make a cardboard drilling guide to keep holes straight.
- Backplate fix: Cover old holes with a chic backplate. Zero filler needed.
- Edge case: If holes don’t line up, fill with wood putty, sand flush, and repaint the drawer face.
Bonus: Soft-close drawer slides are an easy install that make any piece feel custom. Fancy without the fuss.
5. Style Swaps: Cane, Rattan, And Textured Add-Ons
Want instant boutique energy? Add texture. Cane, rattan, and fluting turn a plain box into a “wait, where’d you buy that?” moment.
Upgrade Ideas
- Cane inserts: Remove panel centers, staple cane from the back, and frame with thin trim. Great for cabinet doors.
- Wood slats or fluting: Glue half-round dowels to drawer fronts for a luxe, linear look. Paint or stain to match.
- Peel-and-stick: Grasscloth wallpaper on drawer faces + clear coat = subtle texture win.
- Glass swap: Replace dated glass with ribbed or reeded acrylic for a modern twist.
Edge Banding Hack
- Veneer edge banding: Iron-on strips hide raw edges on particleboard or old shelves. Trim and sand lightly. Looks custom, costs coffee money.
FYI: Texture + neutral tones is the fastest route to high-end without trying too hard.
6. Upholstery Refresh: Seats, Stools, And Headboards
Fabric can instantly change the mood. If a chair’s frame is solid, a little upholstery refresh will take it from “meh” to “magazine.”
Beginner-Friendly Projects
- Drop-in seats: Unscrew the seat, wrap new fabric over fresh foam and batting, and staple underneath. Pull tight at the corners.
- Benches and ottomans: Same idea, bigger surface. Add tufted buttons if you’re feeling extra.
- DIY headboard: Plywood + foam + fabric + a staple gun. Mount with a French cleat for stability.
Fabric Picks That Wear Well
- Performance velvet: Luxe look, easy clean.
- Woven tweed or bouclé: Hides sins and feels designer.
- Outdoor fabric: Great for dining chairs or kid zones. Spills who?
Pro move: Scotchgard after you’re done. Your future self (and your coffee) will thank you.
7. Finish Strong: Styling, Protection, And Cost Breakdown
Once your piece is glowing, style it like it belongs in a chic boutique. Add a few accessories, but don’t bury your hard work under clutter.
Styling Tips
- Rule of three: Group items in varied heights—lamp, stack of books, small sculpture.
- Balance: If the piece is bold, keep decor simple. Neutral accents let the finish shine.
- Function first: Line drawers with peel-and-stick paper for a crisp finished feel.
Protect Your Work
- Topcoats: Use satin for a soft sheen, semi-gloss for wipeability. Two to three coats on high-traffic surfaces.
- Cure time: Dry is not cured. Give paint 7–30 days before heavy use. Light styling is fine.
- Felt pads: On feet and decor items to prevent scratches. Cheap, effective, done.
Realistic Budgeting (Because We’re Grownups)
- Thrift piece: $15–$75
- Paint/stain + primer: $20–$50
- Hardware: $10–$40
- Extras (foam, fabric, cane): $15–$60
Total? Often under $120 for something that looks like $600. Not bad for a weekend project and a little elbow grease, right?
Final pep talk: Don’t wait for the “perfect” piece. Grab something with good bones, take a before photo, and get messy. Your home—and your wallet—will love the glow-up. And when people ask where you bought it? Smile and say, “Oh, this old thing? I made it.”