Kitchen Drawer Organization Tips You’ll Love That Make Cooking Way Easier
Posted in :
If your kitchen drawers are a chaotic jumble of spatulas, soy sauce packets, and that one rogue corn holder, welcome. Let’s turn that chaos into a dreamy, efficient setup you’ll actually want to show off. These tips are simple, stylish, and totally doable—no label maker degree required.
1. Edit Ruthlessly (Yes, Even the Duplicate Peelers)
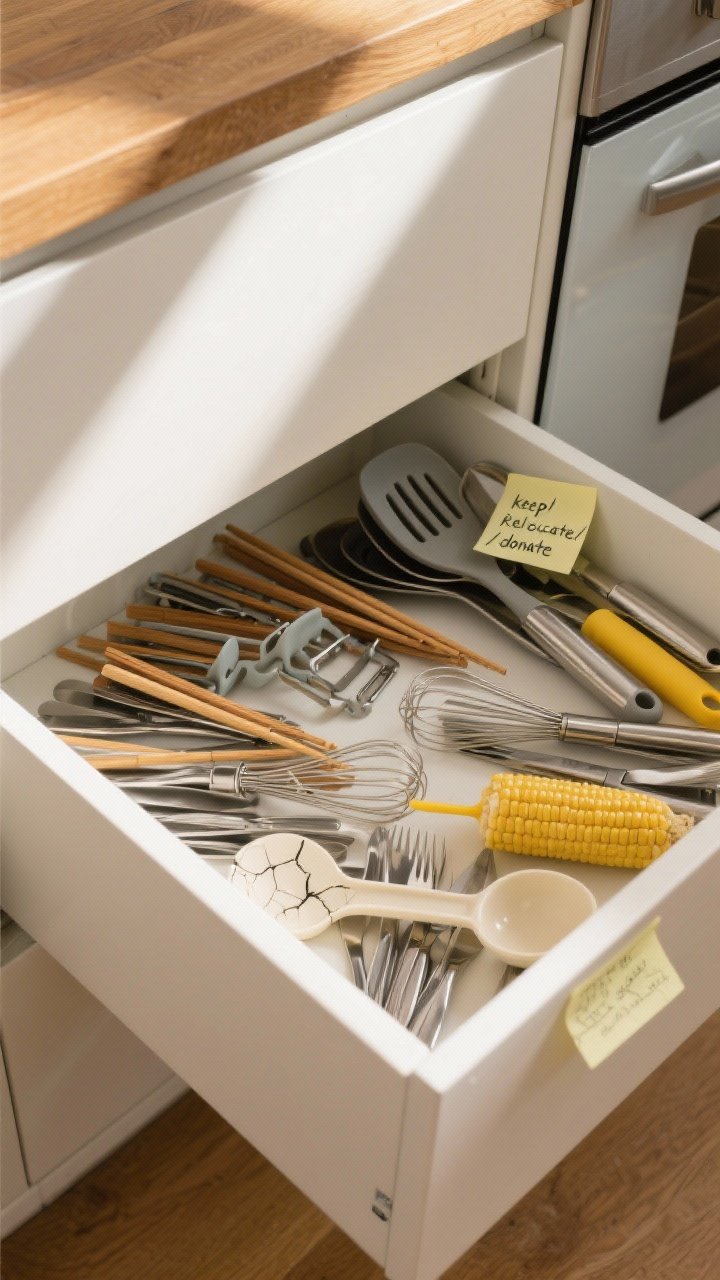
Before we talk organizers, we’ve got to talk stuff. You can’t organize clutter. Pull everything out—every whisk, chopstick, and mysterious gadget—and sort like a pro.
How to Declutter Fast
- Keep: What you use weekly and what sparks actual joy (looking at you, perfect tongs).
- Relocate: Seasonal or bulky tools to a bin or higher cabinet. Drawers are prime real estate.
- Toss/Donate: Broken tools, duplicates, and freebies you never use. Sorry, hotel cutlery.
FYI: If two tools do the same job, pick your favorite and let the other one go. Your drawers will breathe again.
2. Measure First, Buy Once (And Avoid Organizer Tetris)
Here’s the mistake everyone makes: buying cute organizers that don’t fit. Don’t do it. Measure your drawers to the millimeter and sketch a quick layout.
Smart Shopping Checklist
- Measure: Interior length, width, and height. Don’t forget the drawer sides and handle depth.
- Plan Categories: One drawer for daily tools, one for prep, one for baking, etc.
- Choose Materials: Bamboo for warm vibes, acrylic for sleek visibility, or metal mesh for durability.
- Non-Slip Liners: Essential so organizers don’t slide every time you grab a spoon.
Bonus: Modular trays and adjustable dividers let you build a custom system without hiring a carpenter.
3. Zone Like a Chef (Because Efficiency Is the Real Flex)
Organized drawers aren’t just pretty; they’re strategic. Store items where you actually use them so you can cook without doing laps around the kitchen.
Drawer Zones That Make Sense
- Prep Zone (Near Counter): Knives, peelers, graters, measuring cups/spoons.
- Cooking Zone (Near Stove): Spatulas, tongs, wooden spoons, thermometers.
- Baking Zone: Rolling pin, pastry brushes, scoops, silicone mats.
- Snack/Meal Prep Zone: Bag clips, reusable bags, small containers, foil and wrap cutter.
Think: “Grab and go.” If your pasta spoon lives near the stove, future you will thank you on spaghetti night.
4. Divide And Conquer (Custom Layouts Without Custom Prices)
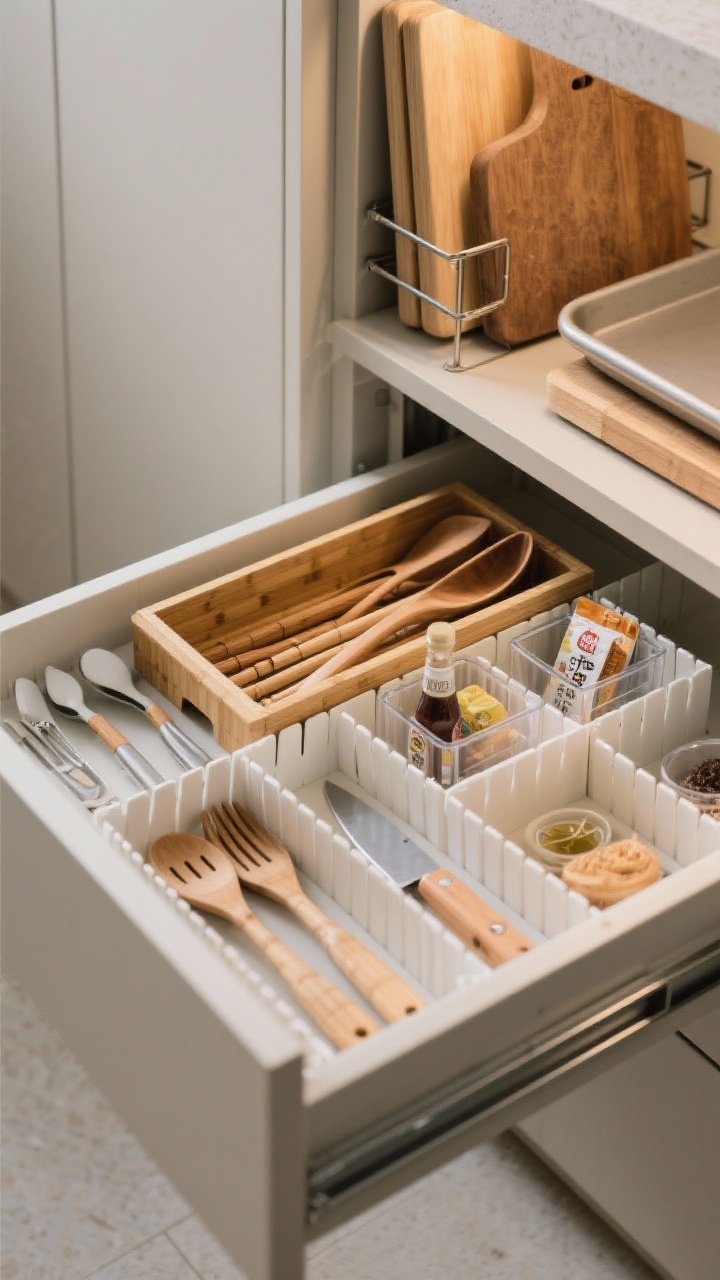
Dividers are the secret sauce. They turn a black hole drawer into a neat, usable grid. And no, they don’t have to be fancy to work.
Organizer Ideas That Actually Work
- Expandable Trays: Perfect for utensils. Expand to fill the drawer so nothing slides around.
- Adjustable Dividers: Create sections for tongs, ladles, and specialty tools.
- Small Bins: Corrals for packet sauces, tea, vitamins, and tiny baking tools.
- Knife Inserts: Wood or plastic blade-safe holders if you don’t want a countertop block.
- File-Folder Trick: Store cutting boards and baking sheets vertically in deep drawers with tension dividers. Chef’s kiss.
IMO, a mix of long and short compartments is best—long for spatulas, small for peelers and corn holders (finally).
5. Label Like a Minimalist (So Everyone Puts Stuff Back)
Labels keep your system alive. Without them, your drawers will morph into chaos again by next week—especially if multiple people cook.
Easy Labeling That Doesn’t Look Extra
- Inside-The-Lip Labels: Place small sticker labels on the inside edge of drawers for a discreet look.
- Category Labels: “Spatulas,” “Measuring,” “Baking Tools,” “Openers & Thermometers.” Keep it simple.
- Icons For Kids: Tiny images for snack drawers make cleanup kid-proof.
- Waterproof Options: If you handwash and reorganize often, go for vinyl labels or a label maker.
Not a label person? Try color coding with bins—blue for baking, clear for tools, white for snacks. Subtle and effective.
6. Max Out Awkward Spaces (Tall, Skinny, Or Just Plain Weird)
We all have that one annoying drawer. Too deep, too narrow, or oddly placed. Good news: there’s a workaround for all of them.
Solutions For Tricky Drawers
- Deep Drawers: Use stacking trays for layers—utensils on top, bulk items below. Or store plastic containers nested with lids upright in a bin.
- Narrow Drawers: Perfect for cutlery, spice inserts, or rolling pins and chopsticks. Use skinny dividers to keep it tight.
- Corner Drawers: Round or pie-shaped inserts help. Store measuring cups/spoons or small gadgets that don’t mind odd angles.
- Under-Cooktop Drawers: Heat-resistant liners and metal dividers for hot pads, trivets, and pan lids.
- Shallow Drawers: Ideal for foil, parchment, zip bags, and knife blocks.
Pro tip: Use drawer pegs in deep drawers to hold bowls and containers upright. Surprisingly satisfying.
7. Maintain In Minutes (The 60-Second Reset Rule)
Organized today, disaster next month? Not on our watch. A tiny maintenance habit keeps everything in line without turning you into a full-time drawer cop.
Simple Systems That Stick
- One-In, One-Out: When a new gadget comes in, donate or relocate one item.
- Weekly 60-Second Reset: Close your night with a quick tidy of the most-used drawer. Easy win.
- Quarterly Edit: Re-home what migrated and wipe liners. Takes 10 minutes, tops.
- Contain Consumables: Give takeout sauces, rubber bands, and bag clips their own mini bin so they don’t escape.
FYI: Drawer liners not only prevent sliding—they catch crumbs and oil splatters so cleanup is a breeze.
Final Touch: Add a little personality. A pretty bamboo tray, a pop of color liner, or a sleek black divider can make opening your drawers feel weirdly luxurious. And yes, you’re allowed to show guests your utensil drawer now. It’s that good.
You’ve got this. Start with one drawer, set your zones, and let the system do the heavy lifting. Cooking just got faster, calmer, and way more fun—exactly how your kitchen should feel.