You don’t need a reno crew or a trust fund to make your space look amazing. With a weekend, a playlist, and a few smart tricks, you can turn “meh” into “whoa, who lives here?” These 12 DIY room makeover ideas are budget-friendly, beginner-proof, and seriously satisfying. Ready to make your place look like it’s been on a design show—without the camera crew?
1. Paint One Wall Like You Mean It
Let’s start with the biggest bang for your buck: paint. A bold accent wall instantly changes the mood of a room. Go moody navy behind your bed, warm terracotta in the living room, or sage green in the office if you’re feeling Zen-core.
Pro Tips
- Sample first. Paint big swatches on different walls and check them morning and night. Light changes everything.
- Use painter’s tape like a boss. Press edges down with a credit card for crisp lines.
- Add a twist. Try a color-block half-wall or a simple geometric shape (circle, arch) for artsy vibes.
FYI: If your room is tiny, choose a color that’s a touch darker than your other walls—it adds depth without shrinking the space.
2. Upgrade Lighting For Instant Drama
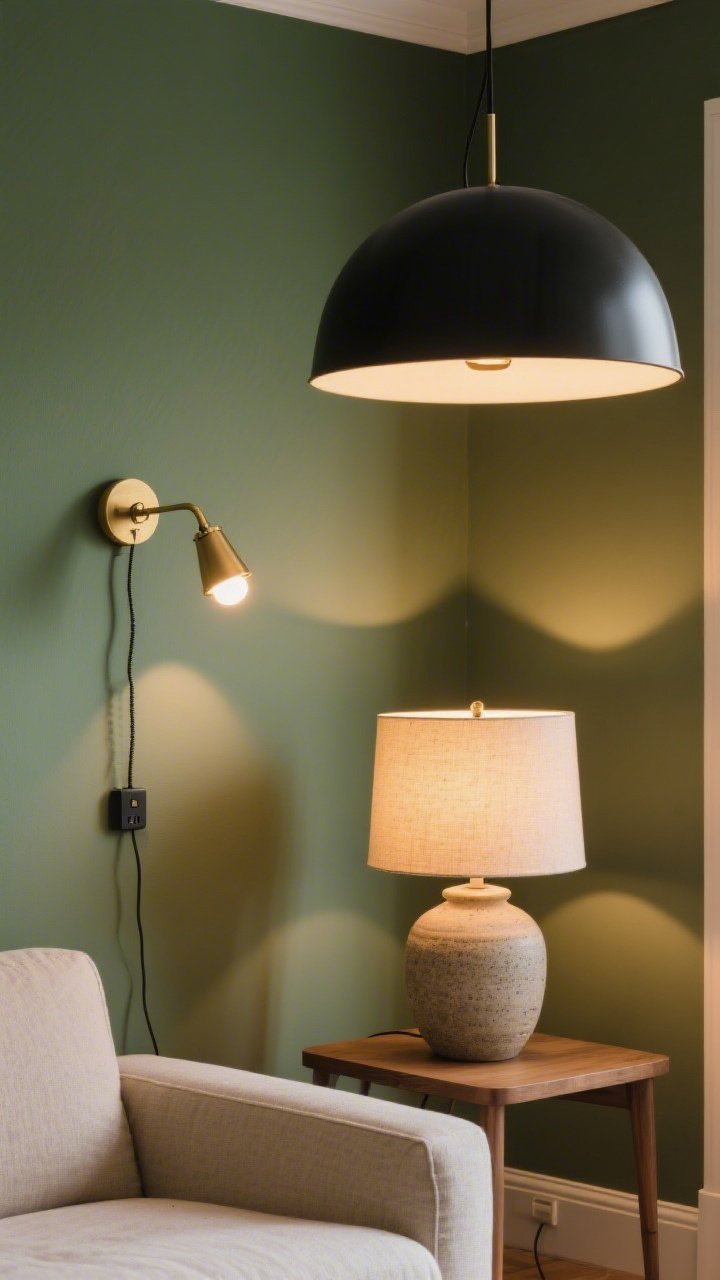
Bad lighting makes even great decor look sad. Swap out the builder-basic dome for a statement pendant or add layers with table lamps and wall sconces. Lighting is like makeup for your room—strategic and transformative.
What To Do
- Layer it: Overhead + task + accent lighting = chef’s kiss.
- Warm it up: Choose 2700K–3000K bulbs for cozy glow.
- Plug-in hacks: No wiring? Use plug-in sconces and drape the cord neatly with cord covers.
Bonus: Try smart bulbs for dimming and color control. Movie night mood? Done.
3. Peel-and-Stick Everything (Yes, Really)
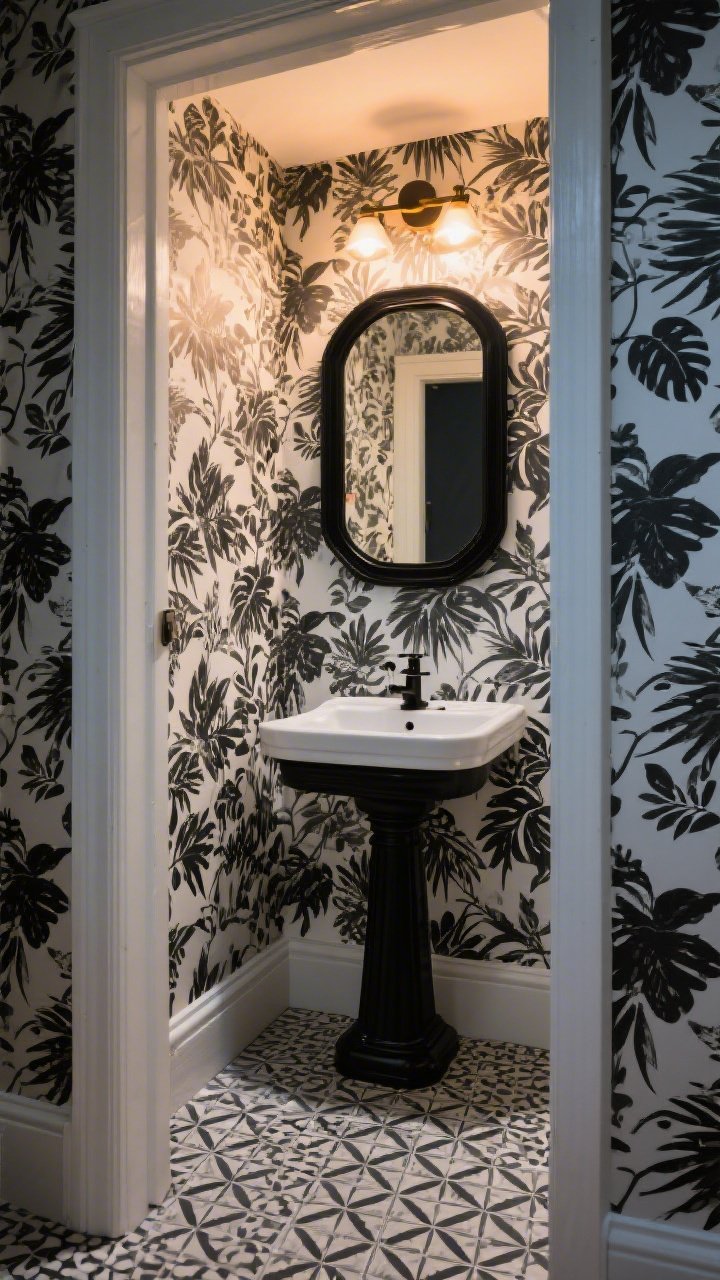
If you’re renting or committal-phobic, peel-and-stick wallpaper and floor tiles are your new best friends. They’re removable, forgiving, and come in endless patterns.
Best Spots
- Powder rooms: Go bold—tiny spaces love drama.
- Backs of bookcases: Pattern pop without chaos.
- Entryways: Define the zone with a statement wall.
Pro move: Use peel-and-stick wood-look planks on a boring dresser. Instant custom furniture vibes.
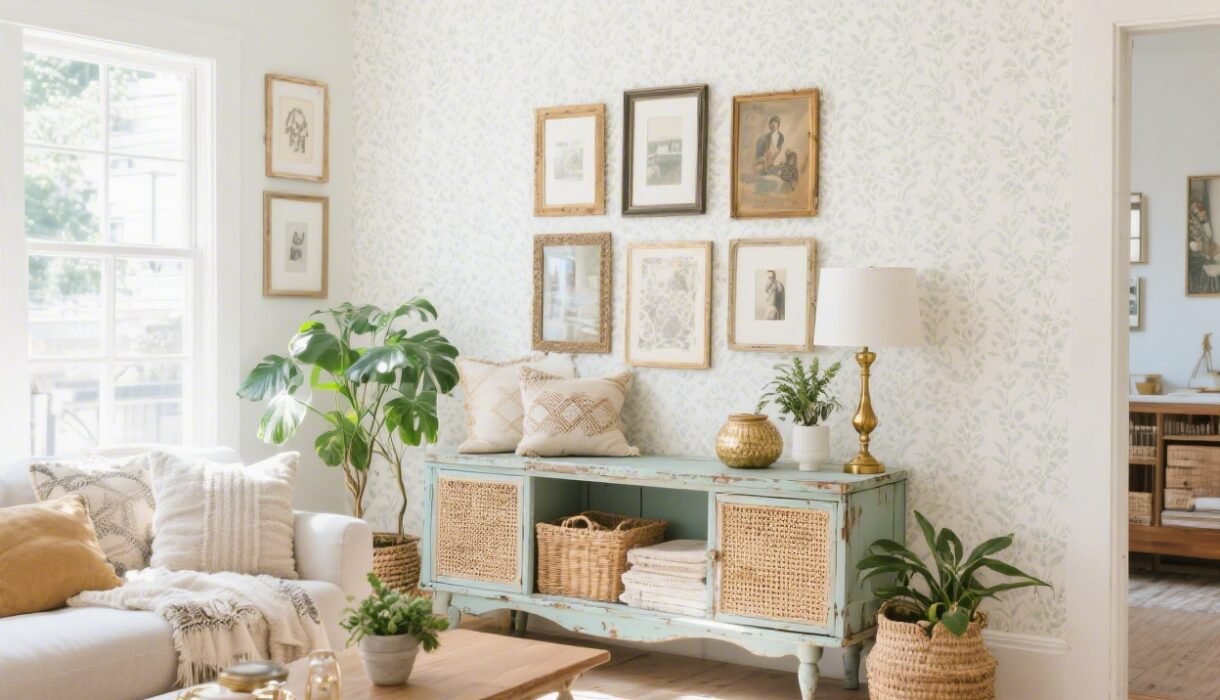
4. Curate Your Wall Art Like a Gallery
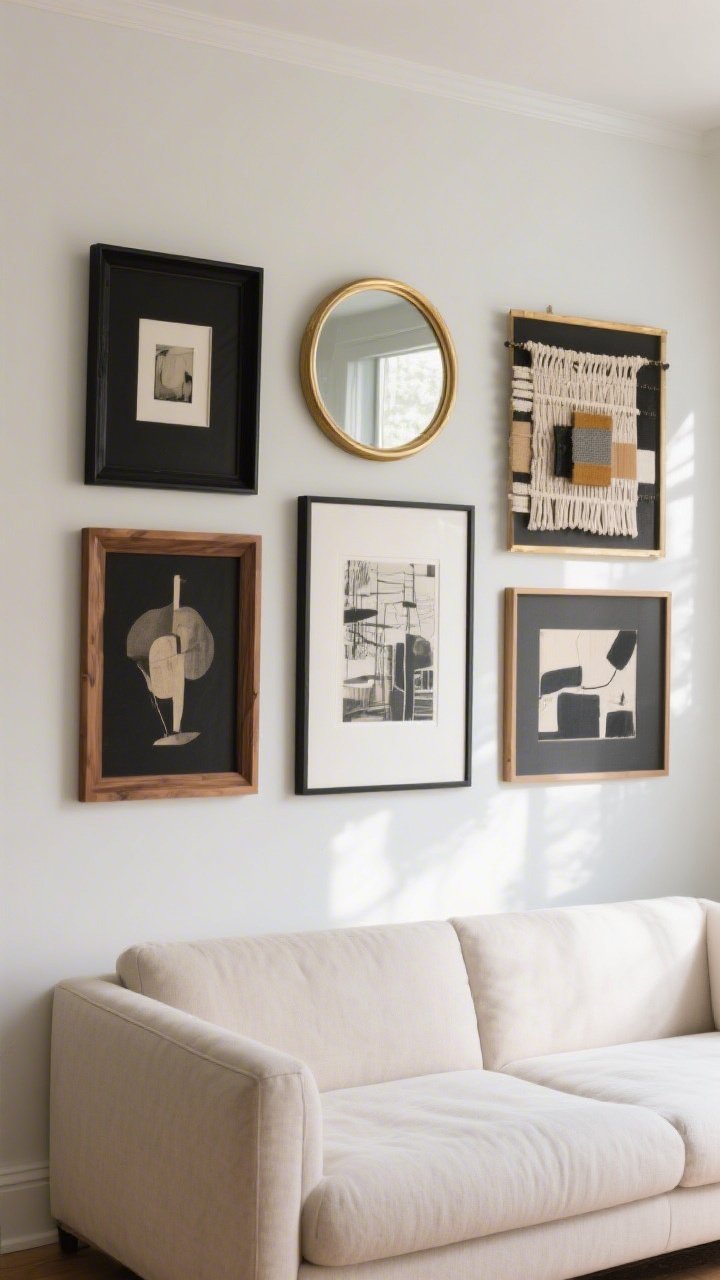
Blank walls make a room feel unfinished. Create a gallery wall that looks designer—but is actually just intentional chaos.
How To Nail It
- Pick a theme: Colors, frames, or subject matter. Keep one thing consistent.
- Lay it out first: Arrange on the floor or use paper templates on the wall.
- Mix media: Add mirrors, textiles, or a sculptural object for dimension.
IMO: Oversized art above a sofa or bed is the fastest way to make a room feel expensive. Go big or go home.
5. Layer Textiles Like a Stylist
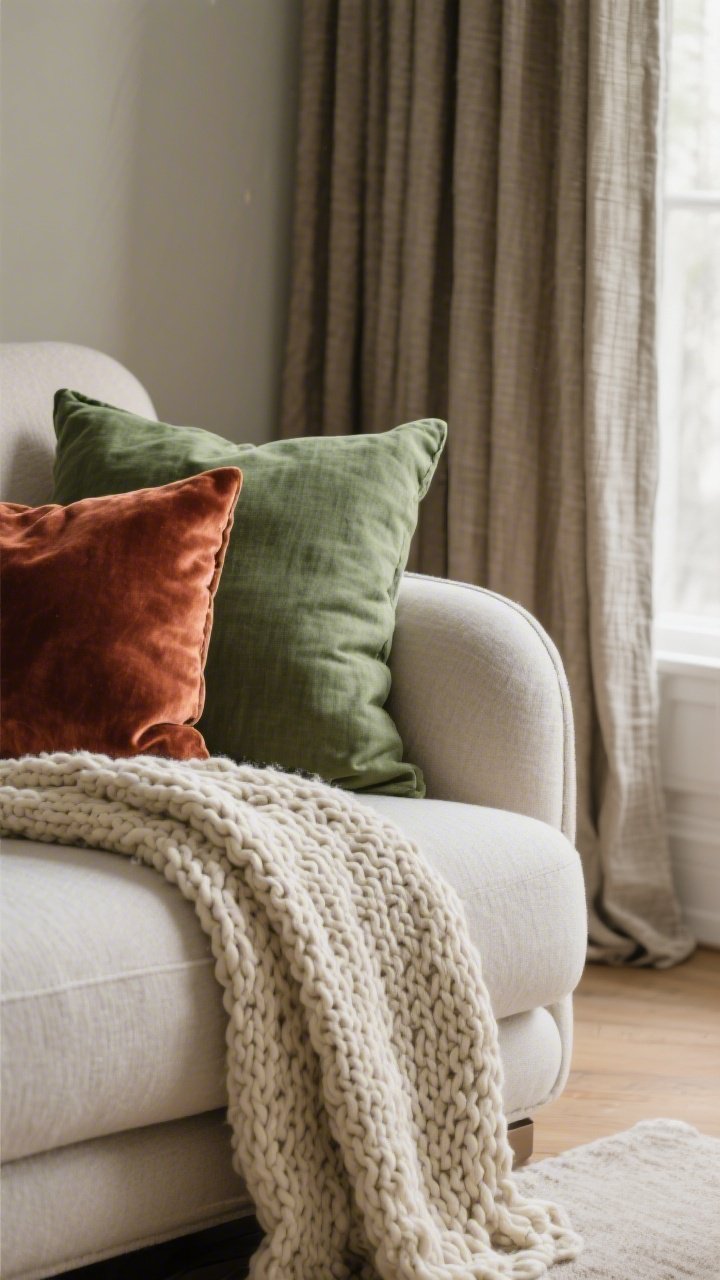
Textiles are the secret to warmth and depth. Think throw pillows, blankets, rugs, curtains—all mingling like they planned it.
Build Your Layers
- Mix textures: Linen + velvet + chunky knit = cozy contrast.
- Vary scales: Pair big patterns with small ones, and add a solid to chill it out.
- Double rugs: Layer a patterned rug over a larger jute or sisal base.
Pro tip: Choose curtains that kiss the floor and hang them high and wide to make windows look grander. It’s a magic trick, promise.
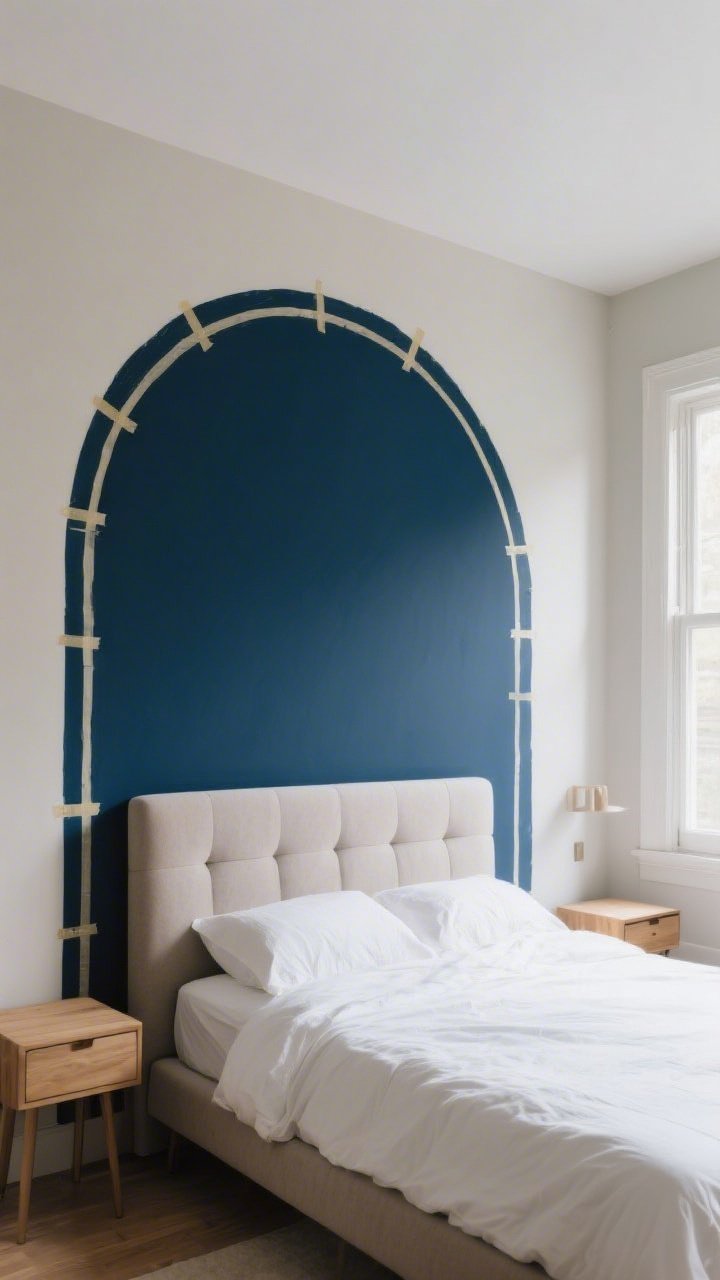
6. Create a DIY Headboard (Zero Carpentry Degree Required)
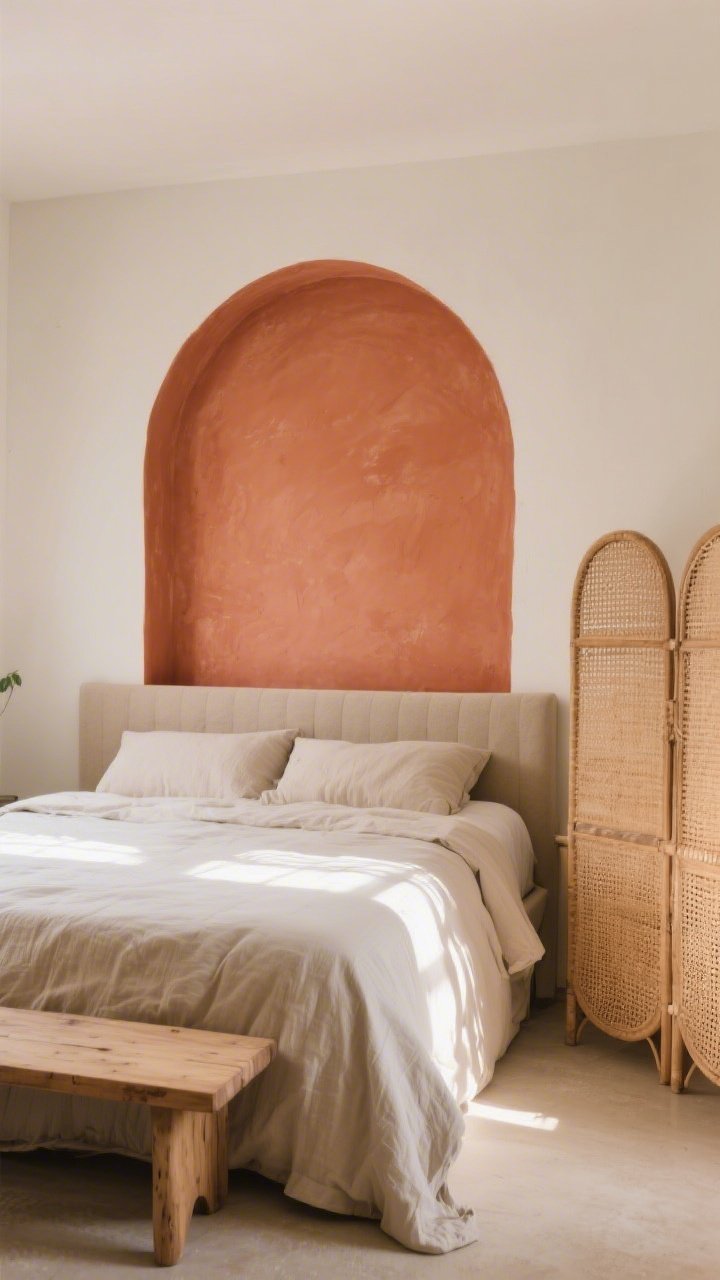
Your bed is the star of the bedroom. Give it the headboard moment it deserves without spending a fortune.
Three Easy Ideas
- Upholstered plank: Wrap plywood in foam and fabric. Staple gun = best tool ever.
- Painted headboard: Tape an arch or rectangle behind the bed. Instant architecture.
- Rattan screen: Use a folding screen as a headboard. Pretty and portable.
Choose a fabric that’s durable (hello, performance velvet) and color that ties to your bedding. Effortless cohesion.
7. Style Your Shelves Like You Own A Bookstore
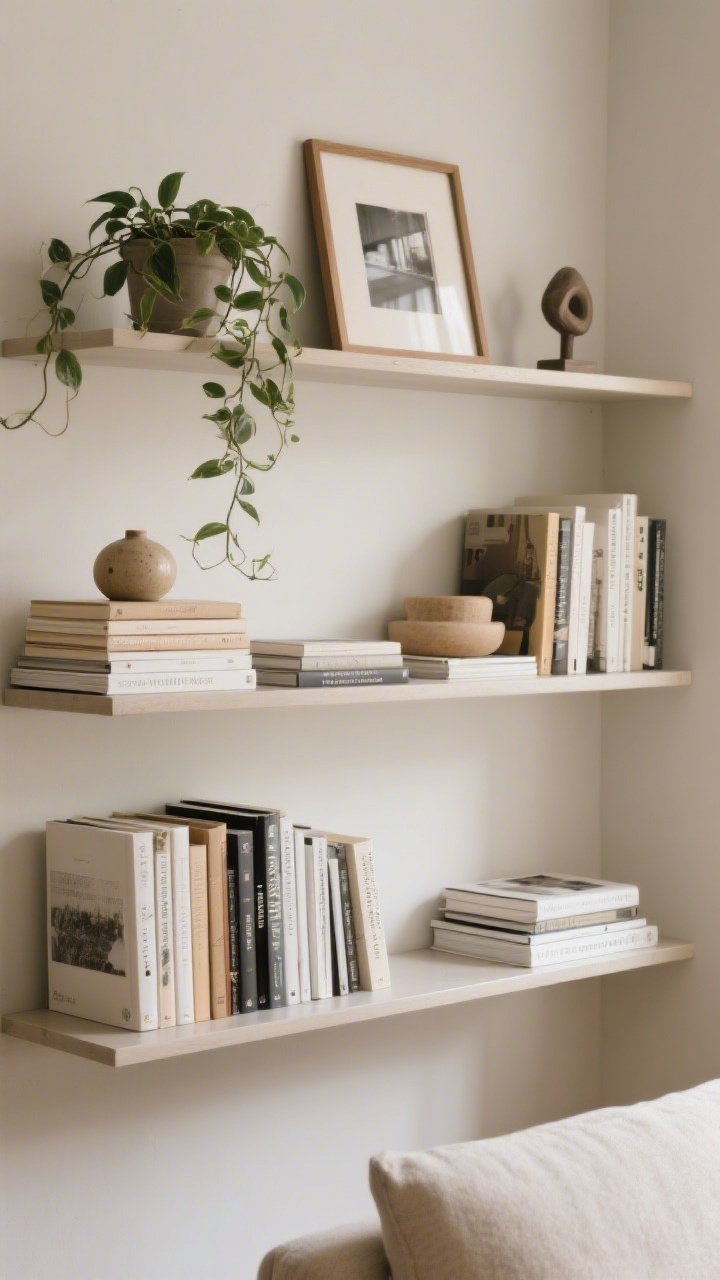
Shelves can look cluttered fast. The fix? Edit, balance, and add intention. You want that “casually curated” look that definitely took effort.
Shelf Styling Formula
- Rule of thirds: Break shelves into three sections for balance.
- Vary heights: Stack books horizontally and vertically, then top with a small object.
- Add life: Plants, framed photos, or a small sculpture = visual rest.
- Leave space: Negative space is your friend. Let pieces breathe.
For bonus points, color-block your books or flip some backwards for a neutral look. Book snobs will be fine.
8. Refresh Furniture With New Hardware (Or Paint)

Before you ditch that sad dresser, try a hardware glow-up. Swapping knobs and pulls can change the whole vibe—think brass, matte black, or leather tabs.
Quick Furniture Facelifts
- Hardware swap: Measure screw spacing before you buy.
- Paint refresh: Sand lightly, prime, and use a foam roller for a smooth finish.
- Two-tone trick: Paint the body, leave the drawers wood. Instant designer detail.
Feeling extra? Add peel-and-stick wallpaper to drawer sides or interiors. It’s the surprise-and-delight moment you didn’t know you needed.
9. Build An Entry Drop Zone That Actually Works

First impressions matter—and so does somewhere to dump your stuff neatly. Create a mini mudroom even if you don’t have one.
Small-Space Solutions
- Wall hooks + shelf: Hang coats, stash keys, style a small tray. Done.
- Bench with baskets: Hide shoes, seat to put them on. Function wins.
- Mirror moment: A big mirror bounces light and gives you a last-look checkpoint.
Stick-on hooks and narrow consoles are game-changers for tiny apartments. No drilling, no problem.
10. Add Molding Or Trim For Architectural Interest
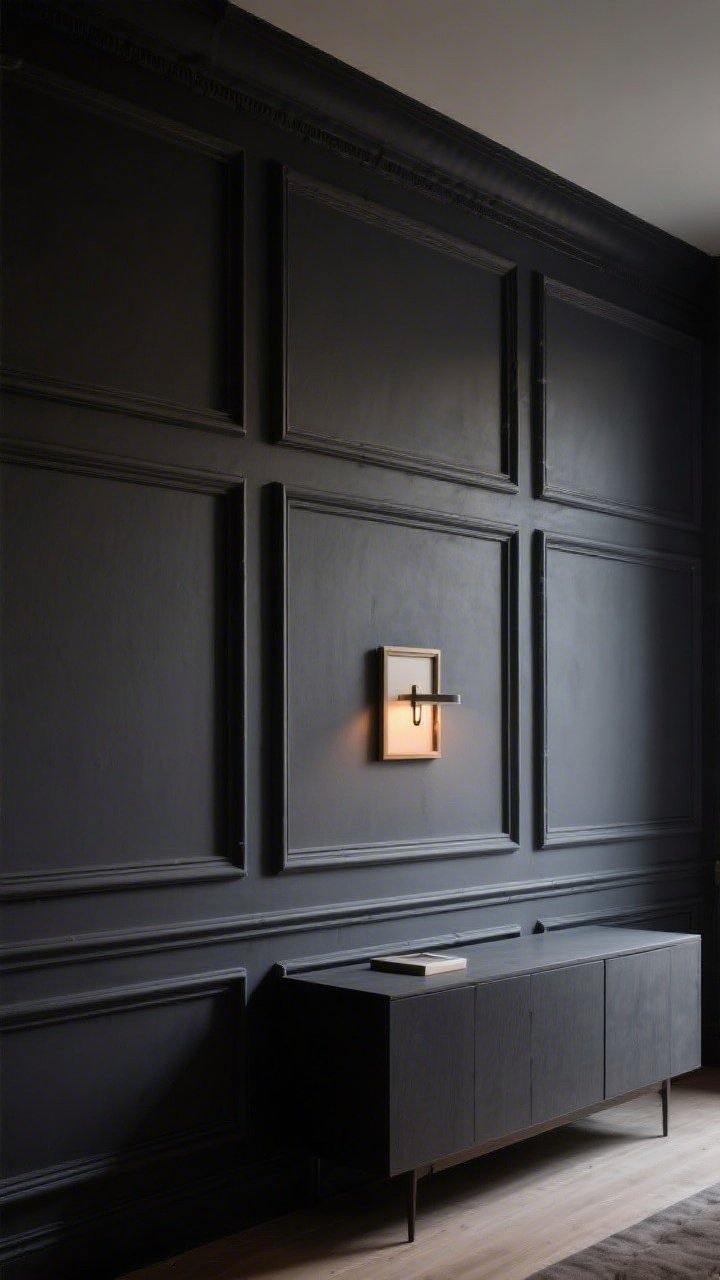
Walls feeling flat? Add picture frame molding, board-and-batten, or a chair rail. It’s surprisingly simple and makes any room feel custom.
Get The Look
- Picture frame molding: Cut trim pieces, glue and nail to the wall, then paint everything one color.
- Board-and-batten: Vertical strips make ceilings feel taller.
- Chair rail: Great for two-tone paint—dark on bottom, light on top.
Paint it all the same shade (walls + trim) for that moody, cocoon effect. Dramatic? Yes. High-maintenance? Not really.
11. Green-ify With Plants (Real Or Faux—No Judgment)
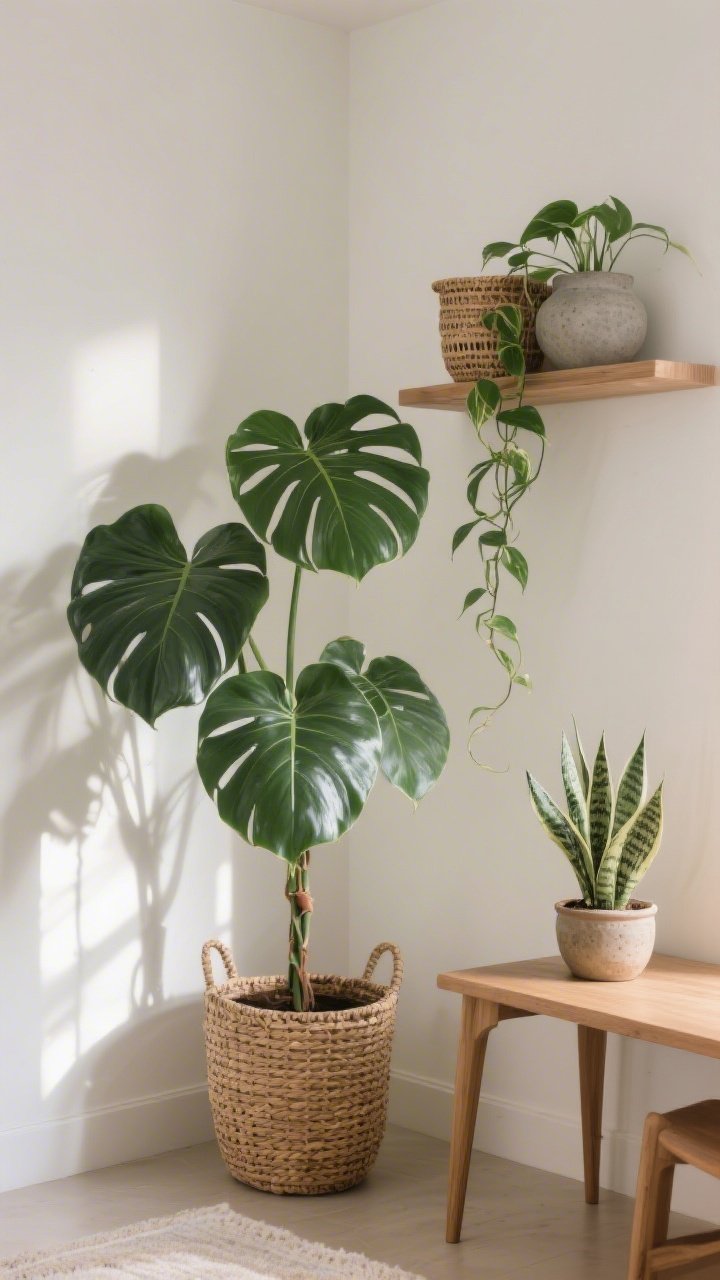
Plants are the easiest way to add texture, color, and life. Even one well-placed statement plant can transform a corner.
Plant Playbook
- Vary heights: Floor plant + tabletop + trailing shelf buddy.
- Stylish pots: Upgrade to ceramic, rattan, or concrete planters.
- Maintenance level: Snake plant, pothos, ZZ = nearly indestructible.
No green thumb? High-quality faux plants exist now. Pair with real soil or moss to sell the look. We won’t tell.
12. Create A Cohesive Color Story

If your room feels chaotic, your colors might be beefing. Build a 3-5 color palette and stick to it across textiles, art, and accessories.
How To Build Your Palette
- Choose an anchor: A rug, art piece, or bedding set. Pull colors from it.
- Use the 60-30-10 rule: 60% main, 30% secondary, 10% accent.
- Repeat tones: Echo your accent color at least three times in the room.
Pro tip: Keep metals and wood tones consistent (or at least complementary). Mixed, not messy, is the goal.
Bonus Micro-Updates That Slap
- Swap lamp shades: Drum to pleated for instant trendiness.
- Corral clutter: Trays on coffee tables and nightstands = tidier look.
- Rehang your art: Center at eye level (around 57″ from the floor). It matters.
FYI: A consistent palette doesn’t mean boring. It means your room looks intentional. Which is the whole point, right?
Shopping And Budget Tips
- Thrift first: Frames, lamps, side tables—prime DIY candidates.
- Spend where it shows: Rugs, lighting, and textiles go the distance.
- Sample sizes: Buy paint samples, swatch fabrics, and order wood finish chips before committing.
Remember: The best rooms evolve. Start with one idea, live with it, then layer in the next. That’s how you get “collected, not decorated.”
Tools You’ll Actually Use
- Painter’s tape and a decent angled brush
- Level and measuring tape (the dream team)
- Command strips for rental-safe hanging
- Staple gun for fabric and upholstery hacks
- Stud finder (for shelves and heavy mirrors—safety first)
There you have it—12 DIY room makeover ideas anyone can try and actually finish this weekend. Pick one, grab your coffee (or your paintbrush), and get started. Your future self—aka the person basking in your glow-up—will thank you.
Feel Confident About Your Room Makeover
Make decisions easily with a clear checklist system.