11 Step-by-step Budget Room Makeover Ideas That Save Money Fast
Posted in :
You don’t need a designer’s budget to make your space look like it belongs on a Pinterest board. Seriously. With a few smart swaps and a little elbow grease, you can pull off a room makeover that feels fresh, cozy, and custom—without scary credit card bills. Ready to transform your space one doable idea at a time?
1. Paint Like You Mean It
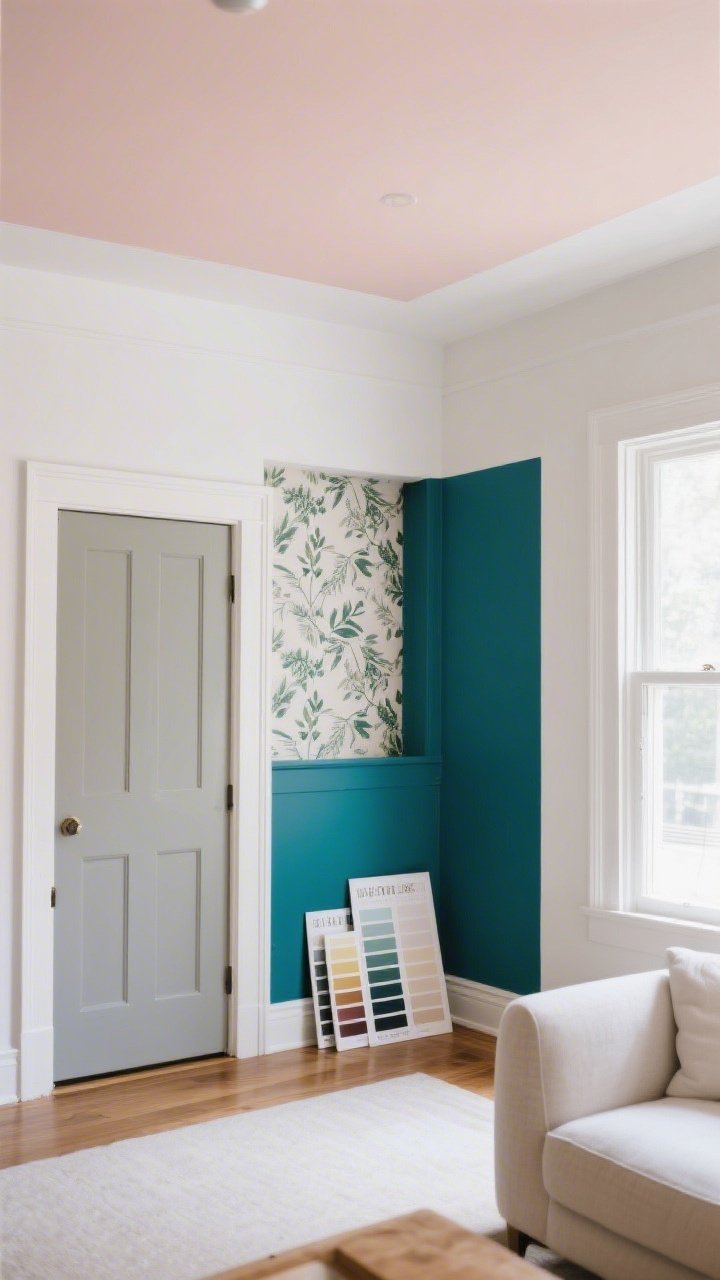
Nothing flips a room’s mood faster than **paint**. Go bold on one wall, or keep things airy with a warm white. If you rent, try removable wallpaper on a feature wall—same impact, zero drama.
Pro Moves
- Sample first: Paint swatches on poster board and move them around the room to see colors in different light.
- Tap into trim: Painting baseboards or doors in a soft contrast color looks luxe on the cheap.
- Don’t forget the ceiling: A pale tint above can make the room feel taller and more designed.
FYI: Satin for walls, semi-gloss for trim—thank me later when cleanup is a breeze.
2. Rearrange for Flow (Zero Dollars, Big Impact)
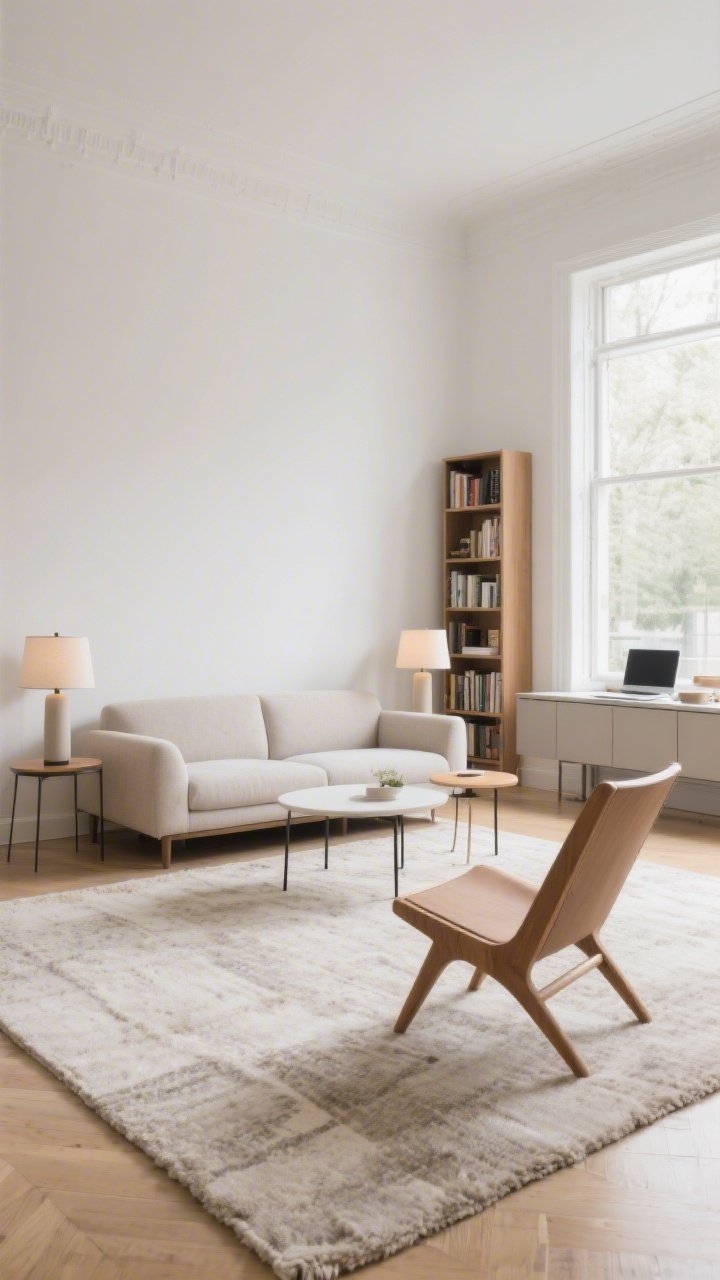
Before buying anything, **shop your layout**. Many rooms feel cramped because furniture is hugging the walls or blocking pathways. Try floating the sofa, angling a chair, or creating zones for lounging, working, and dining.
Quick Wins
- Anchor with a rug: Make sure front legs of seating are on the rug. It pulls the space together.
- Balance height: Mix tall pieces (bookcases, floor lamps) with low ones to avoid a “top-heavy” corner.
- Create symmetry: Pair lamps or chairs to calm visual clutter and make it feel intentional.
Take photos after each tweak. It’s easier to compare layouts—and catch weird angles—on your phone.
3. Upgrade Lighting In Layers
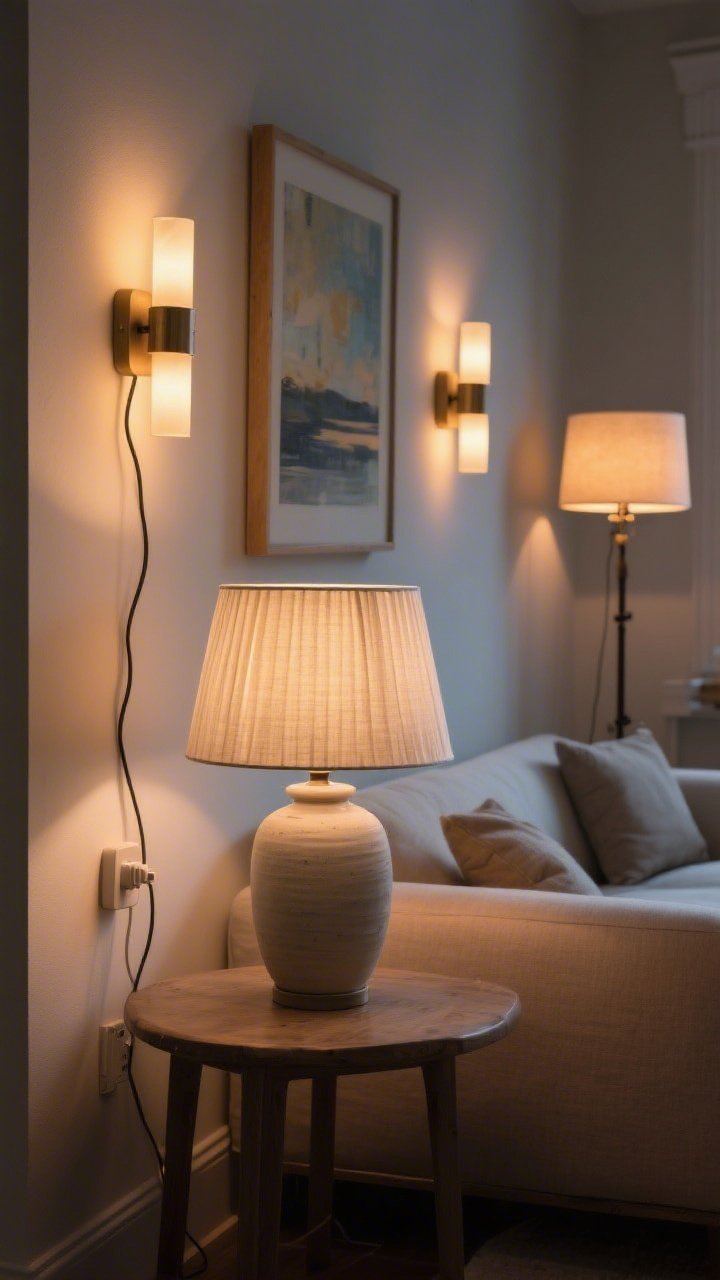
Overhead lights alone? Hard pass. You want **layers**: overhead, task, and accent. This instantly makes any room look designed (and your selfies look better—just saying).
Budget Lighting Ideas
- Swap lampshades: A linen or pleated shade makes basic lamps look designer-y.
- Try plug-in sconces: No wiring needed. Hide cords with a neat cord cover or paintable channel.
- Warm bulbs only: 2700K-3000K keeps things cozy, not hospital chic.
- Use dimmers: Plug-in dimmer switches are cheap and turn any lamp into ambient magic.
One lamp per 50 square feet is a decent rule of thumb. More glow, less glare.
4. Curate Your Wall Art Without Spending Much
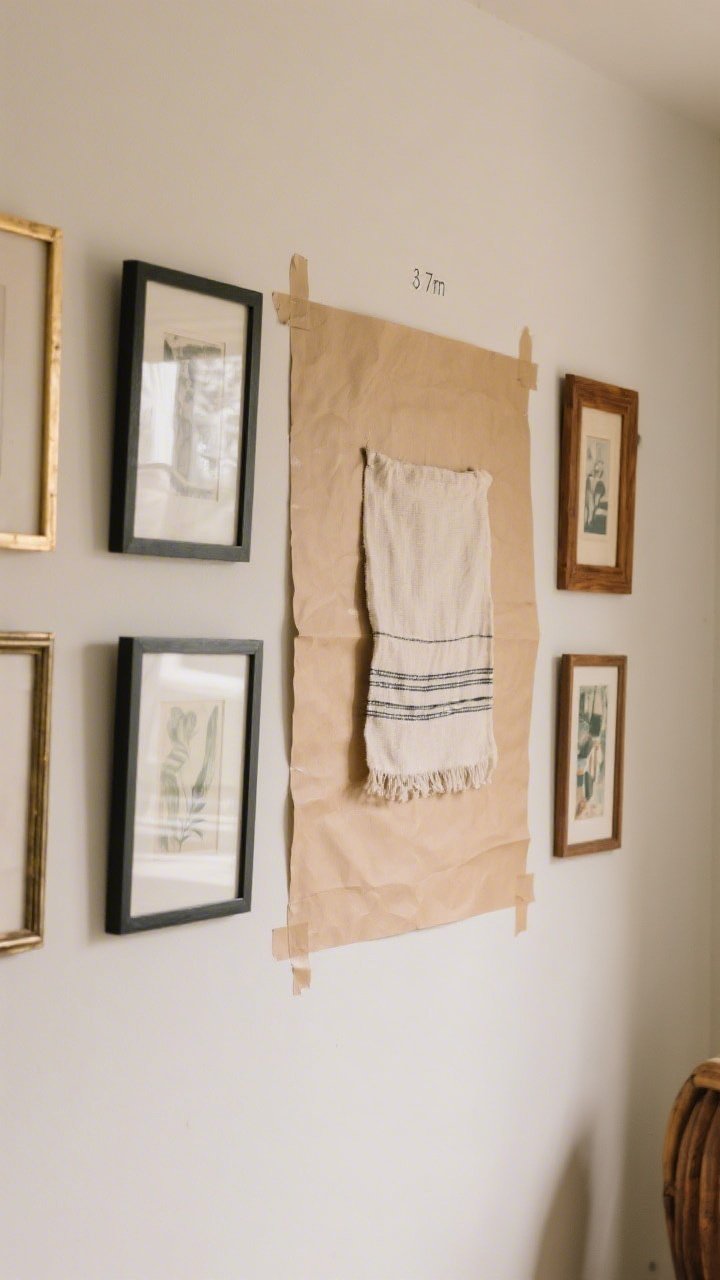
Blank walls = missed opportunities. You don’t need pricey art; you need **personality**. Think prints, textiles, thrifted frames, or even pretty pages from a coffee table book.
Gallery Wall, The Budget Way
- Thrift frames: Spray-paint them all black, gold, or wood tone to keep it cohesive.
- Printable art: Etsy and museum archives have gems—print at home or at a copy shop.
- Use a layout template: Cut kraft paper to frame sizes, tape to the wall, and adjust before you drill.
Pro tip: Hang art so the center is about 57 inches from the floor. It’s the sweet spot for most rooms.
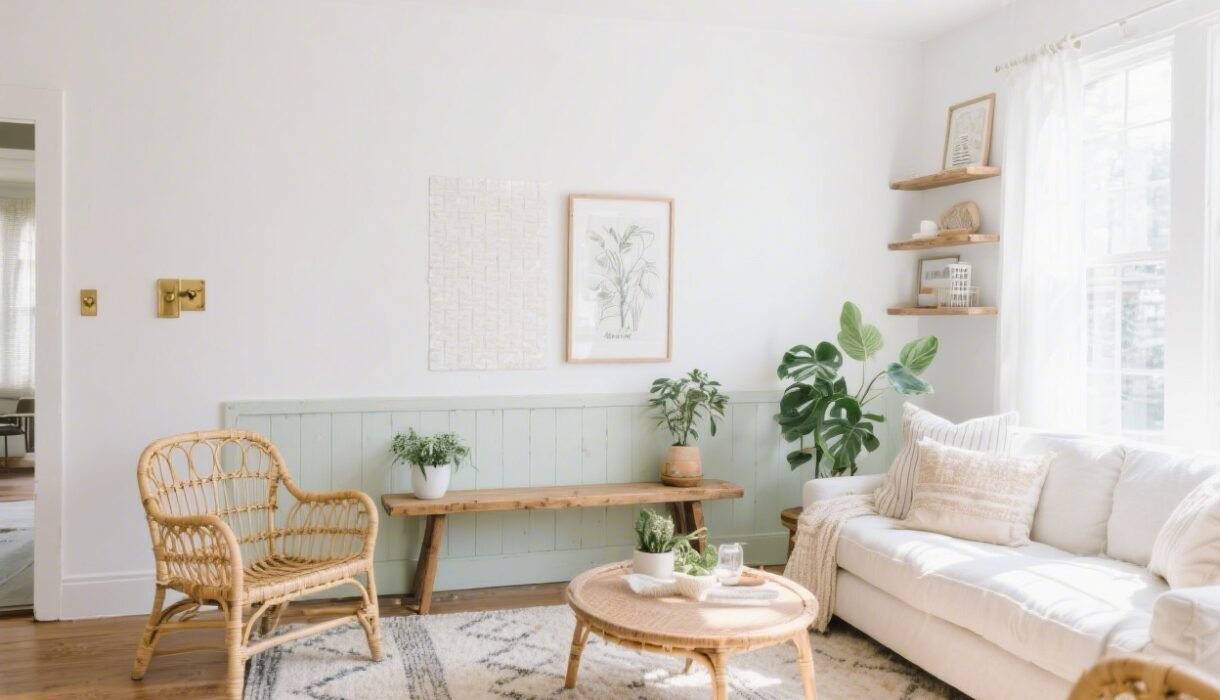
5. Textiles: Layer Like A Stylist
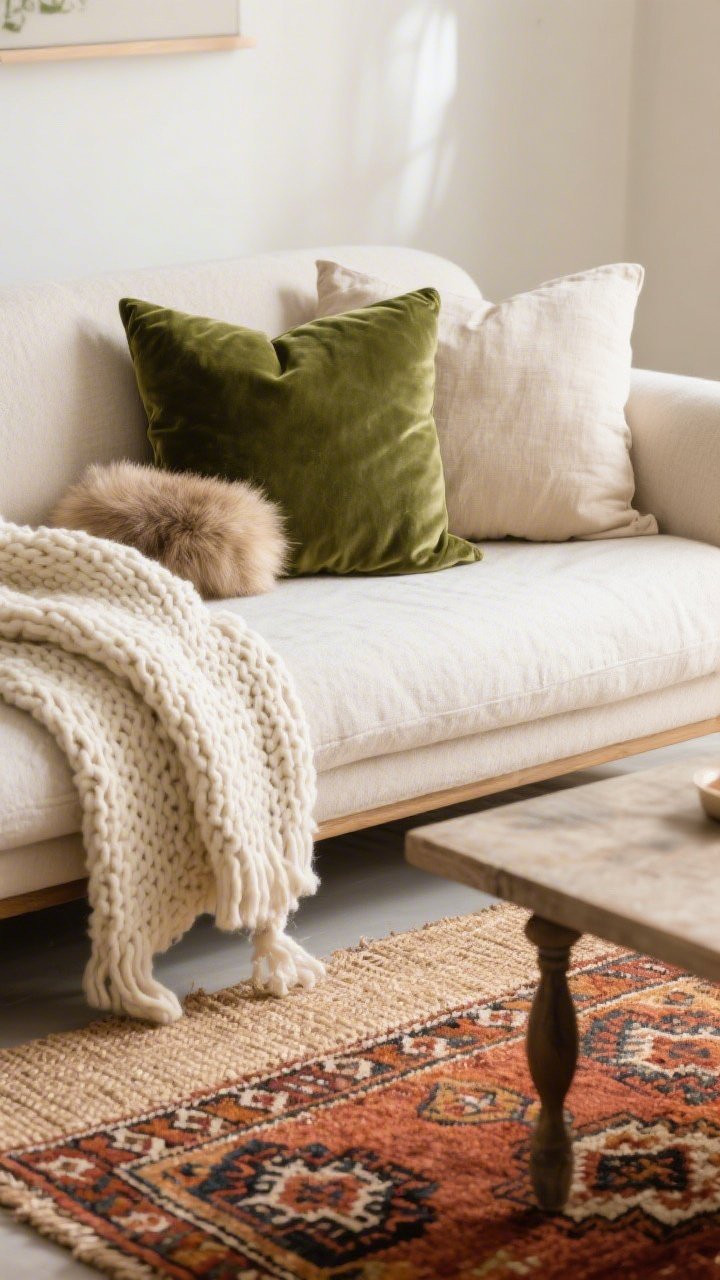
If your room feels flat, it’s probably missing **texture**. Add a throw, swap pillow covers, and layer rugs. Yes, even over carpet. It adds warmth and hides sins (looking at you, mystery stain).
Texture Tricks
- Mix fabrics: Pair nubby knits, soft velvet, linen, and faux fur for dimension.
- Change pillow covers, not inserts: Cheaper, easier, and you can rotate with the seasons.
- Rug on rug: Pop a vibrant kilim or jute over a wall-to-wall carpet for instant character.
Stick to a simple palette—two main colors plus one accent—to keep things cohesive, not chaotic.
6. DIY Furniture Glow-Up
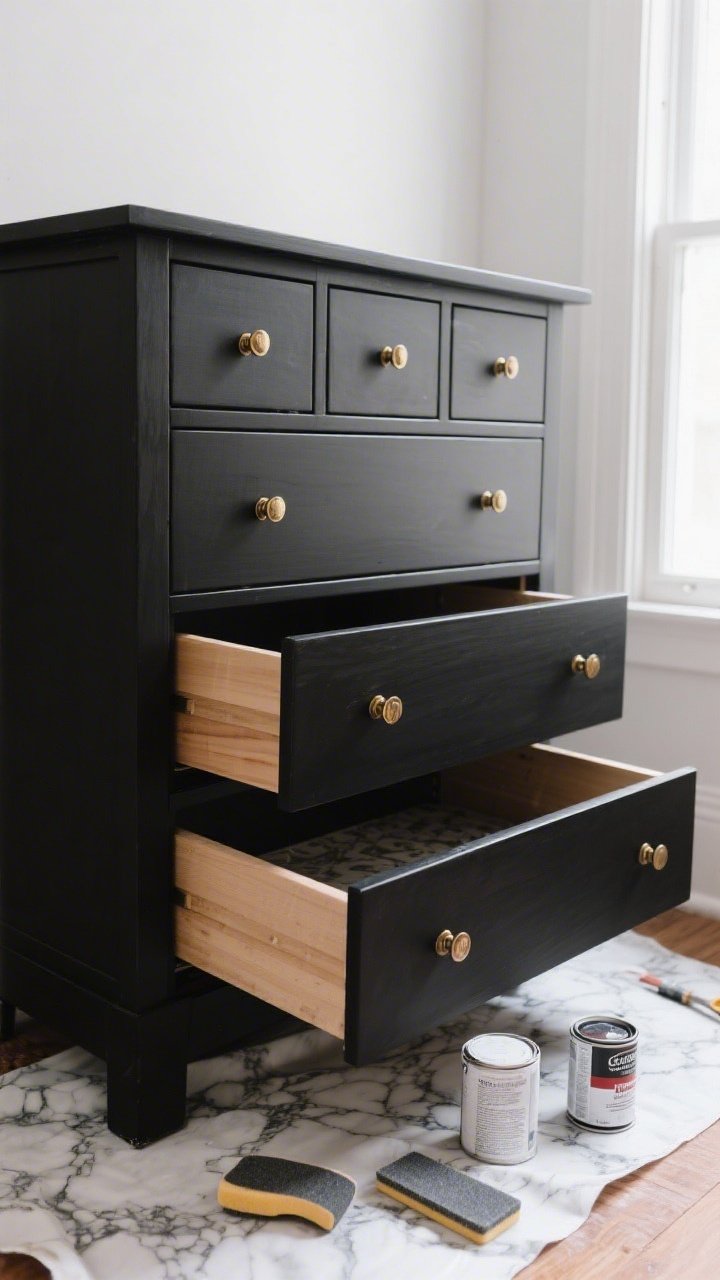
Before you toss that tired dresser, **flip it**. A quick sand, a new stain, or a coat of paint can turn “meh” into “whoa.” Hardware changes are the cherry on top.
Refinish Recipe
- Prep: Clean, sand lightly, and fill dings with wood filler. Skipping prep = regret.
- Prime smart: Use bonding primer if painting over slick finishes.
- Hardware hack: Update pulls; if holes don’t match, use backplates to hide old ones.
- Contact paper: Marble-look or wood-grain on shelves and drawer liners = instant polish.
IMO, a matte black dresser with brass knobs looks high-end 100% of the time.
7. Window Treatments That Don’t Look Cheap
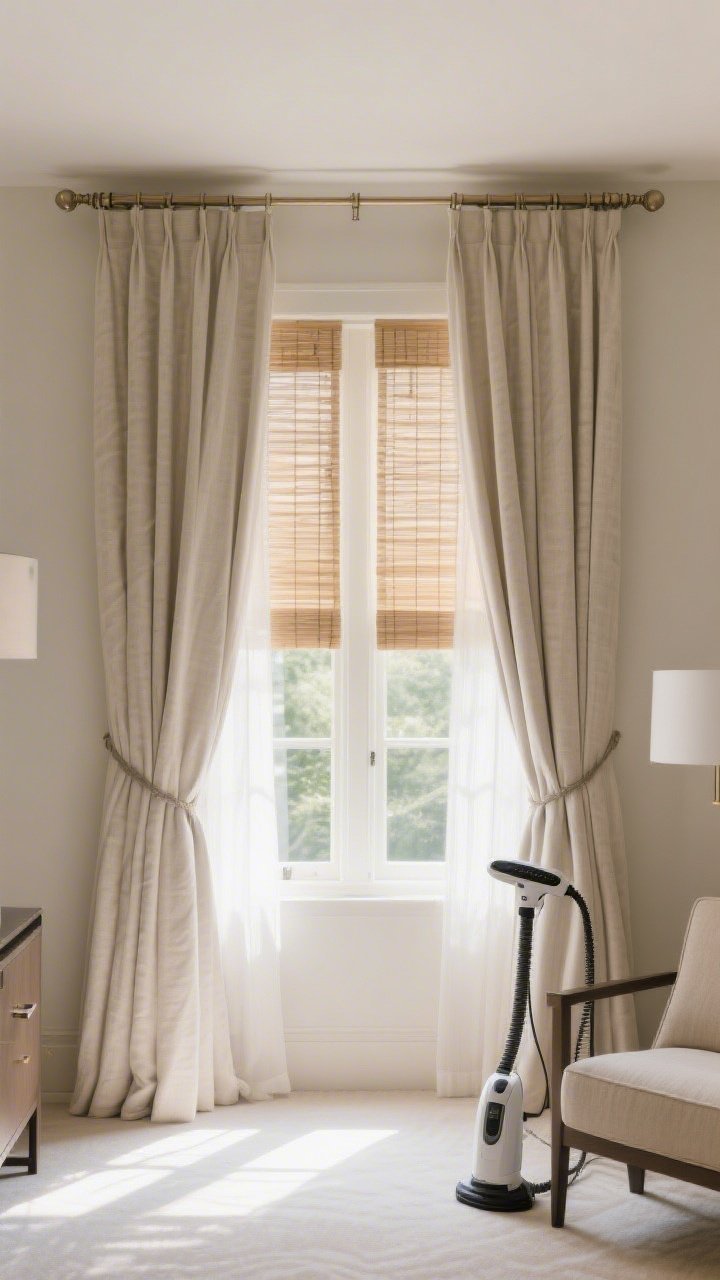
Skimpy curtains are like pants that are too short. Not cute. Hang **curtain rods high and wide** to fake taller windows and fuller drape.
Window Wins
- Go long: Curtains should kiss the floor or barely puddle—no mid-ankle situations.
- Double up: Two panels per side (or lined panels) = hotel-level fullness.
- Layer shades + drapes: A simple bamboo shade behind linen panels looks custom.
- Steam, don’t iron: A handheld steamer makes inexpensive panels look luxe fast.
Neutral linen-look panels work in almost any room and hide their price tag beautifully.
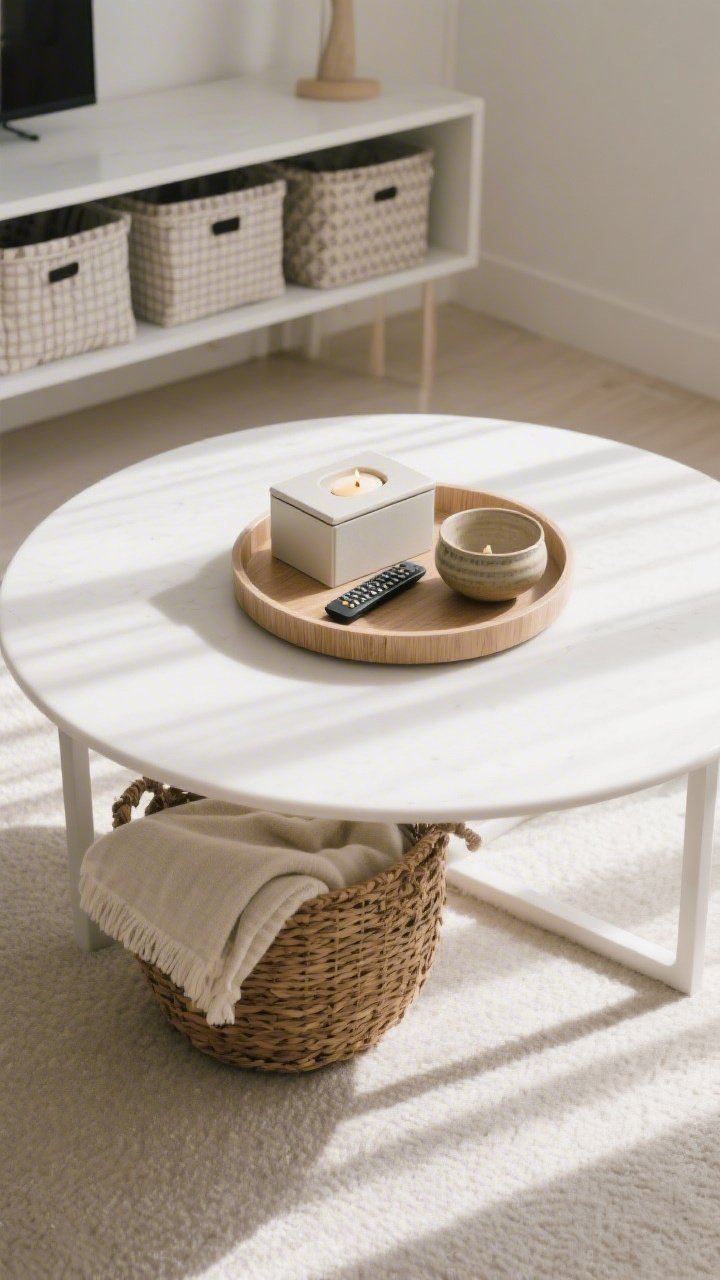
8. Declutter Like You Mean Business
Sometimes the best makeover is **subtracting**. Clear surfaces, edit decor, and stash the extras. Your favorite pieces finally get to breathe—and shine.
Declutter Sprint
- One surface at a time: Coffee table, console, nightstand—keep only what you love.
- Corral with trays: A tray makes a bunch of small items look intentional, not messy.
- Hide the chaos: Baskets for blankets, lidded boxes for remotes, pretty bins for kids’ gear.
- Rotate decor: Store extras and “shop” your stash seasonally to keep it fresh.
Less stuff = bigger-feeling room. It’s basically free square footage.
9. Add Architectural Charm (Fake It Till You Make It)
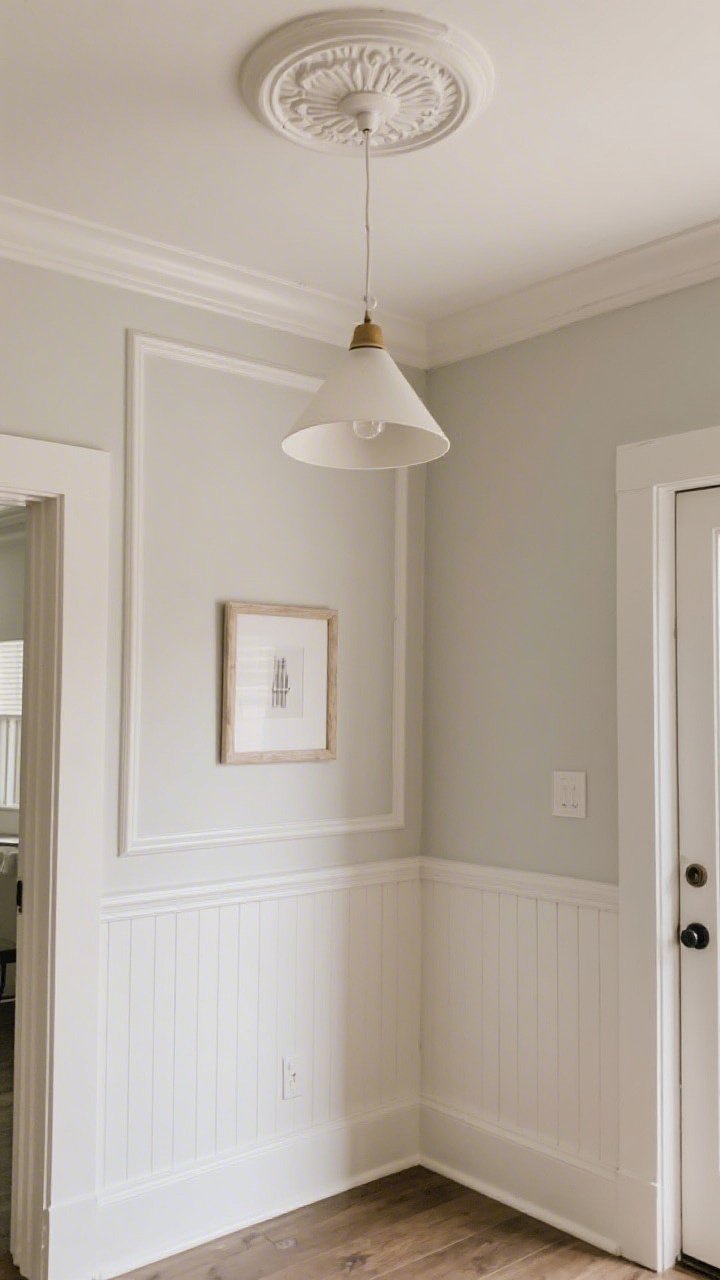
Can’t afford a remodel? Cool, we’ll **fake millwork**. A little trim goes a long way in making a space feel tailored and expensive.
Easy Architectural Add-Ons
- Picture-frame molding: Use trim pieces to create rectangles on the wall; paint everything one color.
- Board and batten: Simple, dramatic, and renter-friendly with Command strips for thinner pieces.
- Ceiling medallions: Lightweight and paintable—suddenly that basic light fixture looks intentional.
- Peel-and-stick “shiplap”: Great for entryways or a headboard wall without major tools.
Paint trim and walls the same shade for a seamless, designer look—especially in small rooms.
10. Style Your Surfaces With Intention
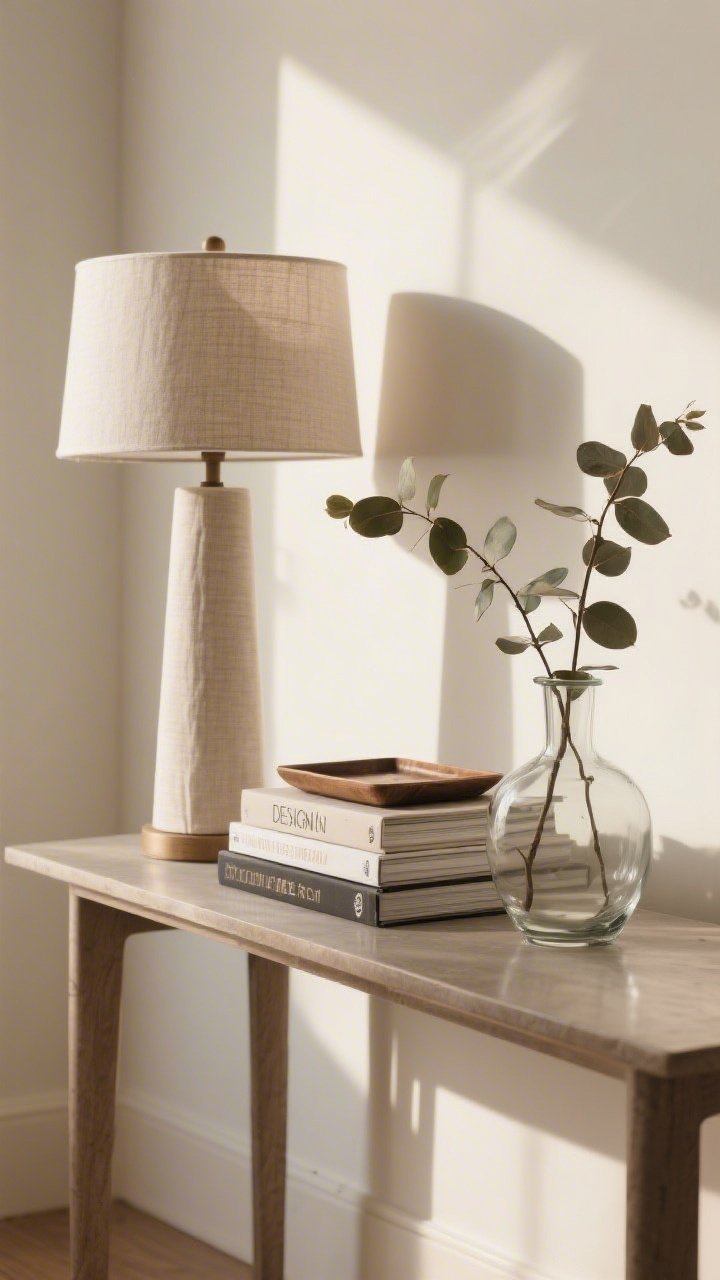
Nightstands, coffee tables, consoles—these are where **styling** pays off. You don’t need expensive objects; you need a plan.
Three-Part Styling Formula
- Height: A lamp or tall vase anchors the vignette.
- Layer: Books, a tray, or a small stack to add levels.
- Life: Something organic—plant, flowers, branch, or a bowl of fruit.
Keep it odd: group items in threes or fives. And leave negative space so the eye can rest. Your surfaces aren’t a museum gift shop—edit, edit, edit.
11. Bring In Greenery (Real or Very Convincing Faux)
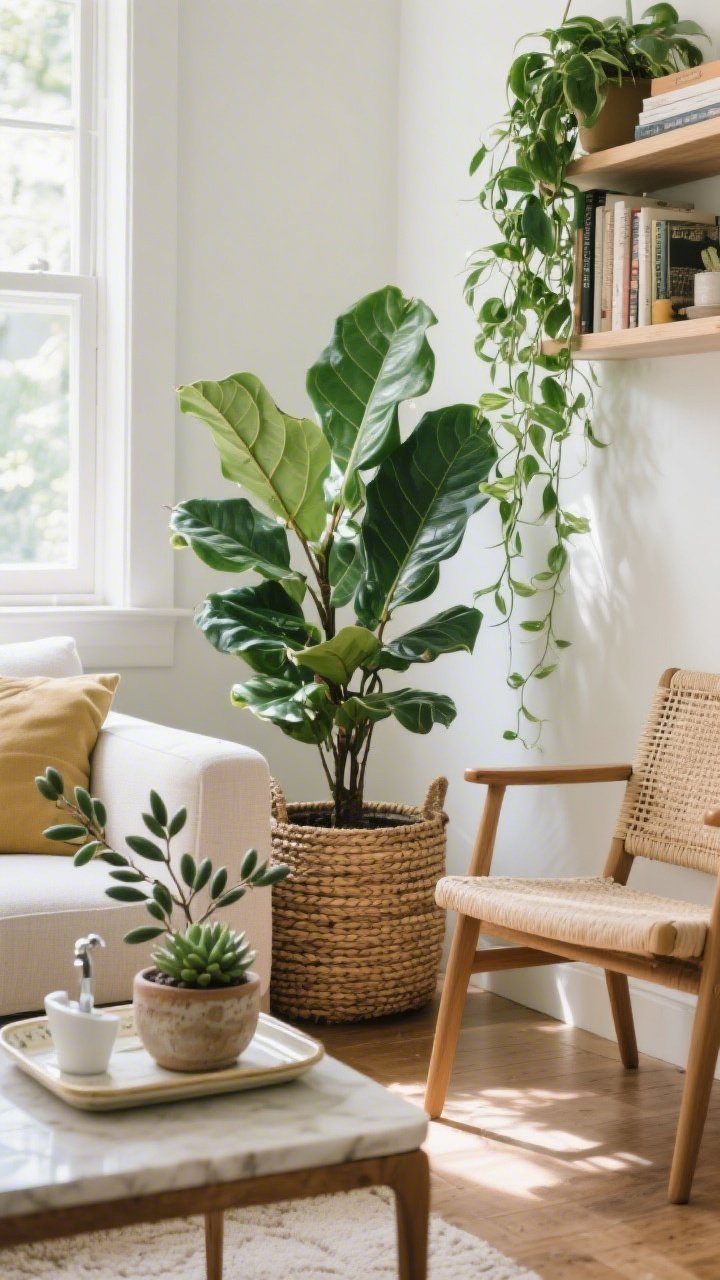
Plants make rooms feel alive. Even the sparsest space gets an instant upgrade with **greenery**. If you don’t have a green thumb, choose low-maintenance or high-quality faux.
Plant Power
- Statement plant: One taller plant (fiddle leaf fig, rubber plant, olive tree) in a woven basket = instant wow.
- Mini moments: Small plants on shelves or the bathroom vanity add freshness without clutter.
- Fake it right: Choose faux with wired stems and realistic color; place out of direct touch zones.
- Cachepot trick: Drop nursery pots into pretty planters—no need to repot immediately.
Real talk: a $15 pothos trailing off a bookshelf looks like a million bucks with zero effort.
Final Boost: Snap a “before” photo right now. Tackle two or three ideas this weekend, then take an “after.” You’ll be shocked at how different your space feels—lighter, cozier, more you. And you did it without emptying your wallet. Go you.
Transform Your Room Without Overspending:
This workbook helps you organize your ideas into a simple plan you can follow from start to finish.