15 Budget Room Makeover Checklist Steps That Actually Work (and Look Luxe)
Posted in :
Ready to make your space look designer-level without lighting your wallet on fire? Good. These 15 budget room makeover checklist steps are honestly all you need. We’re talking quick wins, smart swaps, and a few sneaky design tricks your fave influencers don’t want you to know. Let’s make your room look stunning—fast.
1. Start With a Ruthless Edit
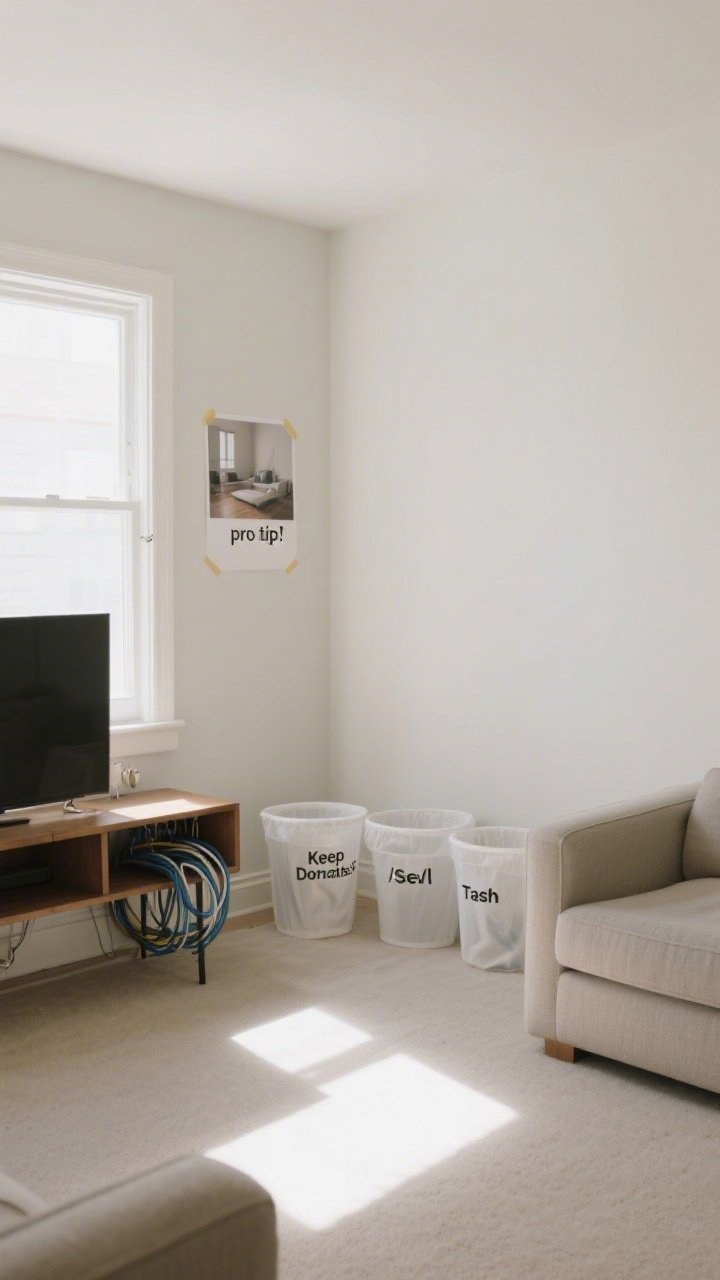
Before you add anything, subtract. Clutter is the fastest way to make a room feel smaller, darker, and weirdly chaotic. Plus, editing costs exactly zero dollars.
Quick Wins
- Pull everything out that’s not essential. If you don’t love it or use it, it goes.
- Make three piles: Keep, Donate/Sell, Trash.
- Hide cords with cable sleeves or simple hooks along the back of furniture.
Pro tip: Take a photo of your room after you edit—it’s easier to spot what still looks heavy or off-balance through a camera lens.
2. Set a One-Sentence Vision
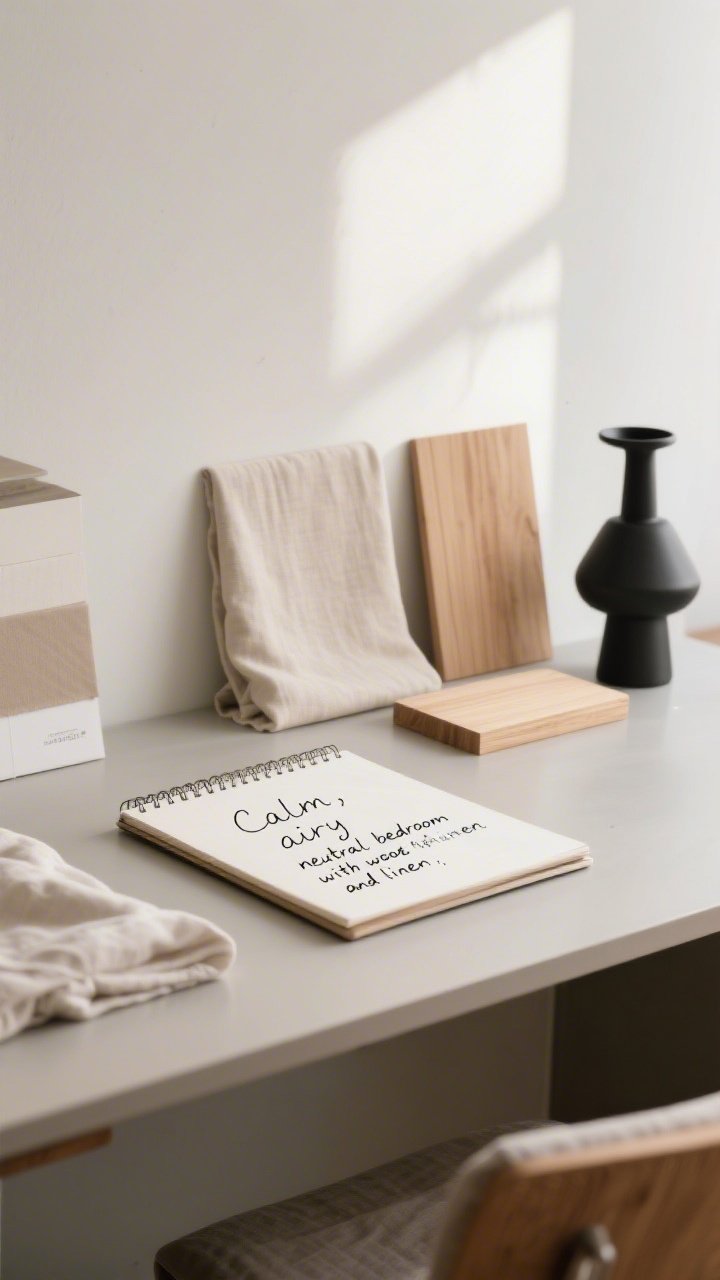
Projects fall apart when the vibe is “everything I like.” Pick a direction. A one-sentence style goal keeps your choices tight and budget on track.
Try These Prompts
- “Calm, airy, neutral bedroom with wood and linen.”
- “Moody, cozy living room with vintage touches.”
- “Light, plant-filled workspace with black accents.”
Use that sentence like a filter. If it doesn’t fit, skip it—no matter how cute or on sale.
3. Create a Free “Mood Board” (The Easy Way)
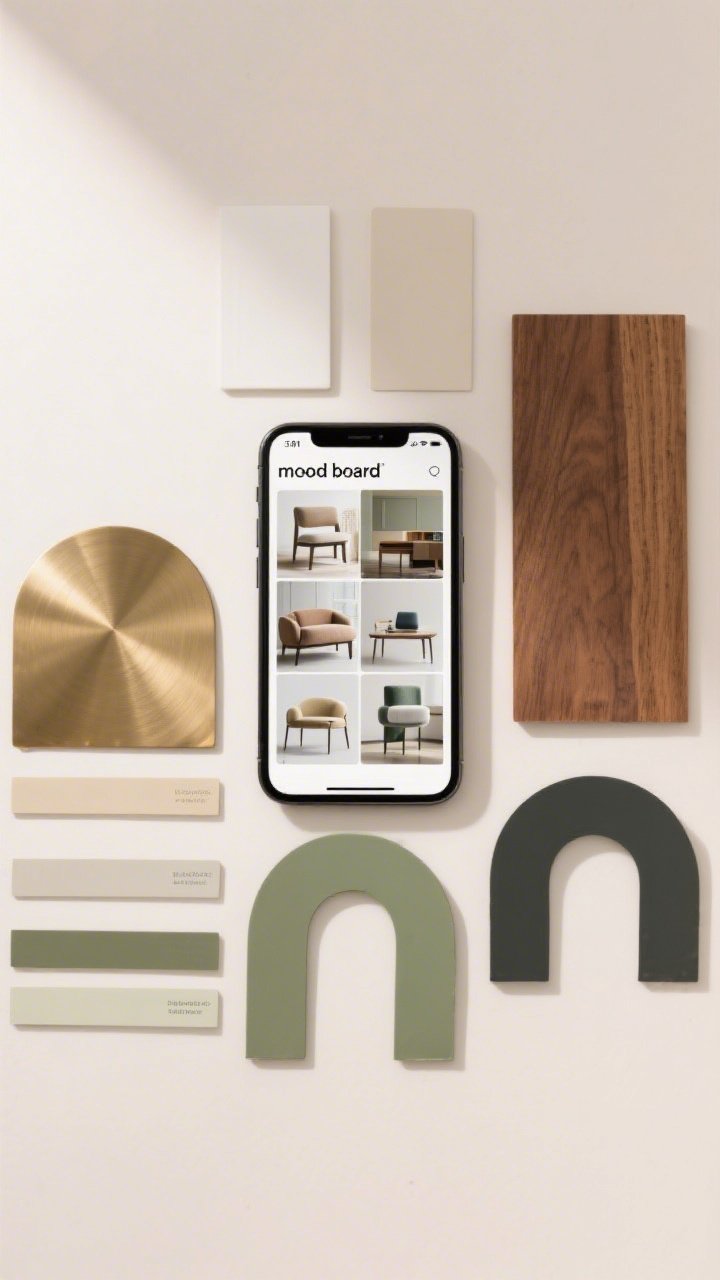
No need for fancy software. Screenshot items you already own and a few wish-list pieces. Drop them into a single collage on your phone. Done.
Keep It Cohesive
- Choose one metal and one wood tone to repeat.
- Pick a simple palette: 2 neutrals + 2 accent colors.
- Repeat patterns or shapes: arches, stripes, rounded corners, etc.
FYI: Repetition is what makes a room look decorated on purpose, not just decorated.
4. Rework Your Layout for Flow
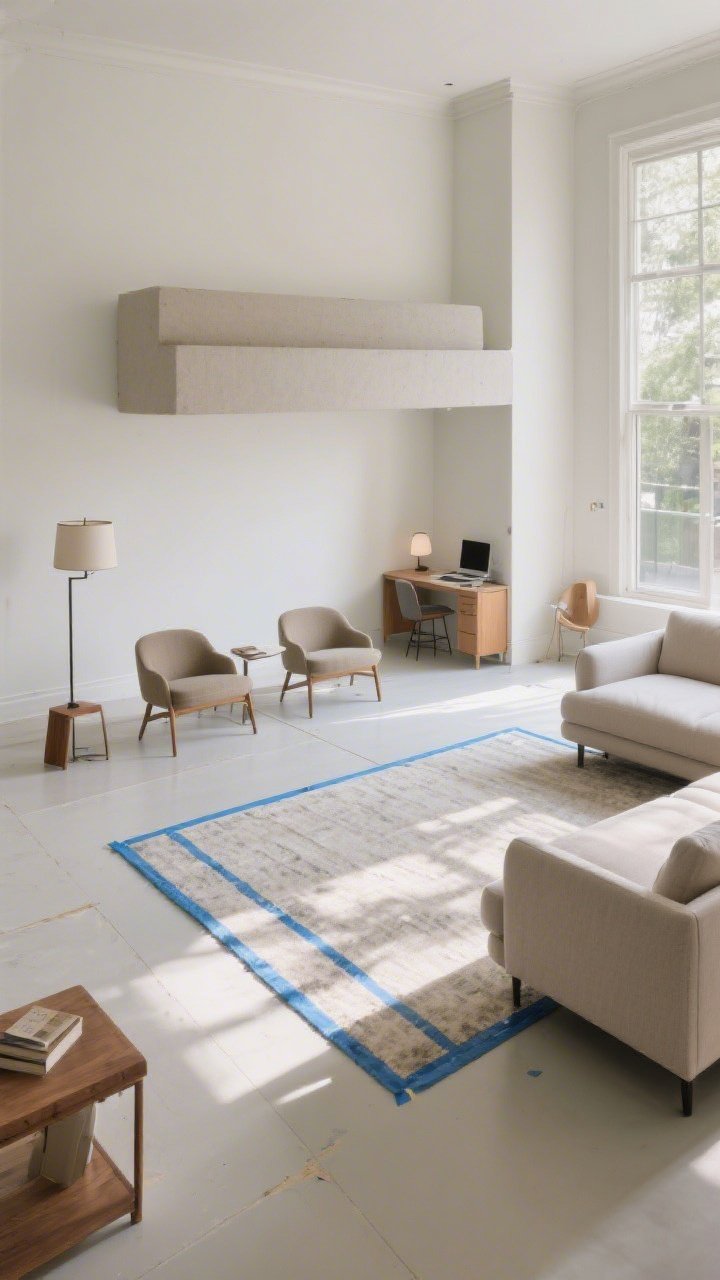
Rearranging = free impact. Most rooms feel off because furniture is clinging to walls or blocking sight lines. Move pieces until you can walk through without dodging a leg or lamp.
Layout Tricks
- Float the sofa with space behind if your room allows—it feels upscale.
- Create zones: conversation area, reading nook, work corner.
- Match rug size to layout: front legs of furniture on the rug or all off—don’t straddle weirdly.
Use tape to map rug size and new furniture placements before you move the heavy stuff. Your back will thank you.
5. Paint: High-Impact, Low-Cost
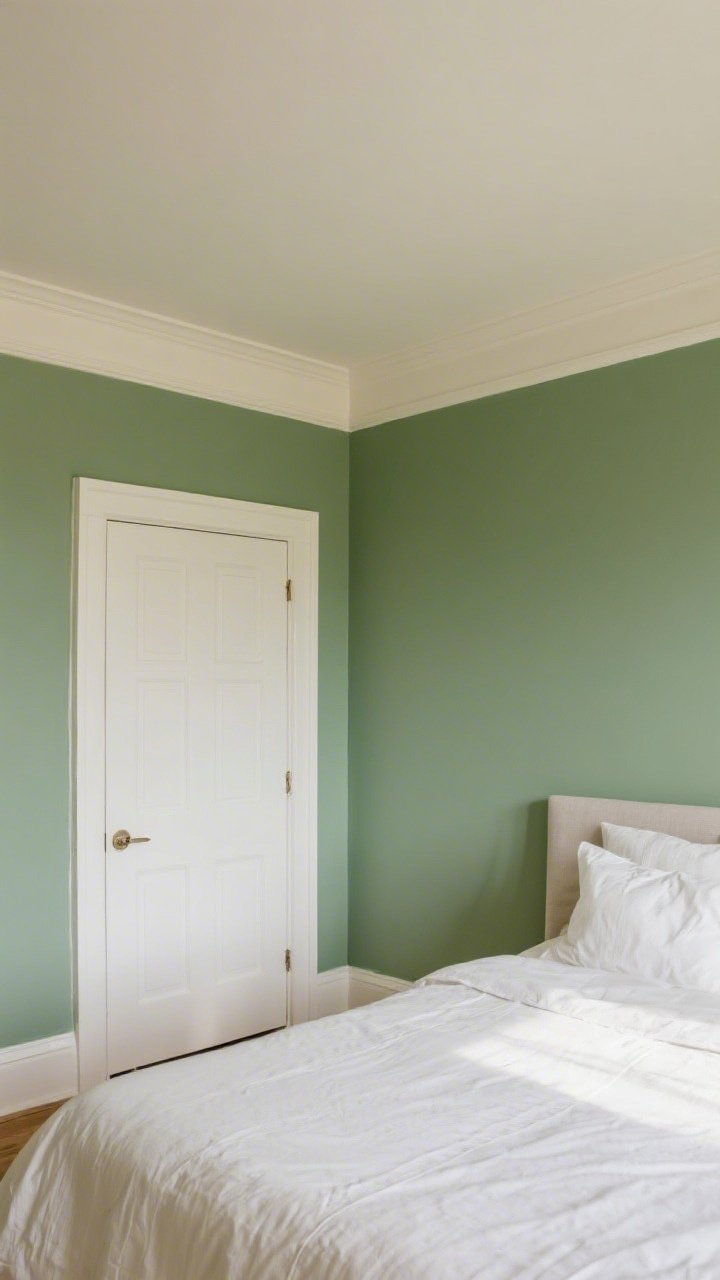
Paint is magic. A gallon can change everything: mood, light, even how big the room feels. Consider soft whites, earthy beiges, gentle greens, or deep charcoals for drama.
Paint Moves That Work
- One-wall focal: choose the wall behind your bed or sofa.
- Color drench: paint walls, trim, and doors the same shade for a cocoon feel.
- Ceiling pop: a pale tint or moody hue draws the eye up.
Don’t forget doors and trim—they’re the unsung heroes of a pro-looking finish.
6. Lighting: Layer It Like a Stylist
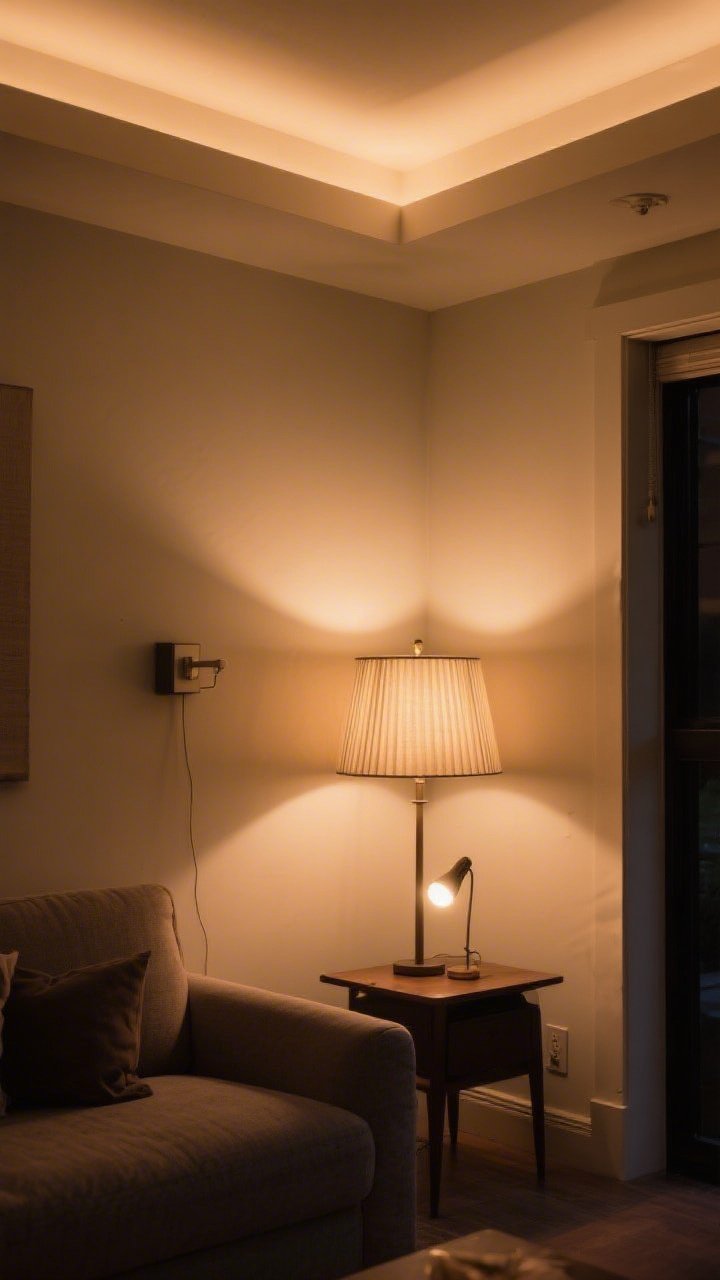
Overhead lighting alone is a vibe-killer. You want three layers: ambient (overhead), task (reading/desk), and accent (glow-y corners).
Affordable Upgrades
- Plug-in sconces for instant sophistication—no electrician needed.
- Lampshade swap: choose linen or pleated shades for texture.
- Warm white bulbs (2700–3000K) for cozy, flattering light.
Place a lamp in the darkest corner. Boom—room feels bigger and more intentional.
7. Textiles: Layer Texture Like a Pro

When in doubt, add texture. It’s the fastest way to make budget pieces look luxe. Think chunky knits, nubby linen, woven jute, and soft velvets.
Checklist
- Throw pillows: mix sizes (20″, 18″, lumbar) and textures; keep colors cohesive.
- Blankets: drape casually over the arm or end of the bed.
- Rugs: layer a patterned rug over a large natural fiber base to save money.
Pro move: Use a pillow insert that’s one size larger than the cover. Looks plush, not sad.
8. Window Treatments That Don’t Scream Rental
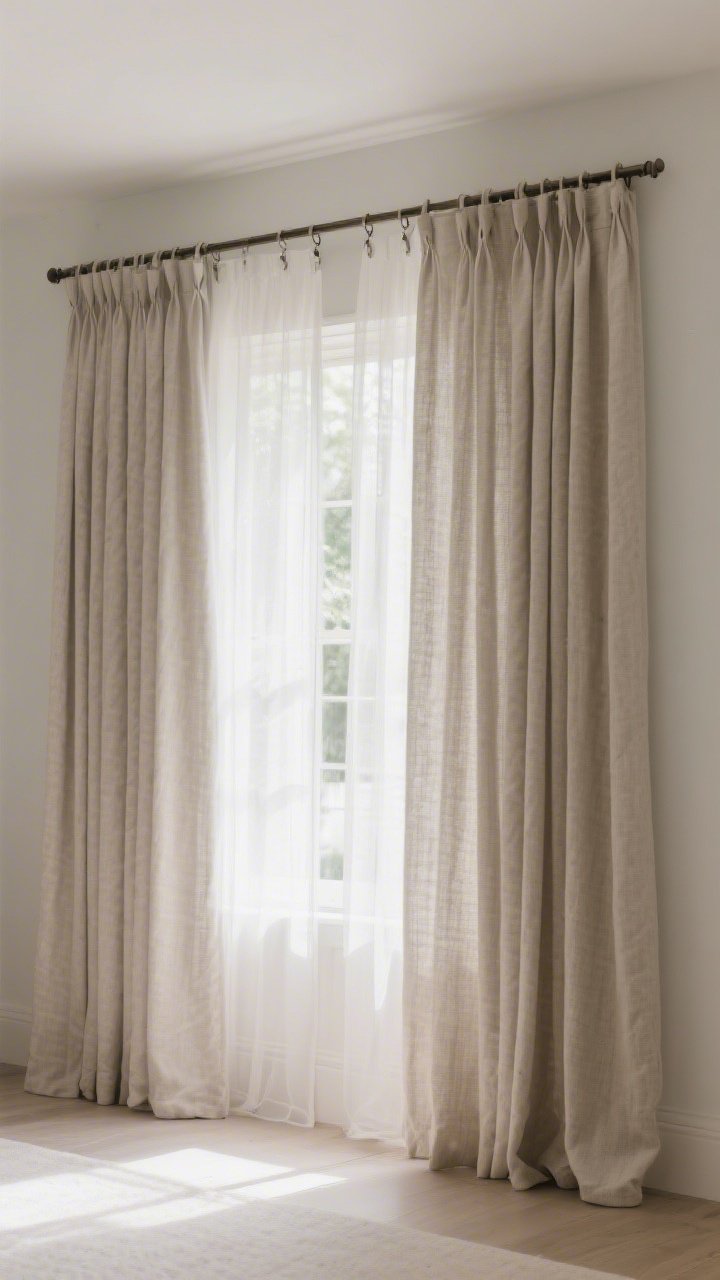
Even basic windows can look grand with the right trick. Hang curtains high and wide to make ceilings look taller and windows look bigger.
Save Without Looking Cheap
- Use curtain clips to fake a custom drape from budget panels.
- Opt for linen-look or cotton—skip shiny polyester when possible.
- Double rods for sheer + blackout if you need light control and softness.
Match curtain color to your wall or trim for a calm, polished vibe.
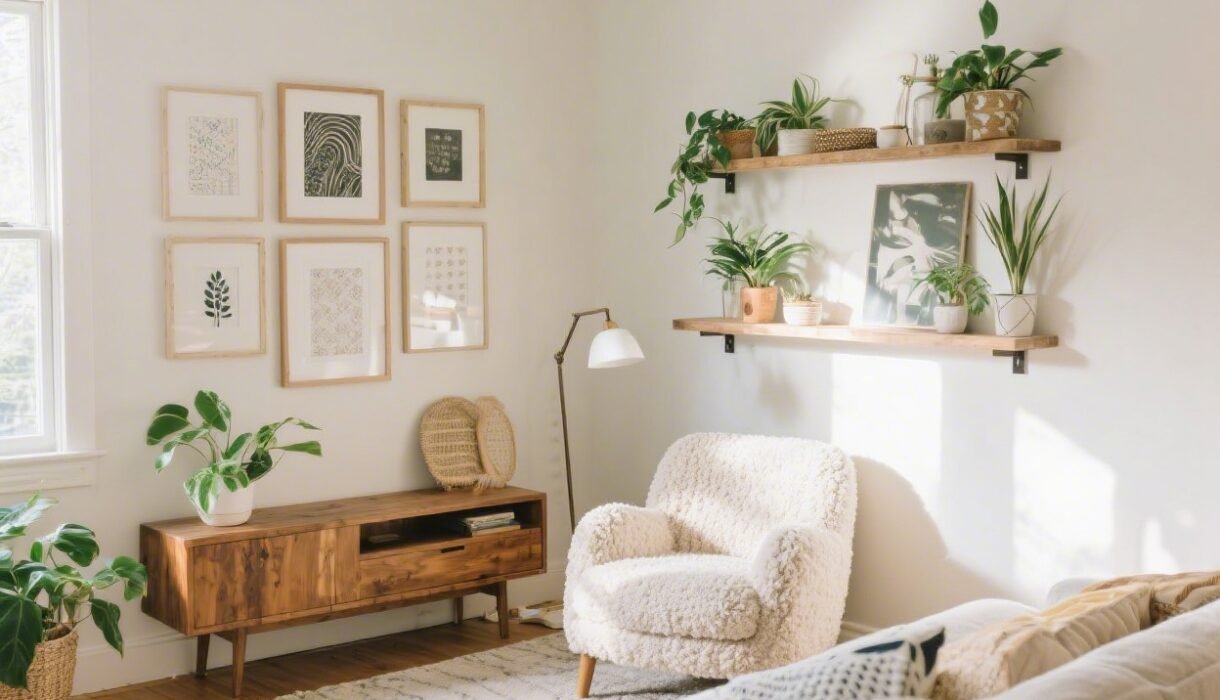
9. Art That Feels Personal (And Not Pricey)
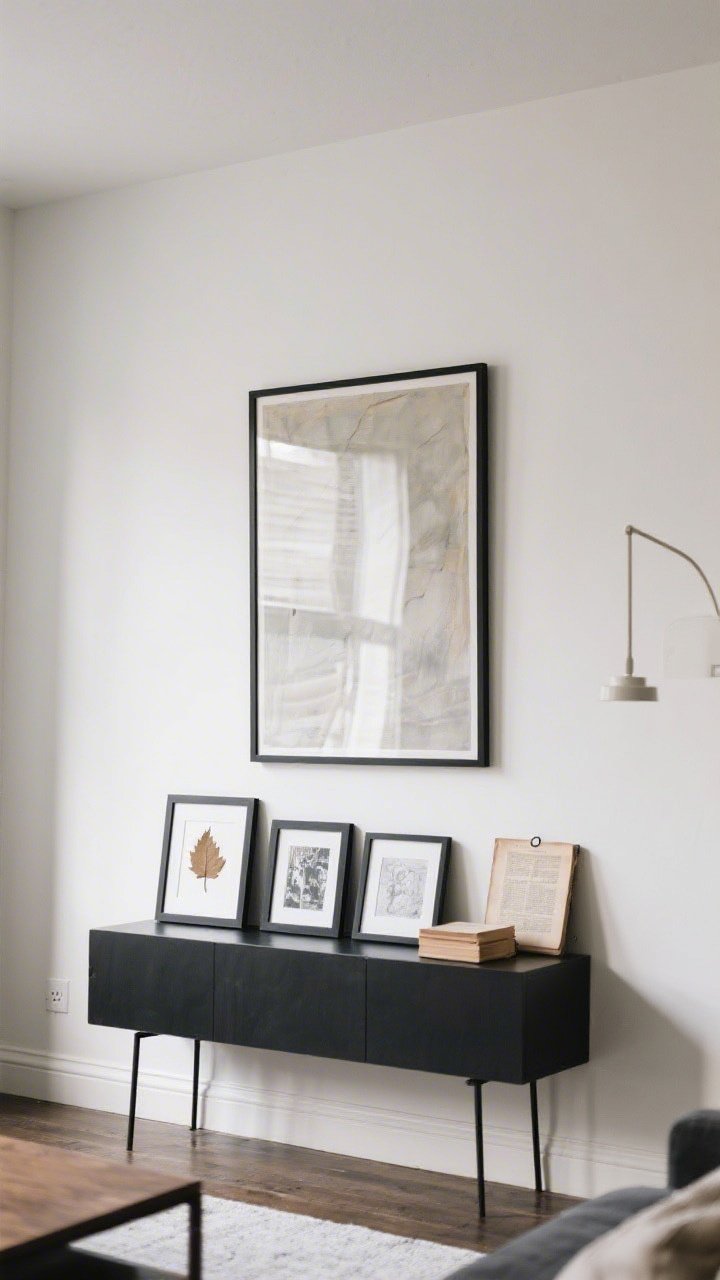
Art finishes a room. It doesn’t have to be fancy, just intentional. Think prints, framed fabric, vintage book pages, or your own photography.
Smart Art Tips
- Scale matters: one big piece > five tiny pieces that read as clutter.
- Gallery wall: keep frames consistent or colors cohesive.
- Skip nails with command strips if you’re renting.
Frame textures: a pressed leaf, a scarf, a map. Easy, cheap, meaningful. IMO, personal beats expensive every time.
10. DIY Your Furniture Glow-Up
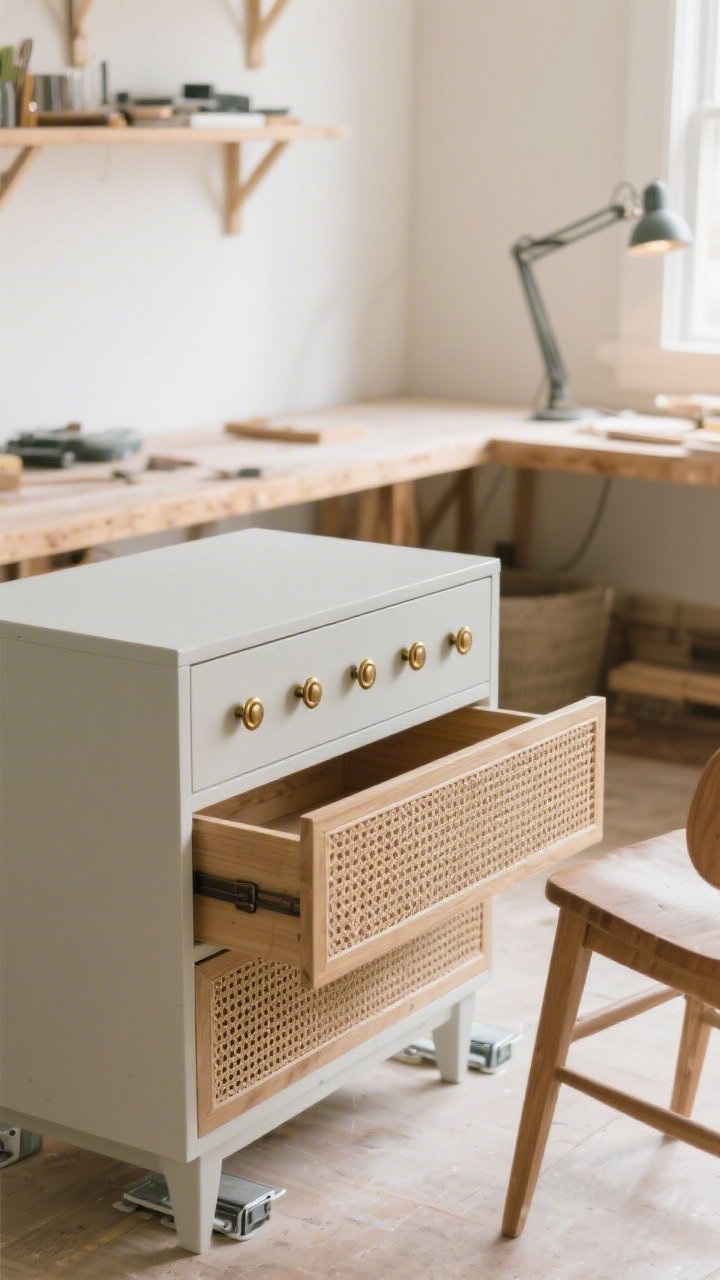
Sometimes your room needs new furniture. Other times, it just needs new finishes. Enter paint, hardware, and contact paper.
Upgrade Ideas
- Paint outdated wood in a satin finish for a modern look.
- Swap knobs and pulls—choose one metal tone and repeat it around the room.
- Use wood-look vinyl wrap or cane webbing to refresh drawer fronts.
Also: Furniture sliders are the MVPs of rearranging. They’re like socks for your sofa.
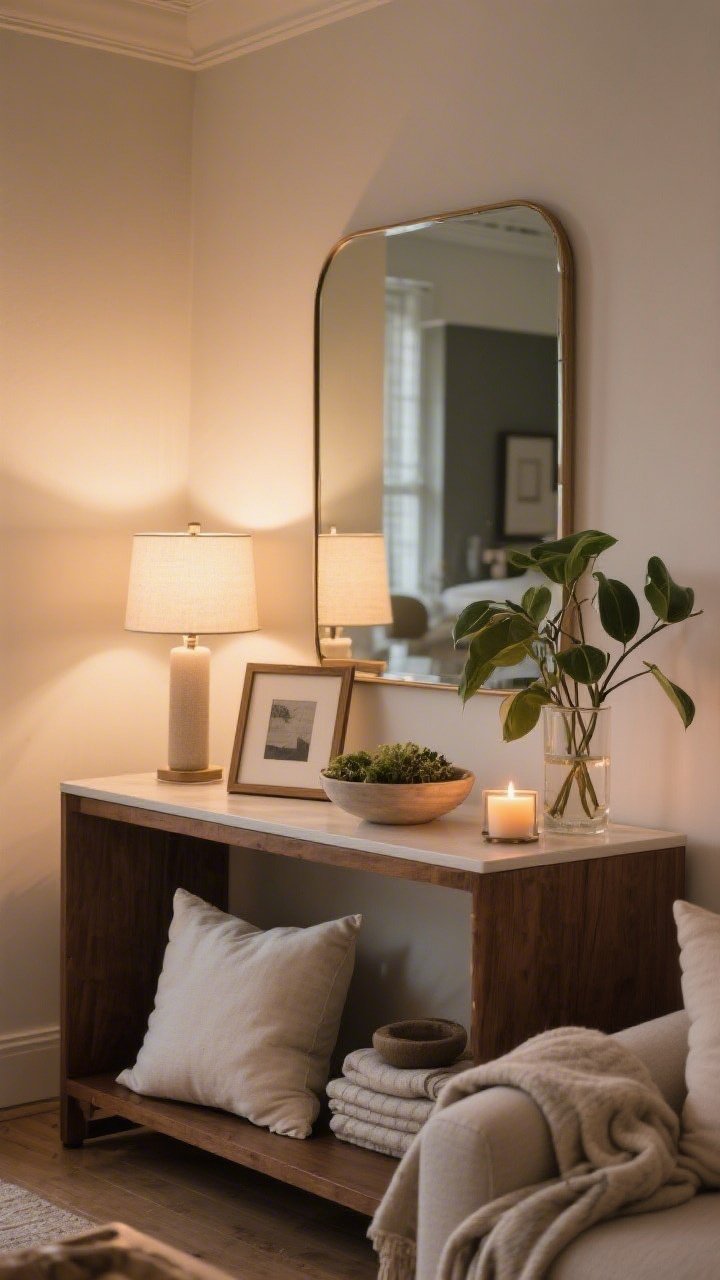
11. Style Surfaces With the Rule of Three
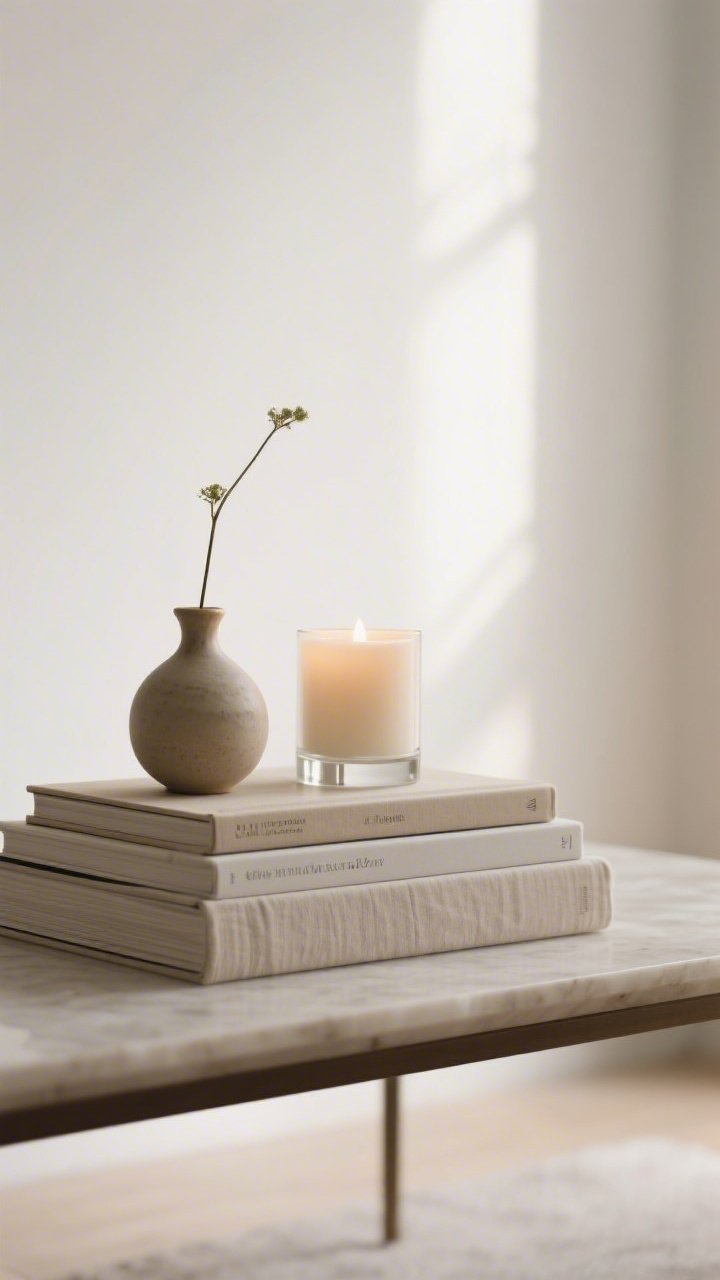
Nightstands, coffee tables, shelves—these are where style happens. Keep it simple: height + shape + texture in groups of three.
Formula You Can Steal
- Stacked books + small vase + candle
- Tray + plant + sculptural object
- Lamp + frame + bowl (keys, remotes, sanity)
Leave empty space. Styled surfaces need breathing room—clutter isn’t a personality.
12. Green Things Make Everything Better
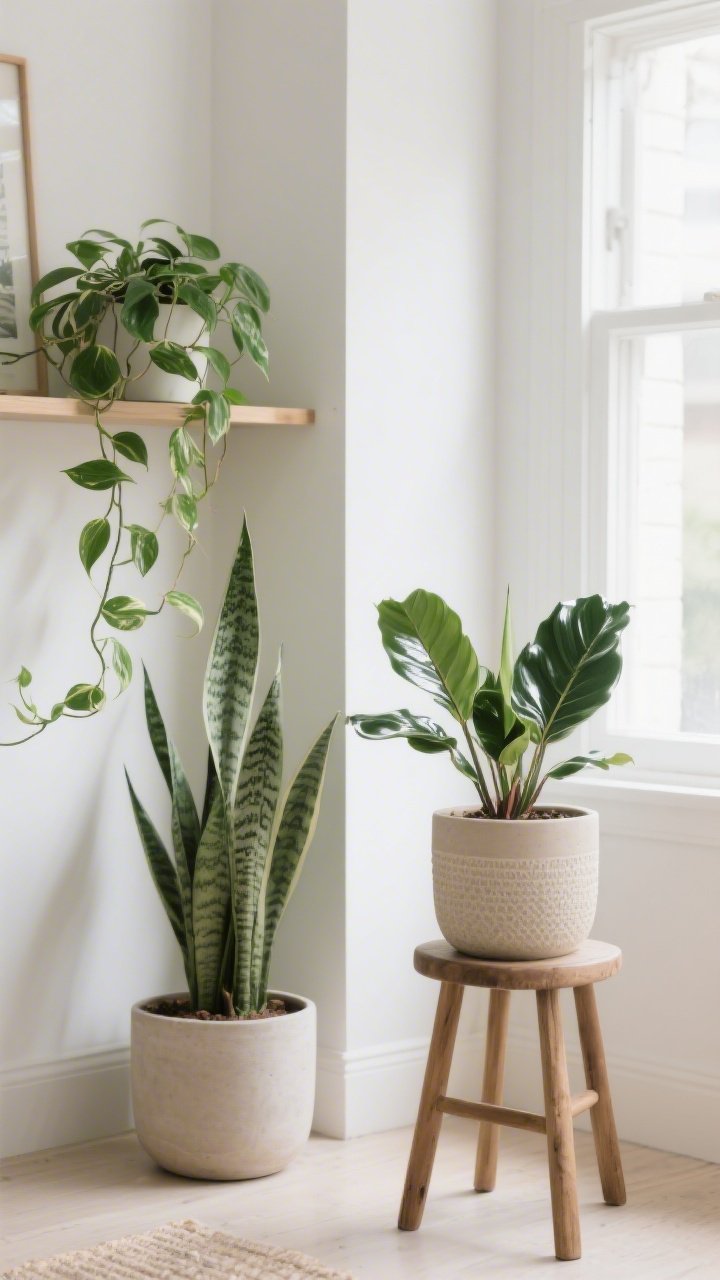
Plants are the cheapest way to make a room feel alive. They add color, texture, and that “someone stylish lives here” energy.
Low-Maintenance Picks
- Pothos: thrives in low light, grows like crazy.
- Snake plant: indestructible, sculptural, good for corners.
- ZZ plant: glossy leaves, barely needs water.
No green thumb? Try high-quality faux stems in a heavy vase. Mix with real water for the ~illusion~ (kidding, don’t do that).
13. Mirrors: Your Secret Space Expander
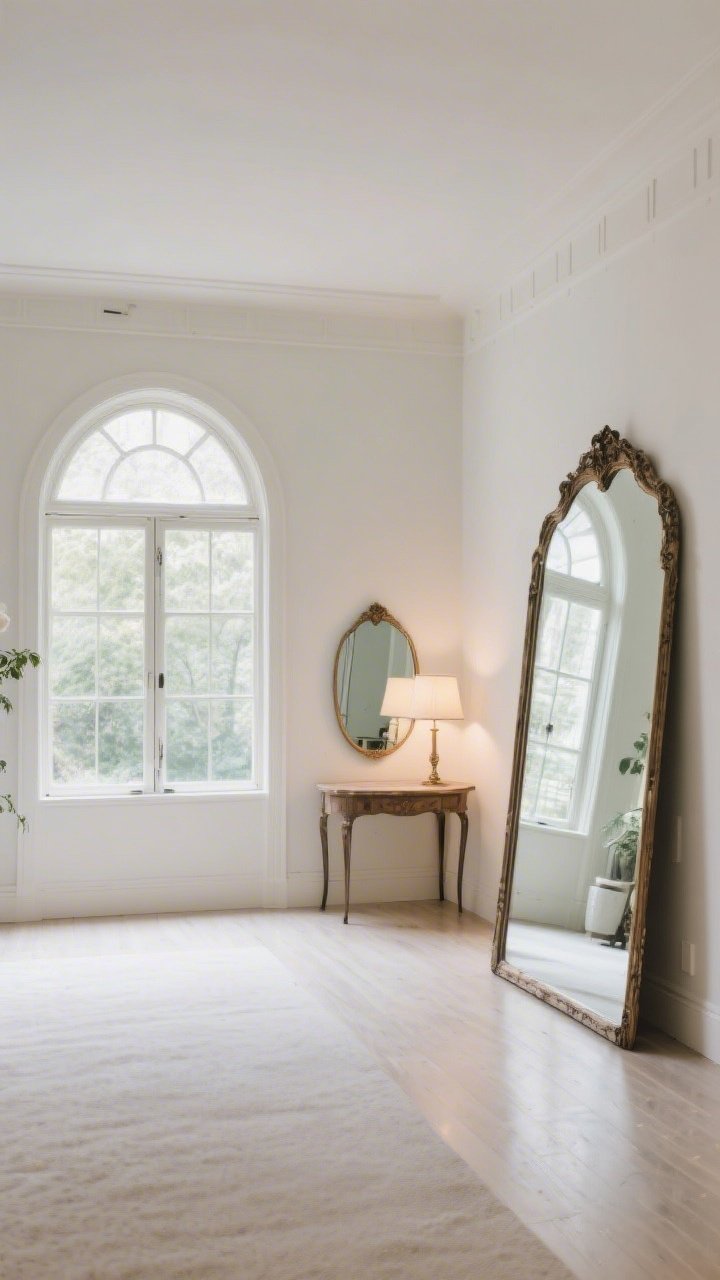
Mirrors bounce light, widen tight rooms, and make ceilings feel taller. They’re basically Photoshop for your home.
Where to Place
- Across from a window to double the daylight.
- Behind a lamp for extra glow.
- As a large floor mirror to elongate the room.
Go for arched or oversized vintage frames to add character on a budget.
14. Small Swaps With Big Energy

You don’t always need a full overhaul—just smart accents. These swaps are low-cost but high-impact.
Power Moves
- Switch plates and outlet covers in a uniform finish.
- Cozy lampshade colors (cream, oatmeal) to soften harsh light.
- Coordinated baskets for throws, toys, and cords—function that looks good.
- Statement tray on ottoman or dresser to corral chaos.
Repeat the same accent color 3 times in the room (pillow, throw, art) so it feels intentional, not random.
15. Finish With a 10-Minute Styling Routine
Here’s how you nail the “magazine but lived-in” look on the daily. Do this quick checklist once a week (or whenever guests are coming over and you want the fake-tidy vibe).
Weekly Reset
- Fluff pillows and fold throws neatly (hospital corners are for beds, not blankets).
- Clear surfaces, then restyle with your rule-of-three formula.
- Water plants and rotate them for even growth.
- Wipe mirrors and switch burned-out bulbs for instant clarity.
- Mini scent moment: light a candle, diffuse oils, or simmer citrus peels.
The goal is consistency. Great rooms aren’t one-time projects—they’re tiny habits that add up to a space you love.
Bonus Shopping Tips (Because You’ll Ask)
- Thrift first: frames, mirrors, side tables, lamps—easy to upgrade.
- Buy inserts better than covers: feather/down alternative looks fuller.
- Invest where it counts: mattresses, main seating, task lighting.
- Save on style: art prints, pillows, vases, trays, baskets.
Sample Budget Breakdown
- Paint and supplies: $60–$120
- Two curtain panels + rod: $70–$150
- Two lamps + bulbs: $60–$120
- Rug (layered jute + smaller pattern): $120–$220
- Pillows/inserts/throws: $60–$120
- Art frames + prints: $40–$100
Total: You can do a legit glow-up for $400–$800, depending on what you already own.
Room-by-Room Micro Tips
- Living Room: Oversized art over the sofa, layered rugs, big plant in a basket.
- Bedroom: Add a tall headboard look by painting a rectangle behind the bed.
- Office: Hide clutter with closed storage and add a task lamp for energy.
- Dining: Center a rug under the table and hang a pendant 30–34″ above it.
You don’t need a renovation. You need a plan, a cart full of small-but-mighty upgrades, and maybe a playlist. Start with the edit, set your vision, and knock out these 15 budget room makeover checklist steps. Your space is about to flex—on budget and on point. FYI: your future self is already proud.
Transform Your Room Without Overspending
If you want a simple step-by-step system to apply everything in this post, use this Budget Room Makeover Checklist Workbook to plan, declutter, and decorate without overspending.