15 Before and After Room Makeover Ideas for Inspiration You’ll Want to Copy
Posted in :
Ready for a little decor adrenaline? These before-and-after makeovers prove you don’t need a sledgehammer or a reality TV crew to transform a space. We’re talking smart paint choices, layout flips, and budget-friendly swaps that make everything look custom. Grab your tape measure and let’s get into 15 ideas that actually deliver.
1. Paint Magic: Go Two-Tone For Instant Architecture
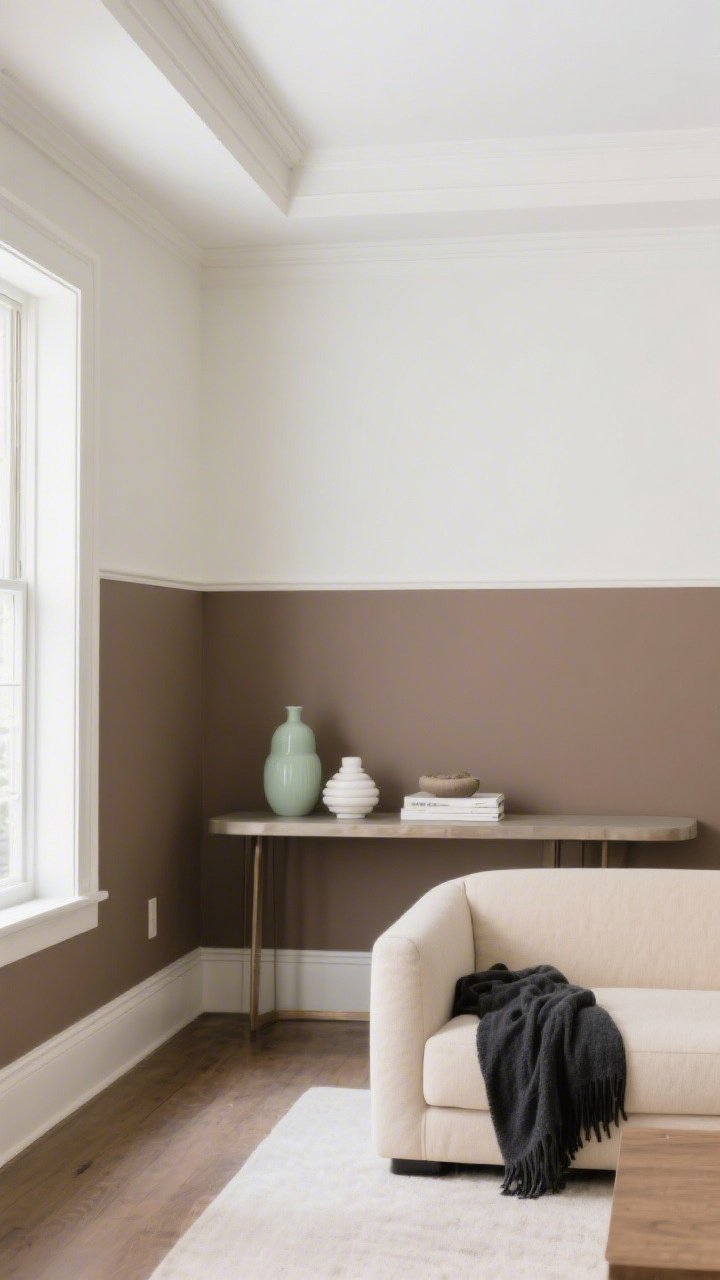
Flat rooms get an instant glow-up with a two-tone wall. It mimics architectural detail without the millwork, and yes, it makes ceilings look taller.
Why It Works
- Contrast = Dimension: Darker lower walls ground the space; lighter uppers feel airy.
- Defines Zones: Great for open-concept living where you need visual boundaries.
How To Do It
- Pick Your Line: 36–42 inches from the floor for a “faux wainscoting” vibe.
- Color Pairings: Warm white + clay taupe, pale sage + ivory, charcoal + creamy beige.
- Crisp Edge Hack: Seal tape with the lighter paint before adding the dark.
2. Swap The Layout, Not The Sofa
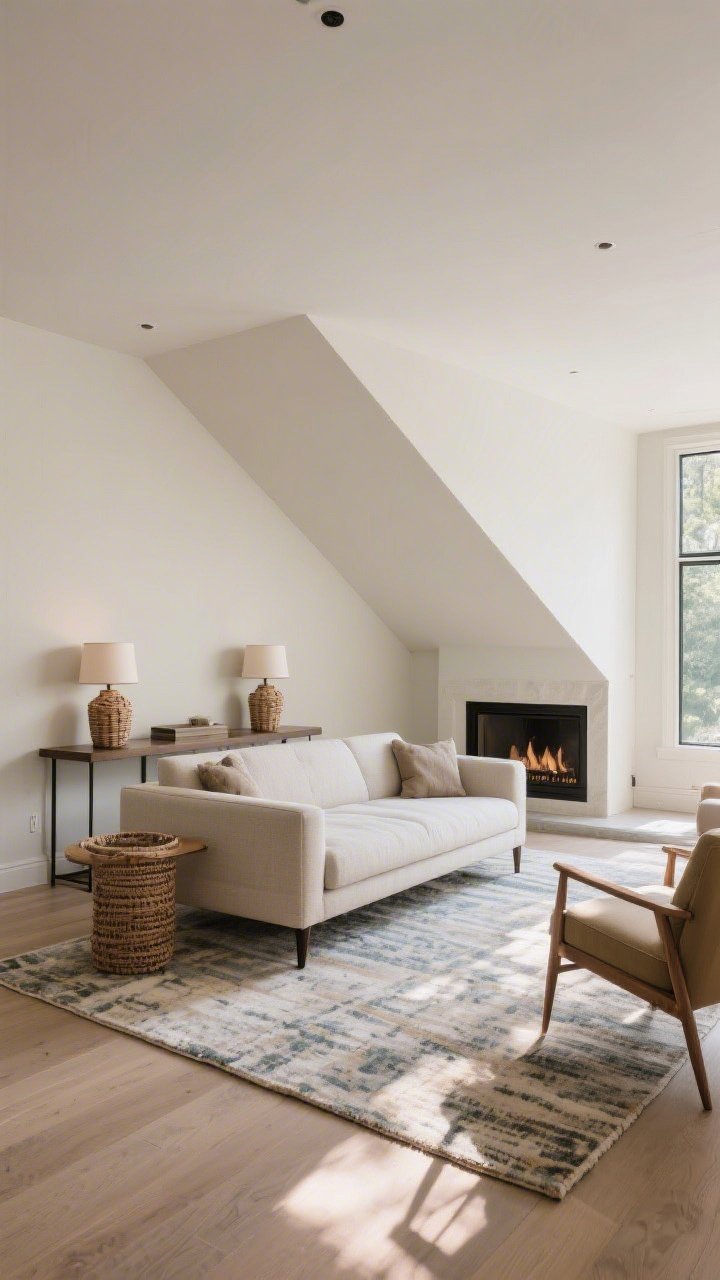
If your living room feels meh, the furniture might be fighting the flow. Rotating the layout can make your old sofa look brand new—zero dollars, maximum effect.
Try These Moves
- Float It: Pull the sofa 8–12 inches off the wall to create depth.
- Angle For Interest: A 10–15 degree angle toward the focal point softens boxy rooms.
- Rug First: Center the rug, then align major pieces. FYI: Front legs on the rug = cohesion.
Finish with a narrow console behind the sofa for lamps and baskets—instant boutique-hotel vibes.
3. Layer Textures Like A Stylist
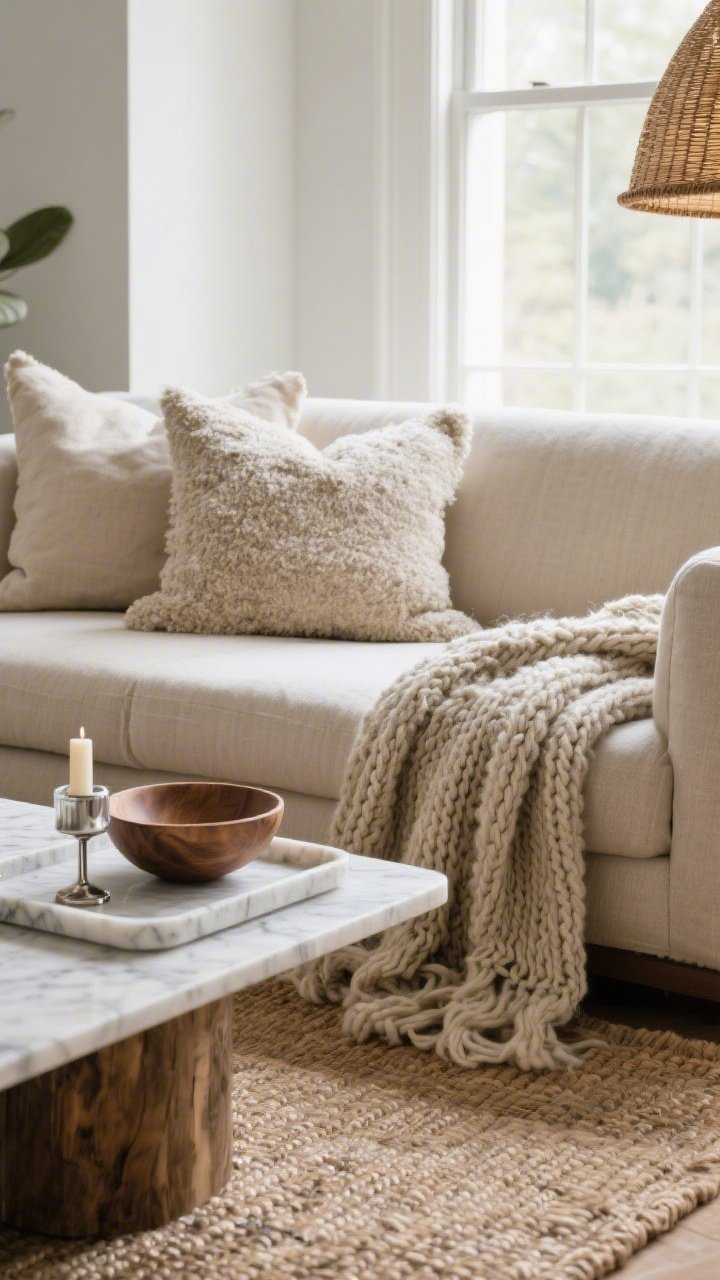
When a room looks flat, it’s usually missing texture. You want a mix that makes people want to touch everything (politely, of course).
The Texture Stack
- Cozy Base: Wool or jute rug to set the foundation.
- Soft + Nubby: Bouclé, linen, and chunky knit throws.
- Shine + Contrast: A little metal, a little glass, maybe a marble tray.
- Organic Touch: Wood bowls, rattan shades, dried stems.
Keep the palette tight—3–4 colors max—and let the textures do the talking.
4. Statement Lighting As The New Crown Molding
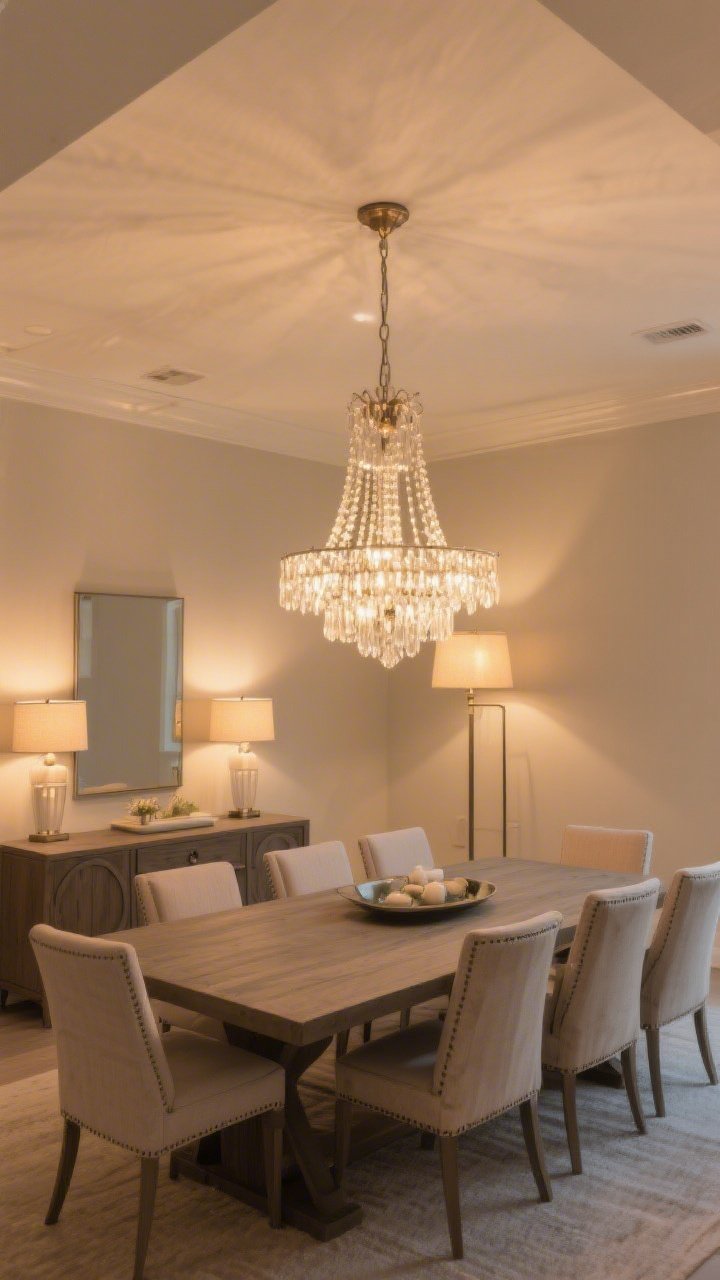
Lighting is the ultimate room Botox. Swap the builder-grade flush mount and your space instantly feels custom.
Pick The Right Scale
- Dining: Diameter in inches ≈ table width in feet + room width in feet (rough guide).
- Living: 24–36 inches wide for a medium room; go bigger if ceilings are 9’+.
- Layer It: Overhead + table lamps + a floor lamp = flattering, flexible light.
Pro tip: Use 2700K bulbs for warm, cozy light. Dimmers are non-negotiable.
5. Closet To Corner Office (Without The Sad Cubicle Vibe)
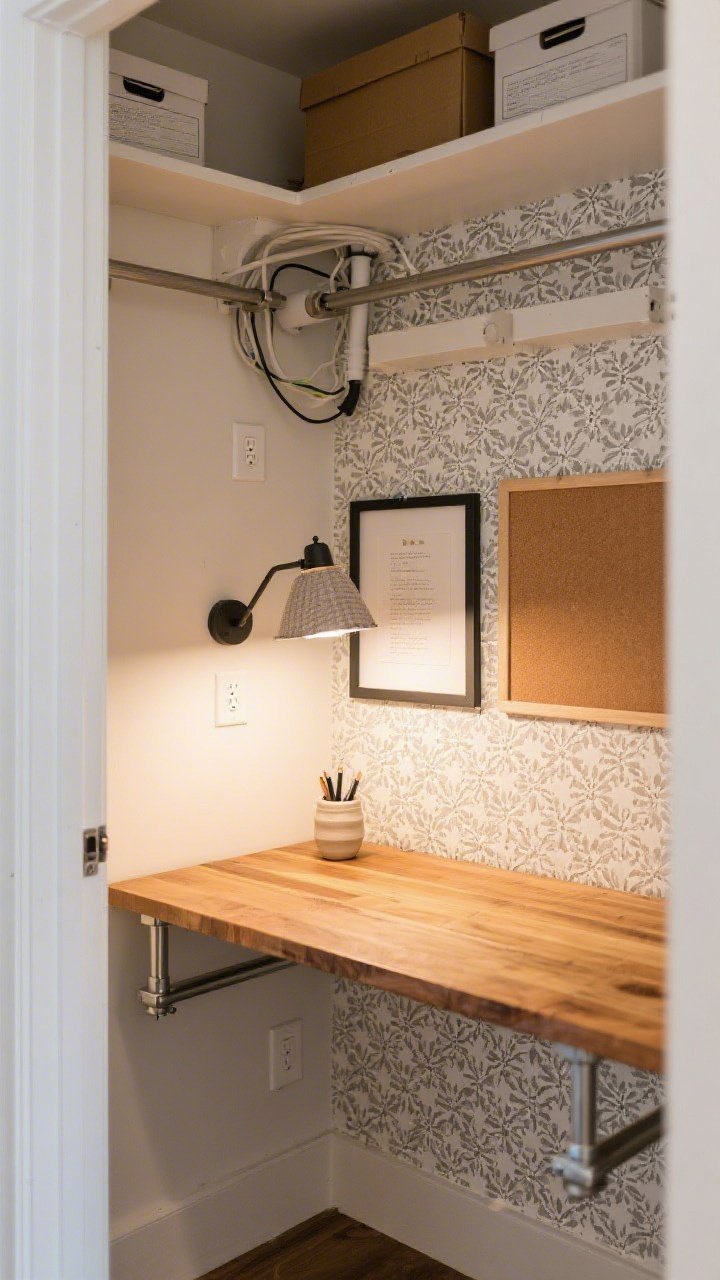
That awkward closet or alcove? Perfect mini office. No drywall needed, promise.
Build The Look
- Desk: A butcher-block shelf on brackets = sleek and affordable.
- Back Wall: Peel-and-stick wallpaper or paint for instant personality.
- Storage: Shallow shelves above the desk; hide cords with a cable raceway.
- Lighting: Sconce with a plug-in cord (no electrician) or a picture light with rechargeable bulb.
Add a framed corkboard and a pretty pen cup. Boom—productivity unlocked.
6. The Power Of A Hero Rug
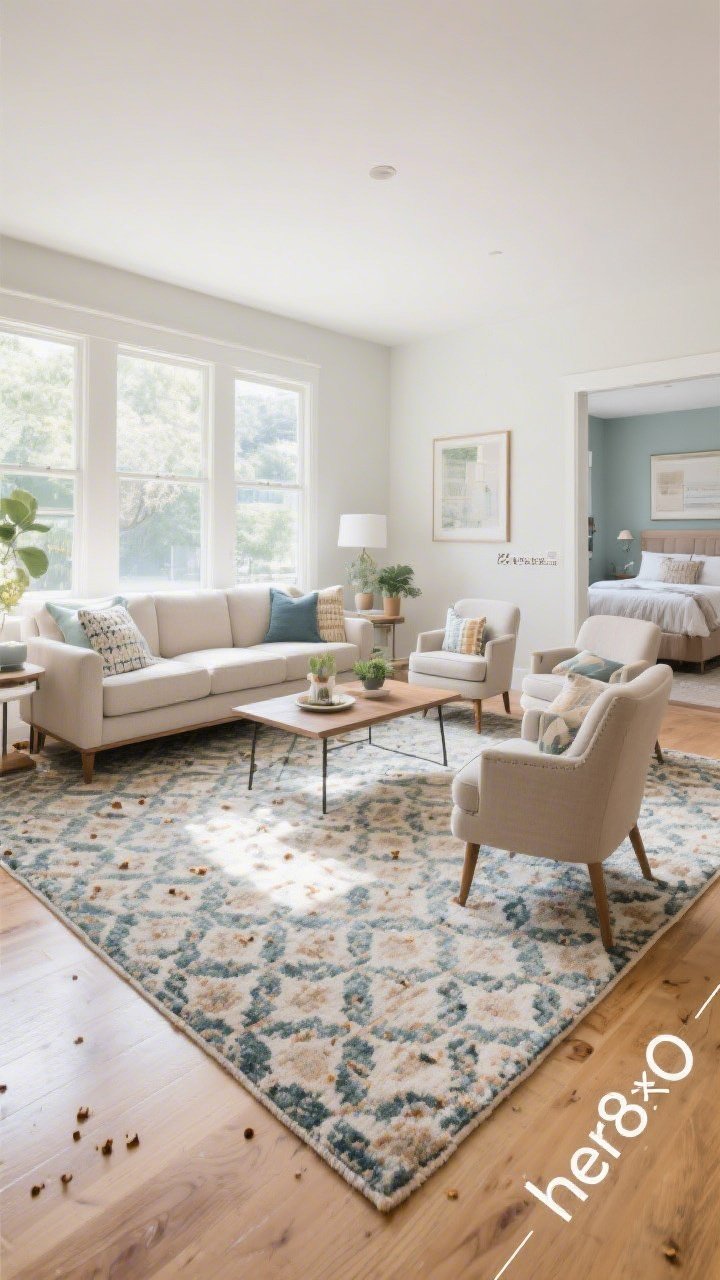
Before: your furniture is floating in space. After: a rug pulls everything into a chic conversation circle.
Size Rules
- Living Room: 8×10 minimum; front legs of seating on the rug.
- Bedroom: Queen bed? 8×10. King? 9×12. Leave 18–24 inches visible around.
- Dining: Add 24 inches on all sides so chairs stay on the rug when pulled out.
Choose pattern for busy homes (hides crumbs). Choose solid with texture for luxe calm.
7. Gallery Wall, But Make It Grown-Up

Frames scattered like confetti? Let’s fix that. A crisp gallery wall can turn a blank wall into a moment.
Plan First, Hang Once
- Theme: Black-and-white photos, travel sketches, or tonal abstracts.
- Frame Family: Keep frames cohesive—same color, varied sizes.
- Spacing: 2 inches between frames; center at 57 inches from floor.
- Layout Trick: Arrange on the floor or with paper templates before drilling.
Pro move: Add one unexpected piece (fabric swatch, tiny sculpture shelf) for dimension.
8. Built-In Vibes Using Flat-Packs
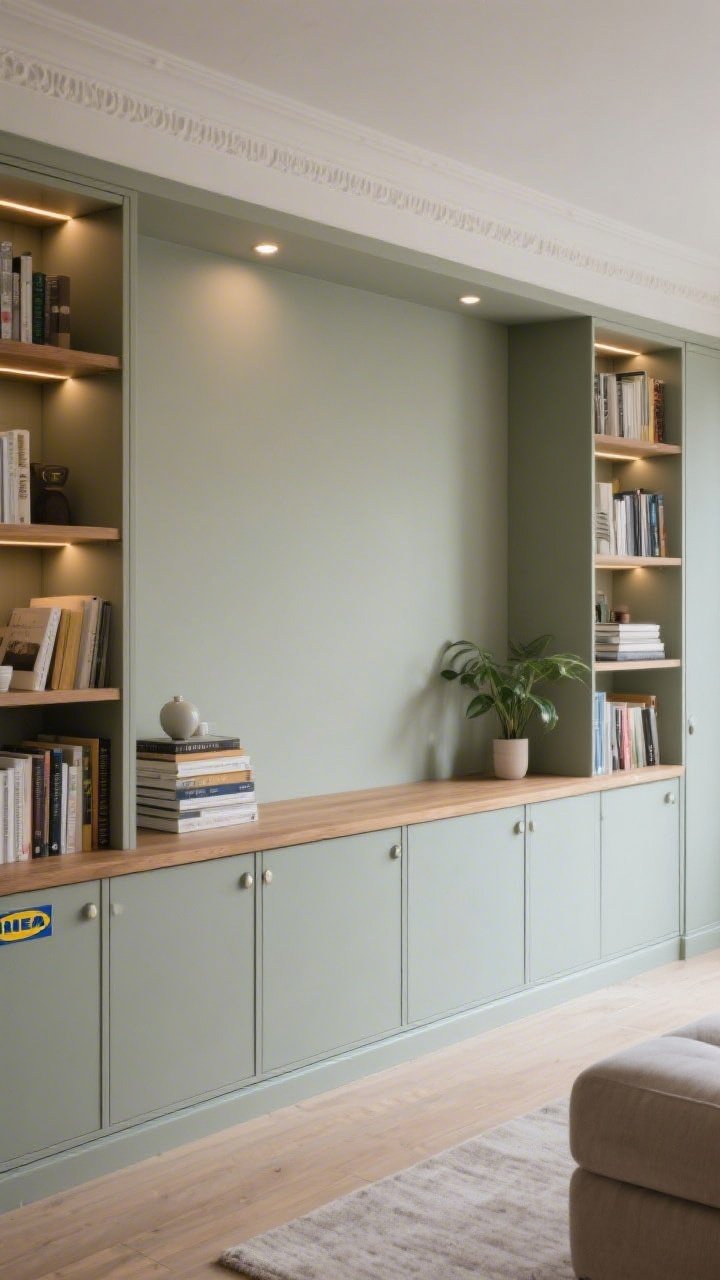
Custom built-ins can cost a car payment. Or, you hack it with modular cabinets and trim for a polished, “was this always here?” look.
How To Fake It
- Base: Use closed-door cabinets (like IKEA Sektion/Besta) for storage.
- Top: Flank with open bookcases; run a continuous wood counter across.
- Unify: Paint everything the same color, add crown and base trim.
- Lighting: Puck lights or LED strips under shelves = chef’s kiss.
Style sparingly: stacks of books, a plant, a few objects. Let it breathe.
9. Bedroom Hotel Upgrade: Headboard Wall Moment
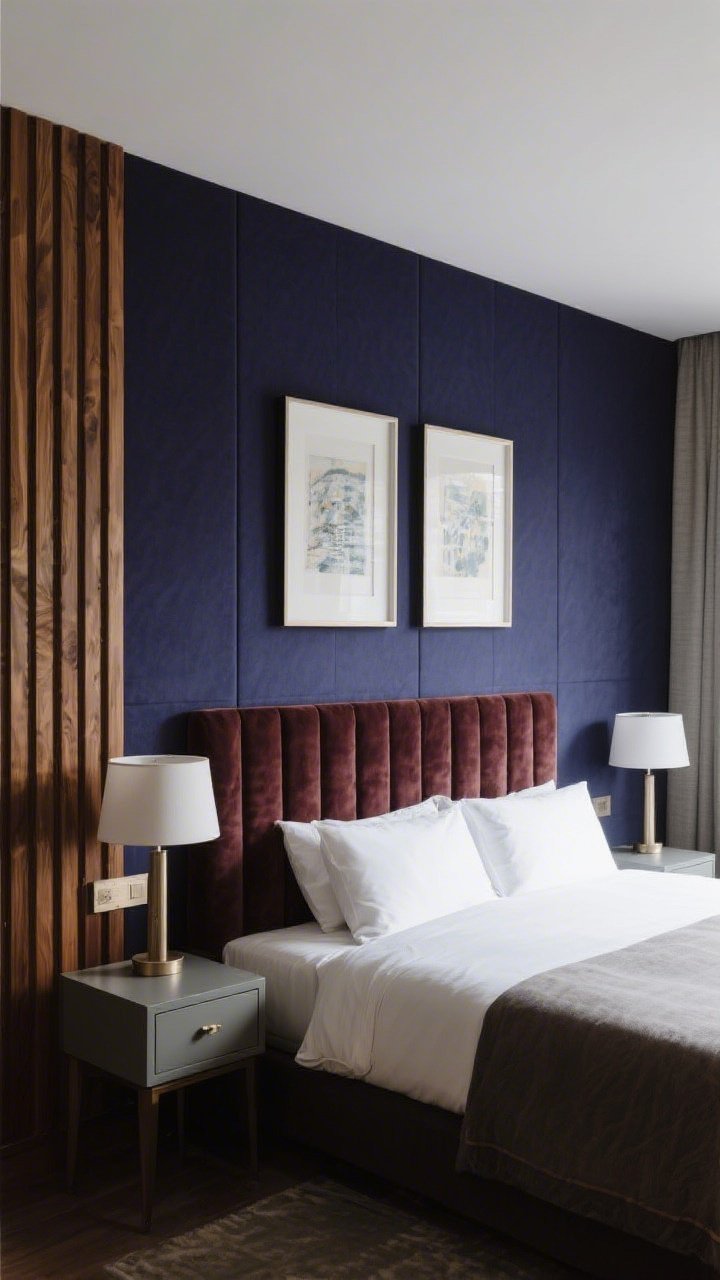
Your bed is the star. Give it a backdrop worthy of the main character energy.
Options For Every Budget
- Paint Paneling: Paint the entire wall one moody color for depth.
- Upholstered Panels: Peel-and-stick velvet panels add luxe softness and sound dampening.
- Wood Slats: Vertical slats elongate walls; stain to match floors or go contrast.
Finish with matching nightstands, lamps at 24–28 inches tall, and symmetrical art or sconces.
10. Kitchen Glow-Up With Hardware And Backsplash

Before: same-old cabinets. After: polished hardware and a backsplash that looks custom—but isn’t fussy.
Quick Wins
- Hardware Swap: Mix knobs on uppers and pulls on lowers. Finish: aged brass or matte black.
- Backsplash: Stacked or herringbone subway tile for a modern twist. Grout slightly darker for definition.
- Under-Cabinet Lights: Rechargeable LED bars = instant chef vibes.
Not painting the cabinets? Deep clean, then add a furniture wax to refresh the wood tone. Seriously transformative.
11. Entryway Wow With Hooks, Bench, And A Mirror
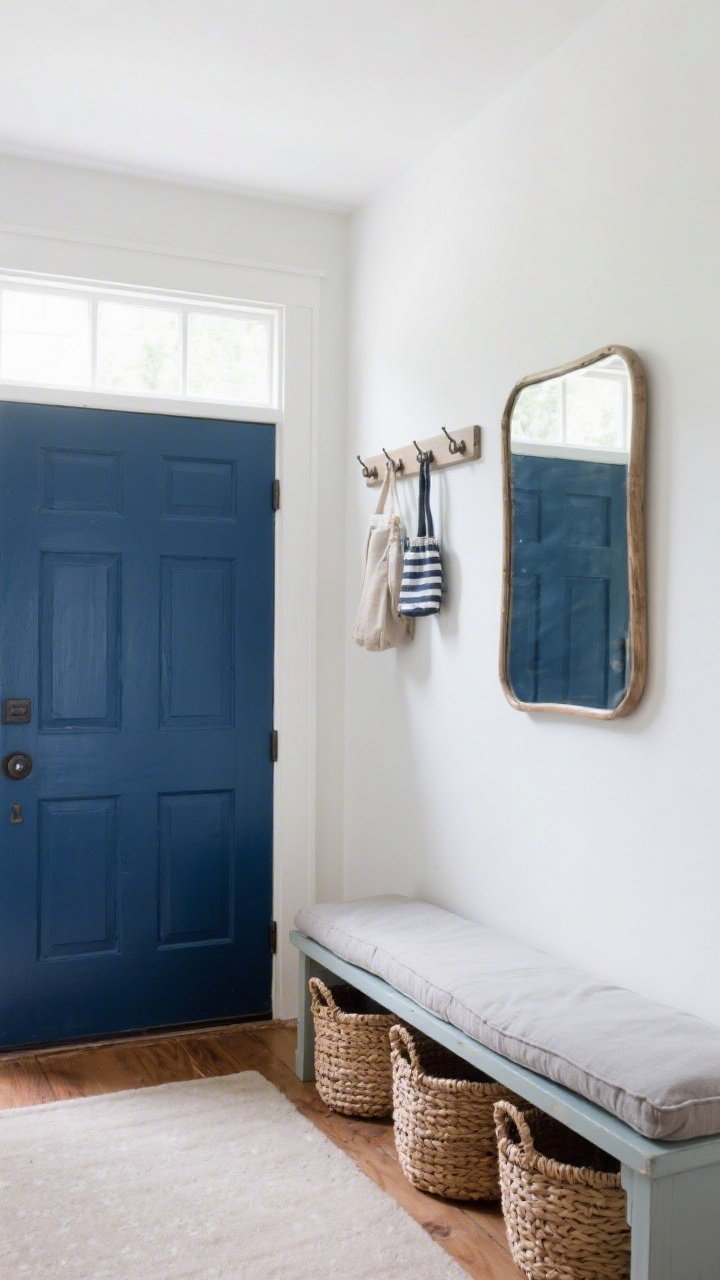
Tiny entry? Perfect. You just need function and a focal point.
The Formula
- Anchor: A narrow bench (12–15 inches deep) with baskets underneath.
- Vertical: A row of sturdy hooks or a shaker peg rail across the wall.
- Shine: Oversized mirror to bounce light and check “do I look alive?” on the way out.
- Color Pop: Paint the door a saturated hue—ink blue, olive, or brick red.
Top the bench with a washable cushion. Shoes corralled, keys contained, chaos canceled.
12. Bathroom Mini Reno: Vanity Paint And Sconce Swap
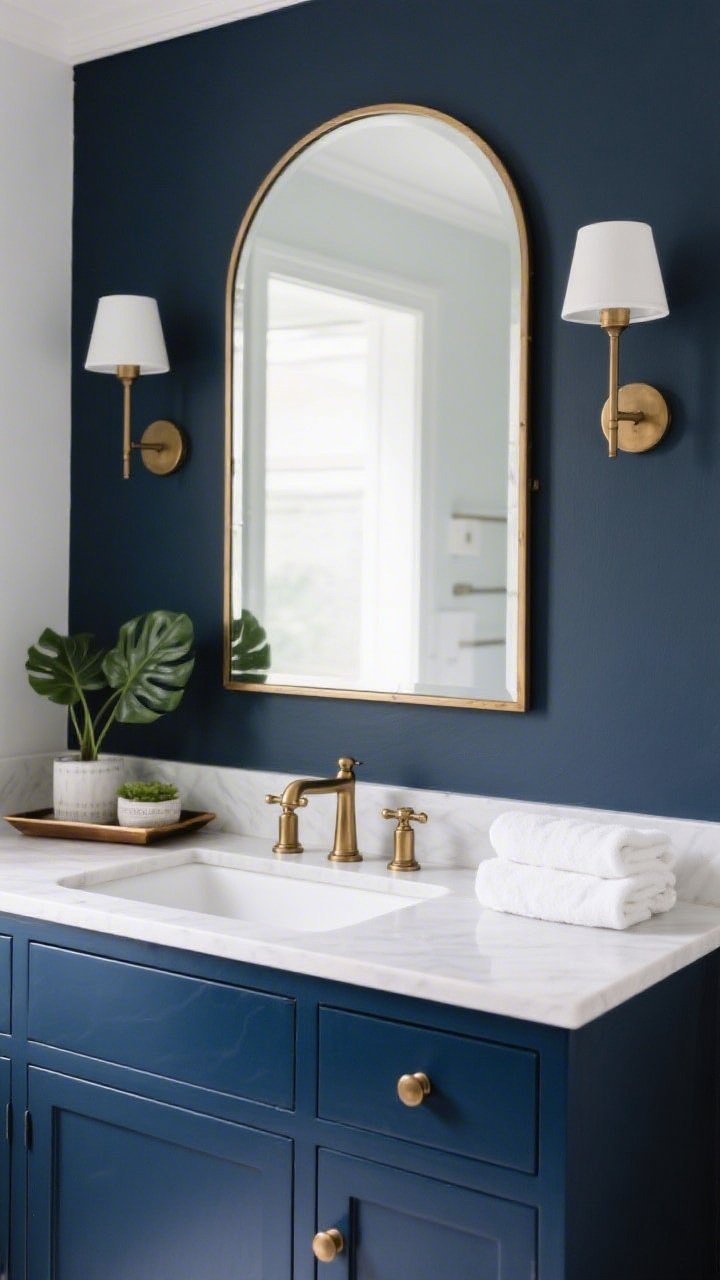
Bathrooms age fast, but you can rewind without tearing out tile. Focus on the vanity zone for maximum impact.
Do This First
- Paint The Vanity: Use a bonding primer, then a durable enamel in navy, greige, or black.
- Hardware + Faucet: Match metals for a tailored look; brushed brass or polished nickel are timeless.
- Sconces: Mount at eye level (about 60–65 inches) on either side of the mirror for flattering light.
- Mirror: Swap to a framed rectangle or an arched shape to modernize instantly.
Style with a small tray, a plant, and plush towels. Done and spa-like, IMO.
13. The Cozy Reading Nook You’ll Actually Use
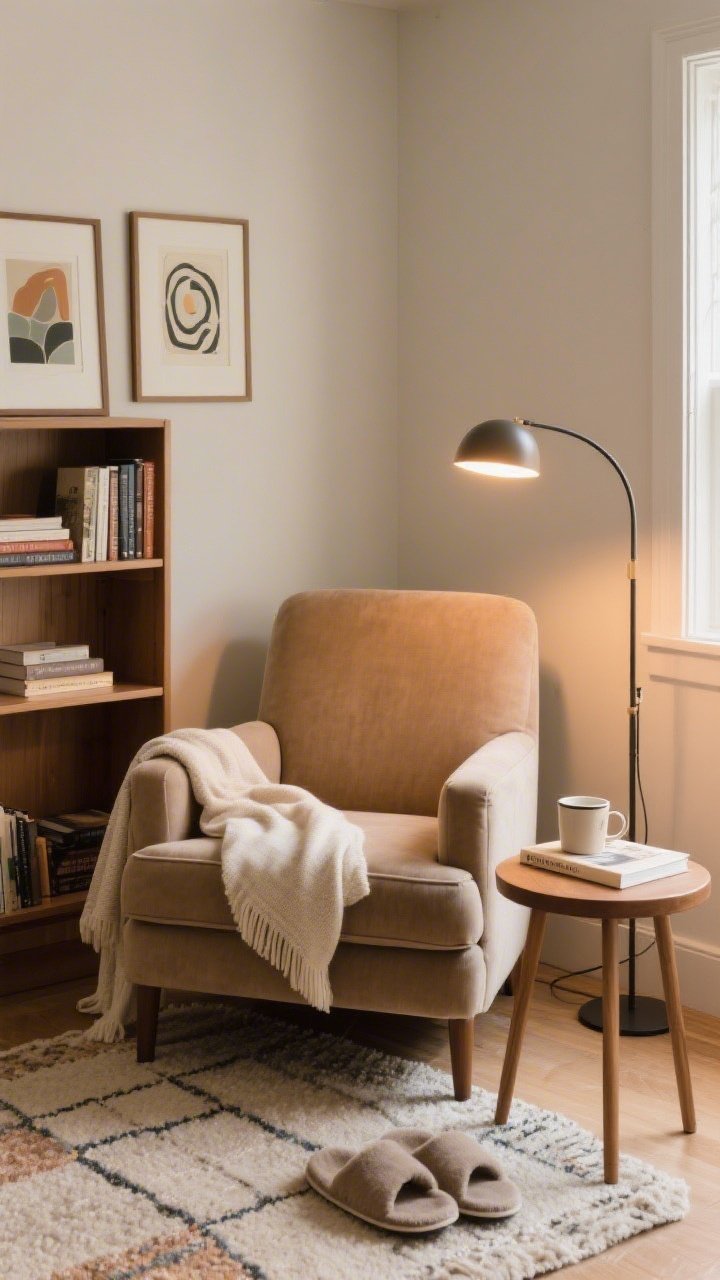
No spare room? No problem. Steal a corner and turn it into a destination.
Recipe For A Perfect Nook
- Chair: Deep seat, arms, and a soft throw. Swivel if you can swing it.
- Side Table: Big enough for a mug and book. Round if space is tight.
- Lighting: Arc floor lamp or plug-in wall sconce at shoulder height.
- Backdrop: A small bookshelf, art pair, or textural wall hanging.
Layer a small rug under the chair to visually claim the zone. Add slippers. You live here now.
14. Window Treatments That Don’t Look Like A Dorm
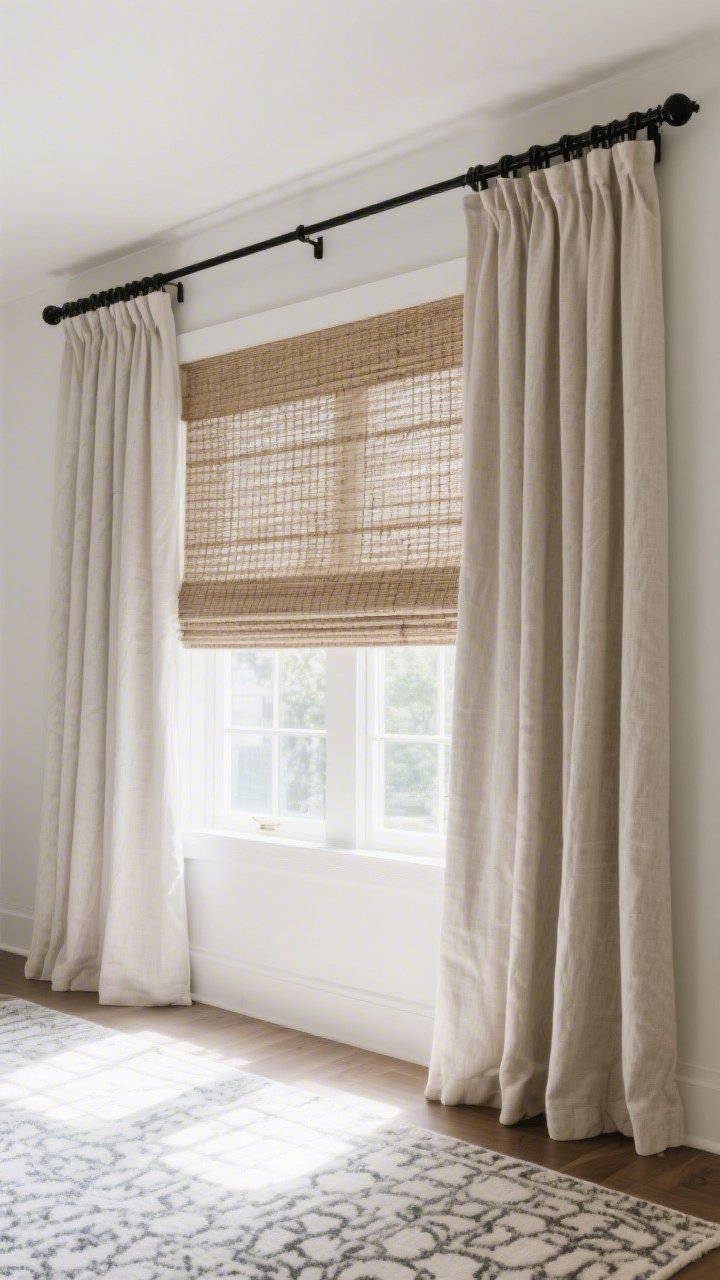
Drapes and shades can turn a room from “rental basic” to “tailored and intentional.” The trick? Hang them like a pro.
Rules To Remember
- High And Wide: Mount 4–6 inches above the frame and extend 8–12 inches past each side.
- Length: Just kissing the floor or a slight 1-inch break—no awkward ankle pants.
- Layer: Roman shade + curtains = texture and control.
- Fabric: Linen blend for movement, velvet for drama, cotton for crisp simplicity.
Neutral panels with black hardware = forever chic. Patterned panels? Keep the rug simpler.
15. Style Your Surfaces: The 70/30 Rule
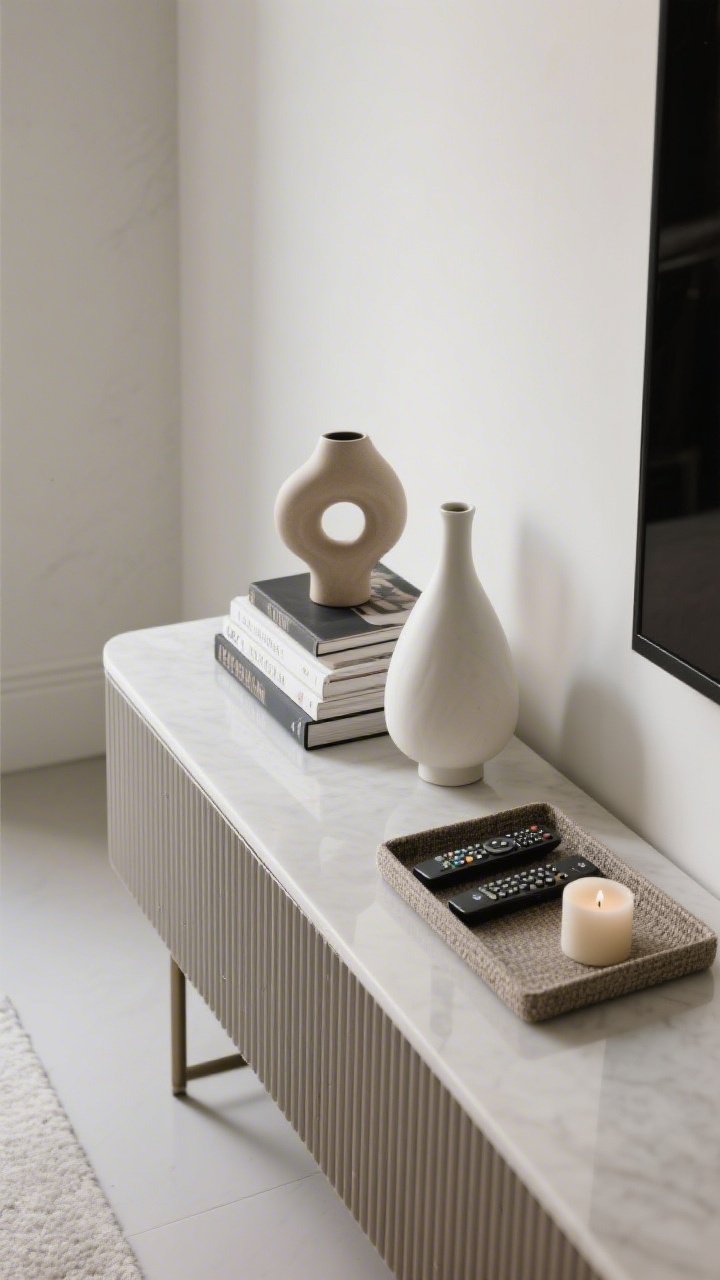
Cluttered surfaces kill a makeover. Curate, don’t accumulate.
Coffee Table, Console, And Nightstand Styling
- 70/30 Rule: Leave ~70% of the surface clear; style the remaining 30% with intention.
- Stacks + Height: Books + a sculptural object + a vase for vertical interest.
- Odd Numbers: Group items in threes; vary heights and textures.
- Tray It: Corral remotes, candles, and coasters so it feels purposeful.
Edit once more than you think. Negative space is your secret luxury ingredient, FYI.
Quick Before-You-Start Checklist
- Measure first. Then measure again. Rugs, curtains, and lighting live or die by scale.
- Pick a color palette: 1–2 mains, 1 accent, 1 metallic. Commit.
- Light bulbs at 2700–3000K. Your skin (and space) will thank you.
- Shop your home before buying anything. You already own a lot of great stuff.
You don’t need a gut reno to get a jaw-dropping after. Start with one idea, snap your “before,” and work your way down this list. When your friends ask who your designer is, just wink and send them this guide.
Turn Your Ideas Into A Clear Plan
Organize your ideas into a simple step-by-step makeover plan.